Lab 8 - Model Driven Programmability🔗
8.1 Set up GitHub Repository🔗
Objectives🔗
Part 1: Join the GitHub Classroom
Part 2: Clone the Remote Repository
Instructions🔗
Part 1: Join the GitHub Classroom🔗
-
Follow the GitHub assignment link posted in Canvas. If you did not complete the setup in Lab 2.2 you will need to authorize GitHub Classroom to link with your account and select your name from the list of students.
-
Accept the assignment and refresh the page until it says your repository has been created. Click the link to proceed to the repository.
Important
GitHub Classroom is currently experiencing a bug where you might receive a Repository Access Issue error after accepting the assignment. If this happens, check the e-mail connected to your GitHub account for an invitation e-mail from GitHub. Use the View Invitation link in the e-mail to see the link to accept the invitation and proceed to the repository.
-
Select the Code dropdown and copy the HTTPS URL. Store it somewhere for use in a later step.
Tip
If you've configured your VM to use SSH to connect to GitHub instead of HTTPS, click on the Code dropdown, select the SSH tab, and copy the URL from there instead.
Part 2: Clone the Remote Repository🔗
Important
If you did not complete Lab 2, or you have reset your VM since then, you'll need to update Git to the newest version as well as configure your name, e-mail address, and default branch name, before beginning this lab.
Open Lab 2 and complete steps 1, 2, and the first 3 tasks of step 3 of the Initializing Git instructions before continuing.
-
Inside the DEVASC VM, open a terminal and change to the
~/labs/devnet-src/directory.devasc@labvm:~$ cd labs/devnet-src/ devasc@labvm:~/labs/devnet-src$ -
Create a new directory called
data-modeling.devasc@labvm:~/labs/devnet-src$ mkdir data-modeling devasc@labvm:~/labs/devnet-src$ -
Use
git cloneto clone a copy of your Lab 8 repository into thedata-modelingdirectory. Use the URL to the GitHub Classroom repository you copied at the end of Part 1, not the one in the command below. Don't forget thedata-modelingdirectory at the end of the command.Tip
If you've configured your VM to use SSH to connect to GitHub, use the SSH URL that you copied in step 1, rather than the HTTPS link.
devasc@labvm:~/labs/devnet-src$ git clone https://github.com/Ontario-Tech-NITS/lab-8-model-driven-programmability-<username>.git data-modeling/ Cloning into 'data-modeling'... Username for 'https://github.com': <username> Password for 'https://<username>@github.com': Personal Access Token remote: Enumerating objects: 14, done. remote: Counting objects: 100% (14/14), done. remote: Compressing objects: 100% (11/11), done. remote: Total 14 (delta 1), reused 4 (delta 0), pack-reused 0 (from 0) Receiving objects: 100% (14/14), 5.20 KiB | 886.00 KiB/s, done. Resolving deltas: 100% (1/1), done. devasc@labvm:~/labs/devnet-src$ -
Change to the
data-modelingdirectory and list the directory contents to ensure it was properly cloned.devasc@labvm:~/labs/devnet-src$ cd data-modeling/ devasc@labvm:~/labs/devnet-src/data-modeling$ ls -la total 20 drwxrwxr-x 4 devasc devasc 4096 Mar 21 15:11 . drwxr-xr-x 19 devasc devasc 4096 Mar 21 15:11 .. drwxrwxr-x 7 devasc devasc 4096 Mar 21 15:11 .git drwxrwxr-x 3 devasc devasc 4096 Mar 21 15:11 .github -rw-rw-r-- 1 devasc devasc 791 Mar 21 15:11 README.md devasc@labvm:~/labs/devnet-src/data-modeling$ -
Verify that the remote repository values were automatically set correctly.
devasc@labvm:~/labs/devnet-src/data-modeling$ git remote -v origin https://github.com/Ontario-Tech-NITS/lab-8-model-driven-programmability-<username>.git (fetch) origin https://github.com/Ontario-Tech-NITS/lab-8-model-driven-programmability-<username>.git (push) devasc@labvm:~/labs/devnet-src/data-modeling$ -
Use
git statusto verify you are on the main branch and that you are don't have anything to commit.devasc@labvm:~/labs/devnet-src/data-modeling$ git status On branch main Your branch is up to date with 'origin/main'. nothing to commit, working tree clean devasc@labvm:~/labs/devnet-src/data-modeling$
8.2 Explore YANG Data Models🔗
Objectives🔗
Part 1: Explore a YANG Model on GitHub
Part 2: Explore a YANG Model Using pyang
Background🔗
YANG models define the exact structure, data types, syntax, and validation rules for the content of messages exchanged between a managed device and another system communicating with the device. Working with files using the YANG language can be a bit overwhelming for the level of details in these files.
In this lab, you will learn how to use the open source pyang tool to transform YANG data models from files using the YANG language, into a much easier to read format. Using the tree view transformation, you will identify what the key elements of the ietf-interfaces YANG model are.
Instructions🔗
Part 1: Explore a YANG Model on GitHub🔗
In this Part, you will browse the YANG Data Models GitHub repository to see examples of how YANG data models are structured. Then you will download a copy of the Cisco IOS XE 16.9.3 data model to the DEVASC VM to work with the data models directly.
Step 1: Explore Cisco IOS XE YANG models in the GitHub repository🔗
-
Open the Chromium Web Browser and navigate to
https://github.com/YangModels/yang. -
Under the main branch, navigate to the YANG models for the Cisco IOS XE version 16.9.3 by clicking the following directories: vendor > cisco > xe > 1693.
-
Scroll down below all the Cisco YANG models and find where the IETF models begin. Look for ietf-interfaces.yang.
-
Click ietf-interfaces.yang and scroll through all the container nodes, leaf nodes, and list nodes. If you are familiar with output from the IOS command
show interfaces, then you should recognize some or all of the nodes. For example, around line 221 you will see the leaf calledenabled.YANGleaf enabled { type boolean; default "true"; description "This leaf contains the configured, desired state of the interface. Systems that implement the IF-MIB use the value of this leaf in the 'running' datastore to set IF-MIB.ifAdminStatus to 'up' or 'down' after an ifEntry has been initialized, as described in RFC 2863. Changes in this leaf in the 'running' datastore are reflected in ifAdminStatus, but if ifAdminStatus is changed over SNMP, this leaf is not affected."; reference "RFC 2863: The Interfaces Group MIB - ifAdminStatus"; }
Step 2: Copy the ietf-interfaces.yang model to a folder on your VM🔗
-
In the Chromium tab where the ietf-interfaces.yang model is still open, scroll back to the top, if necessary, and click Raw to display just the YANG model data.
-
Select and copy the URL in the address bar.
-
Return to the terminal and ensure you are in the
data-modelingfolder. -
Use
wgetto save the rawietf-interfaces.yangfile.Important
Make sure you use the URL you copied above, not the one shown in the example below, as they may be different.
devasc@labvm:~/labs/devnet-src/data-modeling$ wget https://raw.githubusercontent.com/YangModels/yang/master/vendor/cisco/xe/1693/ietf-interfaces.yang
--2025-03-21 15:22:30--  https://raw.githubusercontent.com/YangModels/yang/refs/heads/main/vendor/cisco/xe/1693/ietf-interfaces.yang
Resolving raw.githubusercontent.com (raw.githubusercontent.com)... 185.199.109.133, 185.199.108.133, 185.199.111.133, ...
Connecting to raw.githubusercontent.com (raw.githubusercontent.com)|185.199.109.133|:443... connected.
HTTP request sent, awaiting response... 200 OK
Length: 24248 (24K) [text/plain]
Saving to: 'ietf-interfaces.yang'

ietf-interfaces.yan 100%[===================>]  23.68K  --.-KB/s    in 0.004s

2025-03-21 15:22:31 (5.35 MB/s) - 'ietf-interfaces.yang' saved [24248/24248]
devasc@labvm:~/labs/devnet-src/data-modeling$
You now have a local version of the
ietf-interfaces.yangmodel that you can manipulate withpyang.
Part 2: Explore a YANG Model Using pyang🔗
In this Part, you will install the pyang module into your DEVASC VM and explore how it transforms the YANG model you copied from GitHub. Pyang simplifies working with YANG files. The module comes with a pyang command line executable that transforms YANG files into a more human readable format.
Step 1: Verify pyang is installed and up to date🔗
-
Verify that pyang is already installed with the
pyang -vcommand. Your version number may be different than the one shown here.devasc@labvm:~/labs/devnet-src/data-modeling$ pyang -v pyang 2.2.1 devasc@labvm:~/labs/devnet-src/data-modeling$ -
Verify that you have the latest pyang updates using the following
pip3command. Any updates after the DEVASC VM was first created will be downloaded and installed.devasc@labvm:~/labs/devnet-src/data-modeling$ pip3 install pyang --upgrade Collecting pyang Downloading pyang-2.7.1-py2.py3-none-any.whl (598 kB) |████████████████████████████████| 598 kB 16.4 MB/s Requirement already satisfied, skipping upgrade: lxml in /home/devasc/.local/lib/python3.8/site-packages (from pyang) (4.5.1) Installing collected packages: pyang Attempting uninstall: pyang Found existing installation: pyang 2.2.1 Uninstalling pyang-2.2.1: Successfully uninstalled pyang-2.2.1 Successfully installed pyang-2.7.1 devasc@labvm:~/labs/devnet-src/data-modeling$
Step 2: Transform the ietf-interfaces.yang model🔗
-
Enter
pyang -h | moreto explore the options for transforming the YANG model. Look for the-foption as shown below. You will use thetreeformatting option.devasc@labvm:~/labs/devnet-src/data-modeling$ pyang -h | more Usage: pyang [options] [<filename>...] Validates the YANG module in <filename> (or stdin), and all its dependencies. Options: -h, --help Show this help message and exit -v, --version Show version number and exit (output omitted) -f FORMAT, --format=FORMAT Convert to FORMAT. Supported formats are: yang, yin, dsdl, identifiers, tree, name, uml, depend, omni, sample-xml-skeleton, capability, jsonxsl, jstree, jtox, flatten (output omitted) devasc@labvm:~/labs/devnet-src/data-modeling$ -
Transform the
ietf-interfaces.yangmodel into atreeformat with the following command. Notice that the leafenabledis much easier to find and read in this format.devasc@labvm:~/labs/devnet-src/data-modeling$ pyang -f tree ietf-interfaces.yang ietf-interfaces.yang:6: error: module "ietf-yang-types" not found in search path module: ietf-interfaces +--rw interfaces | +--rw interface* [name] | +--rw name string | +--rw description? string | +--rw type identityref | +--rw enabled? boolean | +--rw link-up-down-trap-enable? enumeration {if-mib}? +--ro interfaces-state +--ro interface* [name] +--ro name string +--ro type identityref +--ro admin-status enumeration {if-mib}? +--ro oper-status enumeration +--ro last-change? yang:date-and-time +--ro if-index int32 {if-mib}? +--ro phys-address? yang:phys-address +--ro higher-layer-if* interface-state-ref +--ro lower-layer-if* interface-state-ref +--ro speed? yang:gauge64 +--ro statistics +--ro discontinuity-time yang:date-and-time +--ro in-octets? yang:counter64 +--ro in-unicast-pkts? yang:counter64 +--ro in-broadcast-pkts? yang:counter64 +--ro in-multicast-pkts? yang:counter64 +--ro in-discards? yang:counter32 +--ro in-errors? yang:counter32 +--ro in-unknown-protos? yang:counter32 +--ro out-octets? yang:counter64 +--ro out-unicast-pkts? yang:counter64 +--ro out-broadcast-pkts? yang:counter64 +--ro out-multicast-pkts? yang:counter64 +--ro out-discards? yang:counter32 +--ro out-errors? yang:counter32 devasc@labvm:~/labs/devnet-src/data-modeling$
8.3 Use NETCONF to Access an IOS XE Device🔗
Objectives🔗
Part 1: Launch the CSR1kv VM and Verify Connectivity
Part 2: Use a NETCONF Session to Gather Information
Part 3: Use ncclient to Connect to NETCONF
Part 4: Use ncclient to Retrieve the Configuration
Part 5: Use ncclient to Configure a Device
Background🔗
The Network Configuration Protocol (NETCONF), defined in RFCs 4741 and 6241, uses YANG data models to communicate with various devices on the network. YANG (Yet Another Next Generation) is a data modeling language. This language defines the data that is sent over network management protocols, like NETCONF. When using NETCONF to access an IOS XE device, the data is returned in XML format.
In this lab, you will use a NETCONF client, ncclient, which is a Python module for client-side scripting. You will use ncclient to verify NETCONF is configured, retrieve a device configuration, and modify a device configuration.
Instructions🔗
Part 1: Launch the CSR1kv VM and Verify Connectivity🔗
In this Part, you launch the CSR1kv VM and verify connectivity. You will then establish a secure shell (SSH) connection.
Step 1: Launch the CSR1kv VM🔗
-
Start the CSR1000v VM and wait for it to boot completely before proceeding.
Step 2: Verify connectivity between the VMs🔗
-
In the CSR1kv VM, press Enter to get a command prompt and then use
show ip interface briefto verify the IPv4 address of interface GigabitEthernet1. Make a note of this address for future steps.CSR1kv> enable CSR1kv# show ip interface brief Interface IP-Address OK? Method Status Protocol GigabitEthernet1 10.0.2.5 YES DHCP up up CSR1kv# -
Open the Terminal on the DEVASC VM and ensure you are still in the
data-modelingdirectory. -
Ping the CSR1kv VM to verify connectivity. Be sure to use the IP address you noted above, as your address may be different than in the example.
devasc@labvm:~/labs/devnet-src/data-modeling$ ping -c 5 10.0.2.5
PING 10.0.2.5 (10.0.2.5) 56(84) bytes of data.
64 bytes from 10.0.2.5: icmp_seq=1 ttl=254 time=1.37 ms
64 bytes from 10.0.2.5: icmp_seq=2 ttl=254 time=1.15 ms
64 bytes from 10.0.2.5: icmp_seq=3 ttl=254 time=0.981 ms
64 bytes from 10.0.2.5: icmp_seq=4 ttl=254 time=1.01 ms
64 bytes from 10.0.2.5: icmp_seq=5 ttl=254 time=1.14 ms

--- 10.0.2.5 ping statistics ---
5 packets transmitted, 5 received, 0% packet loss, time 4006ms
rtt min/avg/max/mdev = 0.981/1.130/1.365/0.135 ms
devasc@labvm:~/labs/devnet-src/data-modeling$
Step 3: Verify SSH connectivity to the CSR1kv VM🔗
-
In the Terminal for the DEVASC VM, SSH to the CSR1kv VM with the following command (again, use the IP address of your CSR1kv VM):
devasc@labvm:~/labs/devnet-src/data-modeling$ ssh cisco@10.0.2.5Note
The first time you SSH to the CSR1kv, your DEVASC VM warns you about the authenticity of the CSR1kv. Because you trust the CSR1kv, answer
yesto the prompt.devasc@labvm:~/labs/devnet-src/data-modeling$ ssh cisco@10.0.2.5 The authenticity of host '10.0.2.5 (10.0.2.5)' can't be established. RSA key fingerprint is SHA256:HYv9K5Biw7PFiXeoCDO/LTqs3EfZKBuJdiPo34VXDUY. Are you sure you want to continue connecting (yes/no/[fingerprint])? yes Warning: Permanently added '10.0.2.5' (RSA) to the list of known hosts.Tip
If this is NOT the first time you've connected to the CSR1kv VM with SSH, it's possible the SSH host key will have changed, and you will receive the following error:
@@@@@@@@@@@@@@@@@@@@@@@@@@@@@@@@@@@@@@@@@@@@@@@@@@@@@@@@@@@
@    WARNING: REMOTE HOST IDENTIFICATION HAS CHANGED!     @
@@@@@@@@@@@@@@@@@@@@@@@@@@@@@@@@@@@@@@@@@@@@@@@@@@@@@@@@@@@
IT IS POSSIBLE THAT SOMEONE IS DOING SOMETHING NASTY!
Someone could be eavesdropping on you right now (man-in-the-middle attack)!
It is also possible that a host key has just been changed.
The fingerprint for the RSA key sent by the remote host is
SHA256:xPuuOg3zw7ta0kcYpHT6Kq/5KBd4uQMal1MeH0lmp1U.
Please contact your system administrator.
Add correct host key in /home/devasc/.ssh/known_hosts to get rid of this message.
Offending RSA key in /home/devasc/.ssh/known_hosts:2
  remove with:
  ssh-keygen -f "/home/devasc/.ssh/known_hosts" -R "10.0.2.5"
RSA host key for 10.0.2.5 has changed and you have requested strict checking.
Host key verification failed.
If you receive this error message, run the command given in the output (using your CSR1kv VM's IP address), then try to connect with SSH again. Do not proceed until you can successfully SSH to the CSR1kv VM.
devasc@labvm:~/labs/devnet-src/data-modeling$ ssh-keygen -f "/home/devasc/.ssh/known_hosts" -R "10.0.2.5" # Host 10.0.2.5 found: line 2 /home/devasc/.ssh/known_hosts updated. Original contents retained as /home/devasc/.ssh/known_hosts.old devasc@labvm:~/labs/devnet-src/data-modeling$ -
Enter
cisco123!as the password and you should now be at the privileged EXEC command prompt for the CSR1kv.Password: <enter 'cisco123!' here> * * ** ** *** *** *** Cisco Networking Academy *** *** *** *** This software is provided for *** *** Educational Purposes *** *** Only in Networking Academies *** *** *** ** ** * * CSR1kv# -
Leave the SSH session open for the next Part.
Part 2: Use a NETCONF Session to Gather Information🔗
In this Part, you will verify that NETCONF is running, enable NETCONF if it is not, and verify that NETCONF is ready for an SSH connection. You will then connect to the NETCONF process, start a NETCONF session, gather interface information, and close the session.
Step 1: Check if NETCONF is running on the CSR1kv🔗
-
NETCONF may already be running. From your SSH session with the CSR1kv, use the
show platform software yang-management processcommand to see if the NETCONF SSH daemon (ncsshd) is running.CSR1kv# show platform software yang-management process confd : Running nesd : Running syncfd : Running ncsshd : Running dmiauthd : Running nginx : Running ndbmand : Running pubd : Running CSR1kv# -
If NETCONF is not running, (does not say
Runningnext to it), enter the global configuration commandnetconf-yang.CSR1kv# config t CSR1kv(config)# netconf-yang CSR1kv(config)# end CSR1kv# -
Type
exitto close the SSH session.CSR1kv# exit Connection to 10.0.2.5 closed by remote host. Connection to 10.0.2.5 closed.
Step 2: Access the NETCONF process through an SSH terminal🔗
In this step, you will re-establish an SSH session with the CSR1kv. But this time, you will specify the NETCONF port 830 and send netconf as a subsystem command.
Note
For more information on these options, explore the manual pages for SSH (man ssh).
-
If you haven't already, type
exitto close the current SSH session with CSR1kv. -
Enter the following command in a Terminal window (using the IP address of your VM). You can use the Up key to recall the latest SSH command and just add the
-pand-soptions as shown. Then, entercisco123!as the password.devasc@labvm:~/labs/devnet-src/data-modeling$ ssh cisco@10.0.2.5 -p 830 -s netconf cisco@10.0.2.5's password: -
The CSR1kv will respond with a
hellomessage that includes over 400 lines of output listing all of its NETCONF capabilities. The end of all NETCONF messages are identified with]]>]]>.<?xml version="1.0" encoding="UTF-8"?> <hello xmlns="urn:ietf:params:xml:ns:netconf:base:1.0"> <capabilities> <capability>urn:ietf:params:netconf:base:1.0</capability> <capability>urn:ietf:params:netconf:base:1.1</capability> <capability>urn:ietf:params:netconf:capability:writable-running:1.0</capability> <capability>urn:ietf:params:netconf:capability:xpath:1.0</capability> <capability>urn:ietf:params:netconf:capability:validate:1.0</capability> <capability>urn:ietf:params:netconf:capability:validate:1.1</capability> (output omitted) </capability> </capabilities> <session-id>20</session-id></hello>]]>]]>
Step 3: Start a NETCONF session by sending a hello message from the client🔗
To start a NETCONF session, the client needs to send its own hello message. The hello message should include the NETCONF base capabilities version the client wants to use.
-
Copy and paste the following XML code into the SSH session. Notice that the end of the client hello message is identified with a
]]>]]>. Make sure you press Enter after pasting the XML code.<hello xmlns="urn:ietf:params:xml:ns:netconf:base:1.0"> <capabilities> <capability>urn:ietf:params:netconf:base:1.0</capability> </capabilities> </hello> ]]>]]> -
Switch to the CSR1kv VM and use the
show netconf-yang sessionscommand to verify that a NETCONF session has been started. If the CSR1kv VM screen is dark, press Enter to wake it up.CSR1kv> en CSRk1v# show netconf-yang sessions R: Global-lock on running datastore C: Global-lock on candidate datastore S: Global-lock on startup datastore Number of sessions : 1 session-id transport username source-host global-lock ------------------------------------------------------------------------------- 20 netconf-ssh cisco 10.0.2.3 None CSR1kv#
Step 4: Send RPC messages to an IOS XE device🔗
-
During an SSH session, a NETCONF client can use Remote Procedure Call (RPC) messages to send NETCONF operations to the IOS XE device. The table lists some of the more common NETCONF operations.
Operation Description <get>Retrieve running configuration and device state information <get-config>Retrieve all or part of a specified configuration data store <edit-config>Loads all or part of a configuration to the specified configuration data store <copy-config>Replace an entire configuration data store with another <delete-config>Delete a configuration data store <commit>Copy candidate data store to running data store <lock> / <unlock>Lock or unlock the entire configuration data store system <close-session>Graceful termination of NETCONF session <kill-session>Forced termination of NETCONF session -
Copy and paste the following RPC
getmessage XML code into the terminal SSH session (not the CSR100v VM) to retrieve information about the interfaces on R1.<rpc message-id="103" xmlns="urn:ietf:params:xml:ns:netconf:base:1.0"> <get> <filter> <interfaces xmlns="urn:ietf:params:xml:ns:yang:ietf-interfaces"/> </filter> </get> </rpc> ]]>]]> -
Recall that XML does not require indention or white space. Therefore, the CSR1kv will return a long string of XML data.
<?xml version="1.0" encoding="UTF-8"?> <rpc-reply xmlns="urn:ietf:params:xml:ns:netconf:base:1.0" message-id="103"><data><interfaces xmlns="urn:ietf:params:xml:ns:yang:ietf-interfaces"><interface><name>GigabitEthernet1</name><description>VBox</description><type xmlns:ianaift="urn:ietf:params:xml:ns:yang:iana-if-type">ianaift:ethernetCsmacd</type><enabled>true</enabled><ipv4 xmlns="urn:ietf:params:xml:ns:yang:ietf-ip"></ipv4><ipv6 xmlns="urn:ietf:params:xml:ns:yang:ietf-ip"></ipv6></interface></interfaces></data></rpc-reply>]]>]]> -
Copy the XML that was returned, but do not include the final
]]>]]>characters. These characters are not part of the XML that is returned by the router. -
Search the internet for "prettify XML". Find a suitable site and use its tool to transform your XML into a more readable format, such as the following:
<?xml version="1.0"?>
<rpc-reply xmlns="urn:ietf:params:xml:ns:netconf:base:1.0" message-id="103">
  <data>
    <interfaces xmlns="urn:ietf:params:xml:ns:yang:ietf-interfaces">
      <interface>
        <name>GigabitEthernet1</name>
        <description>VBox</description>
        <type xmlns:ianaift="urn:ietf:params:xml:ns:yang:iana-if-type">ianaift:ethernetCsmacd</type>
        <enabled>true</enabled>
        <ipv4 xmlns="urn:ietf:params:xml:ns:yang:ietf-ip"/>
        <ipv6 xmlns="urn:ietf:params:xml:ns:yang:ietf-ip"/>
      </interface>
    </interfaces>
  </data>
</rpc-reply>
Step 5: Close the NETCONF session🔗
-
To close the NETCONF session, the client needs to send the following RPC message:
<rpc message-id="9999999" xmlns="urn:ietf:params:xml:ns:netconf:base:1.0"> <close-session /> </rpc> -
After a few seconds, you will be returned to the terminal prompt. Return to the
CSR1kvprompt and show the open netconf sessions. You will see that the session has been closed.CSR1kv# show netconf-yang sessions There are no active sessions CSR1kv#
Part 3: Use ncclient to Connect to NETCONF🔗
Working with NETCONF does not require working with raw NETCONF RPC messages and XML. In this Part, you will learn how to use the ncclient Python module to easily interact with network devices using NETCONF. In addition, you will learn how to identify which YANG models are supported by the device. This information is helpful when building a production network automation system that requires specific YANG models to be supported by the given network device.
Step 1: Verify that ncclient is installed and ready for use🔗
-
In a DEVASC VM terminal, enter the command
pip3 list --format=columnsto see all Python modules currently installed. Pipe the output tomore. Your output may differ from the following, but you should seencclientlisted, as shown. If not, use thepip3 install ncclientcommand to install it.devasc@labvm:~/labs/devnet-src/data-modeling$ pip3 list --format=columns | more Package Version ---------------------- ----------- ansible 2.9.6 apache-libcloud 2.8.0 appdirs 1.4.3 argcomplete 1.8.1 astroid 2.3.3 (output omitted) ncclient 0.6.7 netaddr 0.7.19 netifaces 0.10.4 netmiko 3.1.0 ntlm-auth 1.1.0 oauthlib 3.1.0 (output omitted) xmltodict 0.12.0 zipp 1.0.0 devasc@labvm:~/labs/devnet-src/data-modeling$
Step 2: Create a script to use ncclient to connect to the NETCONF service🔗
The ncclient module provides a manager class with a connect() method to setup the remote NETCONF connections. After a successful connection, the returned object represents the NETCONF connection to the remote device.
-
Open VS code , then click File > Open Folder... and navigate to the
labs/devnet-src/data-modelingdirectory. Click Open.Note
If prompted, check the Trust the authors of all files in the parent folder 'devnet-src' box, and click Yes, I trust the authors
-
In the EXPLORER pane, hover over DATA-MODELING and click the icon for New File... .
-
Name the file
ncclient-netconf.py.Important
Be careful to use this exact filename for the autograder to grade your work properly! Notice that
ncclienthas two C's. -
In your script file, import the
managerclass from thencclientmodule. Then create a variablemto represent theconnect()method. Theconnect()method includes all the information that is required to connect to the NETCONF service running on the CSR1kv. Note that the port is 830 for NETCONF. Use the IP address of your CSR1kv VM in thehostvariable.Pythonfrom ncclient import manager m = manager.connect( host="10.0.2.5", port=830, username="cisco", password="cisco123!", hostkey_verify=False )Note
If the
hostkey_verifyis set toTrue, the CSR1kv will ask you to verify the SSH fingerprint. In a lab environment, it is safe to set this value toFalse, as we have done here. -
Save and run the program to verify that there are no errors. You will not see any output yet.
devasc@labvm:~/labs/devnet-src/data-modeling$ python3 ncclient-netconf.py devasc@labvm:~/labs/devnet-src/data-modeling$ -
You can verify that the CSR1kv accepted the request for a NETCONF session. There should be an
%DMI-5-AUTH_PASSEDsyslog message in the CSR1kv VM. If the screen is black, press Enter to wake the router. The syslog message can be seen above the banner.CSR1kv# *Mar 25 21:22:59.300: %DMI-5-AUTH PASSED: R0/0: dmiauthd: User 'cisco' authenticated successfully from 10.0.2.3:50752 and was authorized for netconf over ssh. External groups: PRIV15
Step 3: Add a print function to the script so that the NETCONF capabilities for the CSR1kv are listed🔗
The m object returned by the manager.connect() function represents the NETCONF remote session. As you saw previously, in every NETCONF session, the server first sends its capabilities, which is a list in XML format, of supported YANG models. With the ncclient module, the received list of capabilities is stored in the m.server_capabilities list.
-
Use a
forloop and aprint()function to display the device capabilities:Pythonprint("#Supported Capabilities (YANG models):") for capability in m.server_capabilities: print(capability) -
Save and run the program. The output is the same output you got from sending the complex hello message previously, but without the opening and closing
<capability>XML tag on each line.devasc@labvm:~/labs/devnet-src/data-modeling$ python3 ncclient-netconf.py #Supported Capabilities (YANG models): urn:ietf:params:netconf:base:1.0 urn:ietf:params:netconf:base:1.1 urn:ietf:params:netconf:capability:writable-running:1.0 urn:ietf:params:netconf:capability:xpath:1.0 (output omitted) urn:ietf:params:xml:ns:netconf:base:1.0?module=ietf-netconf&revision=2011-06-01 urn:ietf:params:xml:ns:yang:ietf-netconf-with-defaults?module=ietf-netconf-with-defaults&revision=2011-06-01 urn:ietf:params:netconf:capability:notification:1.1 devasc@labvm:~/labs/devnet-src/data-modeling$
Part 4: Use ncclient to Retrieve the Configuration🔗
In this Part, you will use the NETCONF ncclient to retrieve the configuration for the CSR1kv, use the xml.dom.minidom module to format the configuration, and use a filter with get_config() to retrieve a portion of the running configuration.
Step 1: Use the get_config() function to retrieve the running configuration for R1🔗
-
Comment out the block of statements that print the capabilities (saving 400+ lines of output), as shown in the following:
Python''' print("#Supported Capabilities (YANG models):") for capability in m.server_capabilities: print(capability) '''Note
VS Code might change the three single quotes (
') to three double quotes ("). This is fine. -
You can use the
get_config()method of themNETCONF session object to retrieve the configuration for the CSR1kv. Theget_config()method expects asourcestring parameter that specifies the source NETCONF datastore. Use aprint()function to display the results. The only NETCONF datastore currently on the CSR1kv is therunningdatastore. You can verify this with theshow netconf-yang datastorescommand.Pythonnetconf_reply = m.get_config(source="running") print(netconf_reply) -
Save and run your program.
devasc@labvm:~/labs/devnet-src/data-modeling$ python3 ncclient-netconf.py <?xml version="1.0" encoding="UTF-8"?> <rpc-reply xmlns="urn:ietf:params:xml:ns:netconf:base:1.0" message-id="urn:uuid:3f31bedc-5671-47ca-9781-4d3d7aadae24" xmlns:nc="urn:ietf:params:xml:ns:netconf:base:1.0"><data><native xmlns="http://cisco.com/ns/yang/Cisco-IOS-XE-native"><version>16.9</version><boot-start-marker/><boot-end-marker/><banner><motd><banner> (output omitted) devasc@labvm:~/labs/devnet-src/data-modeling$ -
Notice that the returned XML is not formatted. You can copy it out to the same site you found earlier to prettify the XML.
<?xml version="1.0" encoding="UTF-8"?>
<rpc-reply xmlns="urn:ietf:params:xml:ns:netconf:base:1.0" xmlns:nc="urn:ietf:params:xml:ns:netconf:base:1.0" message-id="urn:uuid:3f31bedc-5671-47ca-9781-4d3d7aadae24">
  <data>
    <native xmlns="http://cisco.com/ns/yang/Cisco-IOS-XE-native">
      <version>16.9</version>
      <boot-start-marker/>
      <boot-end-marker/>
      <banner>
        <motd>
          <banner>^C</banner>
        </motd>
      </banner>
      <service>
        <timestamps>
          <debug>
            <datetime>
              <msec/>
            </datetime>
          </debug>
          <log>
            <datetime>
              <msec/>
            </datetime>
          </log>
        </timestamps>
      </service>
      <platform>
        <console xmlns="http://cisco.com/ns/yang/Cisco-IOS-XE-platform">
          <output>virtual</output>
        </console>
      </platform>
      <hostname>CSR1kv</hostname>

(output omitted)
Step 2: Use Python to prettify the XML🔗
Python has built in support for working with XML files. The xml.dom.minidom module can be used to prettify the output with the toprettyxml() function.
-
At the beginning of your script, add a statement to import the
xml.dom.minidommodule.Pythonimport xml.dom.minidom -
Replace the simple print function
print(netconf_reply)with a version that prints prettified XML output.Pythonprint(xml.dom.minidom.parseString(netconf_reply.xml).toprettyxml()) -
Save and run your program. The XML is displayed in a more readable format.
devasc@labvm:~/labs/devnet-src/data-modeling$ python3 ncclient-netconf.py
<?xml version="1.0" ?>
<rpc-reply xmlns="urn:ietf:params:xml:ns:netconf:base:1.0" xmlns:nc="urn:ietf:params:xml:ns:netconf:base:1.0" message-id="urn:uuid:3a5f6abc-76b4-436d-9e9a-7758091c28b7">
        <data>
                <native xmlns="http://cisco.com/ns/yang/Cisco-IOS-XE-native">
                        <version>16.9</version>
                        <boot-start-marker/>
                        <boot-end-marker/>
                        <banner>
                                <motd>
                                        <banner>^C</banner>
                                </motd>
                        </banner>
(output omitted)
        </data>
</rpc-reply>

devasc@labvm:~/labs/devnet-src/data-modeling$
Step 3: Use a filter with get_config() to only retrieve a specific YANG model🔗
A network administrator may only want to retrieve a portion of the running configuration on a device. NETCONF supports returning only data that is defined in a filter parameter of the get_conf() function.
-
Create a variable called
netconf_filterthat only retrieves data defined by the Cisco IOS XE Native YANG model for interfaces. Replace the existingnetconf_replyandprint()statements with the code below.Pythonnetconf_filter = """ <filter> <native xmlns="http://cisco.com/ns/yang/Cisco-IOS-XE-native" > <interface> </interface> </native> </filter> """ netconf_reply = m.get_config(source="running", filter=netconf_filter) print(xml.dom.minidom.parseString(netconf_reply.xml).toprettyxml()) -
Save and run your program. The start of the output is the same, as shown below. However, only the
<native>XML element<interface>is displayed this time. Previously, all the YANG models available on the CSR1kv were displayed. Filtering the retrieved data to only display the native YANG module for<interface>significantly reduces your output.devasc@labvm:~/labs/devnet-src/data-modeling$ python3 ncclient-netconf.py <?xml version="1.0" ?> <rpc-reply xmlns="urn:ietf:params:xml:ns:netconf:base:1.0" xmlns:nc="urn:ietf:params:xml:ns:netconf:base:1.0" message-id="urn:uuid:c641aeb1-1162-4dbe-8849-fba76d9e8a19"> <data> <native xmlns="http://cisco.com/ns/yang/Cisco-IOS-XE-native"> <interface> <GigabitEthernet> <name>1</name> <description>VBox</description> <ip> <address> <dhcp/> </address> </ip> <mop> <enabled>false</enabled> <sysid>false</sysid> </mop> <negotiation xmlns="http://cisco.com/ns/yang/Cisco-IOS-XE-ethernet"> <auto>true</auto> </negotiation> </GigabitEthernet> </interface> </native> </data> </rpc-reply> devasc@labvm:~/labs/devnet-src/data-modeling$
Part 5: Use ncclient to Configure a Device🔗
In this Part, you will use ncclient to configure the CSR1kv using the edit_config() method of the manager module.
Step 1: Use ncclient to edit the hostname for the CSR1kv🔗
To update an existing setting in the configuration for the CSR1kv, you can extract the setting location from the configuration retrieved previously. For this step, you will set a variable to change the <hostname> value.
-
Previously, you defined a
<filter>variable. To modify a device configuration, you will define a<config>variable. Add the following variable to the end of yourncclient_netconf.pyscript.Important
Replace
INITIALwith the first letter of your first name.Pythonnetconf_hostname = """ <config> <native xmlns="http://cisco.com/ns/yang/Cisco-IOS-XE-native"> <hostname>INITIAL-router</hostname> </native> </config> """ -
Use the
edit_config()function of themNETCONF session object to send the configuration and store the results in thenetconf_replyvariable so that they can be printed. The parameters for theedit_config()function are as follows:target- the targeted NETCONF datastore to be updatedconfig- the configuration modification that is to be sent
Pythonnetconf_reply = m.edit_config(target="running", config=netconf_hostname)Important
This is a new
netconf_replyat the end of the file. Don't replace the existingnetconf_replyline in your code. -
The
edit_config()function returns an XML RPC reply message with<ok/>indicating that the change was successfully applied. Repeat the previousprint()statement to display the results.Pythonprint(xml.dom.minidom.parseString(netconf_reply.xml).toprettyxml()) -
Save and run your program. You should get output similar to the output displayed below.
devasc@labvm:~/labs/devnet-src/data-modeling$ python3 ncclient-netconf.py
(output omitted)
<?xml version="1.0" ?>
<rpc-reply xmlns="urn:ietf:params:xml:ns:netconf:base:1.0" xmlns:nc="urn:ietf:params:xml:ns:netconf:base:1.0" message-id="urn:uuid:e304b225-7951-4029-afd5-59e8e7edbaa0">
        <ok/>
</rpc-reply>

devasc@labvm:~/labs/devnet-src/data-modeling$
Important
Also verify that the hostname of the rotuer has changed by switching to the CSR1kv VM. You should see
INITIAL-routeras the hostname, whereINITIALis the first initial of your first name: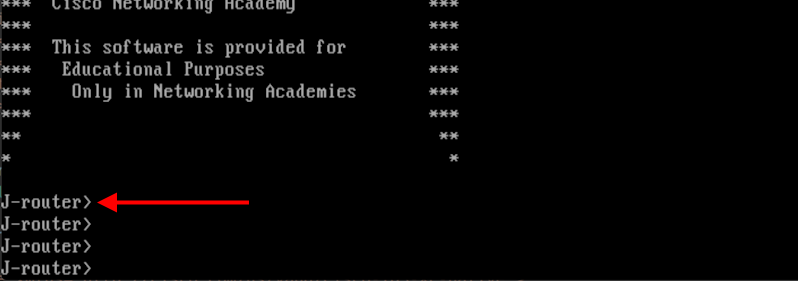
-
Edit your script to change hostname back to
CSR1kv(case sensitive). Save and run your program.
Step 2: Use ncclient to create a new loopback interface on R1🔗
-
Create a new
<config>variable to hold the configuration for a new loopback interface. Add the following to the end of yourncclient_netconf.pyscript.Note
You can use whatever description you want. However, only use alphanumeric characters or you will need to escape them with the backslash (
\).Pythonnetconf_loopback = """ <config> <native xmlns="http://cisco.com/ns/yang/Cisco-IOS-XE-native"> <interface> <Loopback> <name>1</name> <description>My first NETCONF loopback</description> <ip> <address> <primary> <address>10.1.1.1</address> <mask>255.255.255.0</mask> </primary> </address> </ip> </Loopback> </interface> </native> </config> """ -
Add the following
edit_config()function to the end of yourncclient_netconf.pyto send the new loopback configuration to R1 and then print out the results.Pythonnetconf_reply = m.edit_config(target="running", config=netconf_loopback) print(xml.dom.minidom.parseString(netconf_reply.xml).toprettyxml()) -
Save and run your program. You should get output similar to the following:
devasc@labvm:~/labs/devnet-src/data-modeling$ python3 ncclient-netconf.py (output omitted) <?xml version="1.0" ?> <rpc-reply xmlns="urn:ietf:params:xml:ns:netconf:base:1.0" xmlns:nc="urn:ietf:params:xml:ns:netconf:base:1.0" message-id="urn:uuid:98437f47-7a93-4cac-9b9e-9bc8afc9dfa1"> <ok/> </rpc-reply> devasc@labvm:~/labs/devnet-src/data-modeling$ -
On the CSR1kv, verify that the new loopback interface was created.
CSR1kv> en
CSR1kv# show ip interface brief
Interface              IP-Address      OK? Method Status                Protocol
GigabitEthernet1       10.0.2.5        YES DHCP   up                    up
Loopback1              10.1.1.1        YES other  up                    up
CSR1kv# show run interface Loopback1
interface Loopback1
 description My first NETCONF loopback
 ip address 10.1.1.1 255.255.255.0
CSR1kv#
Step 3: Attempt to create a new loopback interface with the same IPv4 address🔗
-
Create a new variable called
netconf_newloop. It will hold a configuration that creates a new loopback 2 interface but with the same IPv4 address as on loopback 1:10.1.1.1/24. At the router CLI, this would create an error because of the attempt to assign a duplicate IP address to an interface. Add the following to the end of yourncclient-netconf.pyscript.Pythonnetconf_newloop = """ <config> <native xmlns="http://cisco.com/ns/yang/Cisco-IOS-XE-native"> <interface> <Loopback> <name>2</name> <description>My second NETCONF loopback</description> <ip> <address> <primary> <address>10.1.1.1</address> <mask>255.255.255.0</mask> </primary> </address> </ip> </Loopback> </interface> </native> </config> """ -
Add the following
edit_config()function to the end of yourncclient_netconf.pyto send the new loopback configuration to the CSR1kv. You do not need aprint()statement for this step.Pythonnetconf_reply = m.edit_config(target="running", config=netconf_newloop) -
Save and run the program. You should get error output similar to the following with the RPCError message Device refused one or more commands.
devasc@labvm:~/labs/devnet-src/data-modeling$ python3 ncclient-netconf.py Traceback (most recent call last): File "ncclient-netconf.py", line 80, in <module> netconf_reply = m.edit_config(target="running", config=netconf_newloop) File "/home/devasc/.local/lib/python3.8/site-packages/ncclient/manager.py", line 231, in execute return cls(self._session, File "/home/devasc/.local/lib/python3.8/site-packages/ncclient/operations/edit.py", line 69, in request return self._request(node) File "/home/devasc/.local/lib/python3.8/site-packages/ncclient/operations/rpc.py", line 348, in _request raise self._reply.error ncclient.operations.rpc.RPCError: inconsistent value: Device refused one or more commands devasc@labvm:~/labs/devnet-src/data-modeling$ -
NETCONF will not apply any of the configuration that is sent if one or more commands are rejected. To verify this, enter the
show ip interface briefcommand on R1. Notice that your new interface, loopback 2, was not created.CSR1kv# show ip interface brief Interface IP-Address OK? Method Status Protocol GigabitEthernet1 10.0.2.5 YES DHCP up up Loopback1 10.1.1.1 YES other up up CSR1kv#
Step 4: Commit the changes to the repository🔗
-
Add the
ncclient-netconf.pyfile to the staging area then commit the changes to the local repository using the message Using NETCONF to Configure Router.devasc@labvm:~/labs/devnet-src/data-modeling$ git add ncclient-netconf.py devasc@labvm:~/labs/devnet-src/data-modeling$ git commit -m "Using NETCONF to Configure Router" [main 27951fb] Using NETCONF to Configure Router 1 file changed, 83 insertions(+) create mode 100644 ncclient-netconf.py devasc@labvm:~/labs/devnet-src/data-modeling$
8.4 Use RESTCONF to Access an IOS XE Device🔗
Objectives🔗
Part 1: Configure an IOS XE Device for RESTCONF Access
Part 2: Open and Configure Postman
Part 3: Use Postman to Send GET Requests
Part 4: Use Postman to Send a PUT Request
Part 5: Use a Python Script to Send GET Requests
Part 6: Use a Python Script to Send a PUT Request
Background🔗
The RESTCONF protocol provides a simplified subset of NETCONF features over a RESTful API. RESTCONF allows you to make RESTful API calls to an IOS XE device. The data that is returned by the API can be formatted in either XML or JSON. In the first half of this lab, you will use the Postman program to construct and send API requests to the RESTCONF service that is running on the CSR1kv. In the second half of the lab, you will create Python scripts to perform the same tasks as your Postman program.
Instructions🔗
Part 1: Configure an IOS XE Device for RESTCONF Access🔗
In this Part, you will configure the CSR1kv VM to accept RESTCONF messages. You will also start the HTTPS service.
Note
The services discussed in this Part may already be running on your VM. However, make sure you know the commands to view the running services and to enable them.
Step 1: Verify that the RESTCONF daemons are running🔗
-
RESTCONF should already be running because it was part of the default configuration provided by NetAcad. From the terminal, you can use the
show platform software yang-management processcommand to see if all the daemons associated with the RESTCONF service are running. The NETCONF daemon may also be running from the previous part of this lab.Important
Even if all of the daemons already say
running, proceed to the next step to learn how to enable them.CSR1kv# show platform software yang-management process confd : Running nesd : Running syncfd : Running ncsshd : Running dmiauthd : Running nginx : Running ndbmand : Running pubd : Running CSR1kv#Note
The purpose and function of all the daemons is beyond the scope of this lab.
Step 2: Enable and verify the RESTCONF service🔗
-
Enter the global configuration command
restconfto enable the RESTCONF service on the CSR1kv.CSR1kv# configure terminal CSR1kv(config)# restconf CSR1kv(config)# end CSR1kv# -
Verify that the required RESTCONF daemons are now running. Recall that
ncsshdis the NETCONF service, which may be running on your device. We do not need it for this lab. However, you do neednginx, which is the HTTPS server. This will allow you to make REST API calls to the RESTCONF service.CSR1kv# show platform software yang-management process confd : Running nesd : Running syncfd : Running ncsshd : Not Running dmiauthd : Running nginx : Not Running ndbmand : Running pubd : Running CSR1kv#
Step 3: Enable and verify the HTTPS service🔗
-
Enter the following global configuration commands to enable the HTTPS server and specify that server authentication should use the local database of user accounts.
CSR1kv# configure terminal CSR1kv(config)# ip http secure-server CSR1kv(config)# ip http authentication local CSR1kv(config)# end CSR1kv# -
Verify that the HTTPS server (
nginx) is now running.CSR1kv# show platform software yang-management process confd : Running nesd : Running syncfd : Running ncsshd : Not Running dmiauthd : Running nginx : Running ndbmand : Running pubd : Running CSR1kv#
Part 2: Open and Configure Postman🔗
In this Part, you will open Postman, disable SSL certificates, and explore the user interface.
Step 1: Open Postman🔗
-
In the DEVASC VM, open the Postman application.
-
If this is the first time you have opened Postman, it may ask you to create an account or sign in. At the bottom of the window, you can also click the "Skip" message to skip signing in. Signing in is not required to use this application.
Step 2: Disable SSL certification verification🔗
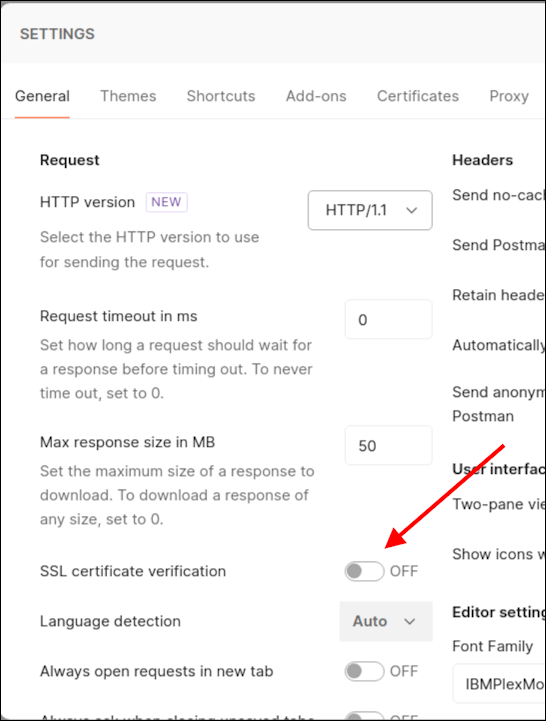
By default, Postman has SSL certification verification turned on. You will not be using SSL certificates with the CSR1kv; therefore, you need to turn off this feature.
-
Click File > Settings.
-
Under the General tab, set the SSL certificate verification to OFF.
-
Close the Settings dialog box.
Part 3: Use Postman to Send GET Requests🔗
In this Part, you will use Postman to send an HTTP GET request to the CSR1kv to verify that you can connect to the RESTCONF service.
Step 1: Explore the Postman user interface🔗
-
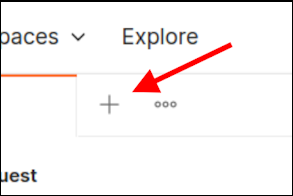
Click the plus sign () next to the open tab (if a tab is open) to open a GET Untitled Request. This interface is where you will do all your work in this lab.
Step 2: Enter the URL for the CSR1kv🔗
-
The request type is already set to GET. Leave the request type set to GET.
-
In the "Enter URL or paste text" field, type in the URL that will be used to access the RESTCONF service that is running on the CSR1kv. Remember to use the IP address of your CSR1kv VM, which may be different from this example. Do not click Send yet.
https://10.0.2.5/restconf/
Step 3: Enter authentication credentials🔗
Under the URL field, there are tabs listed for Params, Authorization, Headers, Body, Pre-request Script, Test, and Settings. In this lab, you will use the Authorization, Headers, and Body tabs.
-
Click the Authorization tab.
-
Under Type, click the down arrow next to No Auth and choose Basic Auth.
-
For Username and Password, enter the local authentication credentials for the CSR1kv:
Username: cisco Password: cisco123! -
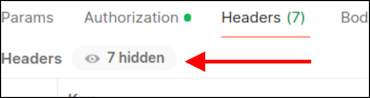
Click Headers. Then click the 7 hidden button. You can verify that the Authorization key has a Basic value that will be used to authenticate the request when it is sent to the CSR1kv. (You might have to scroll up to see the Authorization header)

Step 4: Set JSON as the data type to send to and receive from the CSR1kv🔗
You can send and receive data from the CSR1kv in XML or JSON format. For this lab, you will use JSON.
-
In the Headers area, click in the first blank Key field at the bottom and type
Content-Typefor the type of key. In the Value field, typeapplication/yang-data+json. This tells Postman to send JSON data to the CSR1kv. -
Below your
Content-Typekey, add another key/value pair. The Key field isAcceptand the Value field isapplication/yang-data+json.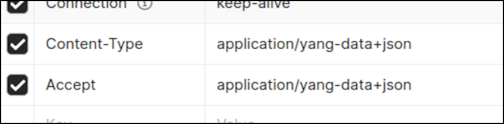
Note
You could change
application/yang-data+jsontoapplication/yang-data+xmlto send and receive XML data instead of JSON data. For this lab, leave it as JSON.
Step 5: Send the API request to the CSR1kv🔗
-
Postman now has all the information it needs to send the GET request. Click Send. In the Response area at the bottom of the Postman window, you should see the following JSON response from the CSR1kv. If not, verify that you completed the previous steps in this part of the lab and correctly configured RESTCONF and HTTPS service in Part 2.
{
    "ietf-restconf:restconf": {
        "data": {},
        "operations": {},
        "yang-library-version": "2016-06-21"
    }
}
This JSON response verifies that Postman can now send other REST API requests to the CSR1kv.
Step 6: Use a GET request to gather the information for all interfaces on the CSR1kv🔗
-
Now that you have a successful GET request, you can use it as a template for additional requests. At the top of Postman, right-click the GET tab that you just used and choose Duplicate Tab.
-
Next, use the ietf-interfaces YANG model to gather interface information from CSR1kv. Add
data/ietf-interfaces:interfacesto the end of the URL:https://10.0.2.5/restconf/data/ietf-interfaces:interfaces -
Click Send. You should see a JSON response from the CSR1kv that is similar to the output shown below.
{
    "ietf-interfaces:interfaces": {
        "interface": [
            {
                "name": "GigabitEthernet1",
                "description": "VBox",
                "type": "iana-if-type:ethernetCsmacd",
                "enabled": true,
                "ietf-ip:ipv4": {},
                "ietf-ip:ipv6": {}
            },
            {
                "name": "Loopback1",
                "description": "My first NETCONF loopback",
                "type": "iana-if-type:softwareLoopback",
                "enabled": true,
                "ietf-ip:ipv4": {
                    "address": [
                        {
                            "ip": "10.1.1.1",
                            "netmask": "255.255.255.0"
                        }
                    ]
                },
                "ietf-ip:ipv6": {}
            }
        ]
    }
}
Step 7: Use a GET request to gather information for a specific interface on the CSR1kv🔗
To specify just the GigabitEthernet interface, extend the URL to only request information for this interface.
-
Duplicate your last GET request.
-
Add the
/interface=parameter to specify an interface and type in the name of the interface.https://10.0.2.5/restconf/data/ietf-interfaces:interfaces/interface=GigabitEthernet1Note
If you request interface information from a different device with names that use forward slashes (
/), such asGigabitEthernet0/0/1, use the HTML code%2Ffor the forward slashes in the interface name. So,0/0/1becomes0%2F0%2F1. This is to prevent the router from treating the forward slash as part of the URL path rather than the interface name. -
Click Send. You should see a JSON response from the CSR1kv that is similar to the output below. Your output may be different depending on your particular router. In the default CSR1kv setup, you will not see IP addressing information.
{ "ietf-interfaces:interface": { "name": "GigabitEthernet1", "description": "VBox", "type": "iana-if-type:ethernetCsmacd", "enabled": true, "ietf-ip:ipv4": {}, "ietf-ip:ipv6": {} } } -
This interface receives addressing from a Virtual Box template. Therefore, the IPv4 address is not shown under
show running-config. Instead, you will see theip address dhcpcommand. You can see this also in theshow ip interface briefoutput where it saysDHCPunder theMethodfor GigabitEthernet1 (your interface address may be different).CSR1kv# show ip interface brief Interface IP-Address OK? Method Status Protocol GigabitEthernet1 10.0.2.5 YES DHCP up up Loopback1 10.1.1.1 YES other up up CSR1kv# -
In the next Part you will need to use the JSON response from a manually configurated interface. Open the CSR1kv VM window and statically configure the GigabitEthernet1 interface with the same IPv4 address currently assigned to it by Virtual Box. Notice that the
Methodnow saysmanualfor GigabitEthernet1.Important
Make sure you use the IP address that was assigned to your VM, which may be different than the one in the example.
CSR1kv# conf t CSR1kv(config)# interface g1 CSR1kv(config-if)# ip address 10.0.2.5 255.255.255.0 CSR1kv(config-if)# end CSR1kv# show ip interface brief Interface IP-Address OK? Method Status Protocol GigabitEthernet1 10.0.2.5 YES manual up up Loopback1 10.1.1.1 YES other up up CSR1kv# -
Return to Postman and send your GET request again. You should now see IPv4 addressing information in the JSON response, as shown below. In the next Part, you will copy this JSON format to create a new interface.
{
  "ietf-interfaces:interface": {
    "name": "GigabitEthernet1",
    "description": "VBox",
    "type": "iana-if-type:ethernetCsmacd",
    "enabled": true,
    "ietf-ip:ipv4": {
      "address": [
        {
          "ip": "10.0.2.5",
          "netmask": "255.255.255.0"
        }
      ]
    },
    "ietf-ip:ipv6": {}
  }
}
Part 4: Use Postman to Send a PUT Request🔗
In this Part, you will configure Postman to send a PUT request to the CSR1kv to create a new loopback interface.
Step 1: Duplicate and modify the last GET request🔗
-
Duplicate the last GET request.
-
For the Type of request, click the down arrow () next to GET and choose PUT.
-
For the
interface=parameter, change it to=Loopback2to specify a new interface.https://10.0.2.5/restconf/data/ietf-interfaces:interfaces/interface=Loopback2
Step 2: Configure the body of the request specifying the information for the new loopback🔗
-
To send a PUT request, you need to provide the information for the body of the request. Next to the Headers tab, click Body. Then click the Raw radio button. The field is currently empty. If you click Send now, you will get error code
400 Bad Requestbecause Loopback2 does not exist yet and you did not provide enough information to create the interface. -
Fill in the Body section with the required JSON data to create a new Loopback2 interface. You can copy the Body section of the previous GET request and modify it. Or you can copy the following into the Body section of your PUT request. Notice that the type of interface must be set to
softwareLoopback.{ "ietf-interfaces:interface": { "name": "Loopback2", "description": "My first RESTCONF loopback", "type": "iana-if-type:softwareLoopback", "enabled": true, "ietf-ip:ipv4": { "address": [ { "ip": "10.2.2.2", "netmask": "255.255.255.0" } ] }, "ietf-ip:ipv6": {} } } -
Click Send to send the PUT request to the CSR1kv. Below the Body section, you should see the HTTP response code
Status: 201 Created. This indicates that the resource was created successfully.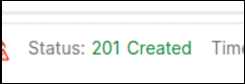
-
You can verify that the interface was created. Return to the CSR1kv VM and enter
show ip interface brief. You can also run the Postman tab that contains the request to get information about the interfaces on the CSR1kv that was created in the previous Part of this lab.CSR1kv# show ip interface brief Interface IP-Address OK? Method Status Protocol GigabitEthernet1 10.0.2.5 YES manual up up Loopback1 10.1.1.1 YES other up up Loopback2 10.2.2.2 YES other up up CSR1kv#
Part 5: Use a Python script to Send GET Requests🔗
In this Part, you will create a Python script to send GET requests to the CSR1kv.
Step 1: Create the RESTCONF directory and start the script🔗
-
Open VS code , then click File > Open Folder... and navigate to the
labs/devnet-src/data-modelingdirectory. Click Open. -
In the EXPLORER hover over DATA-MODELING and click the icon for New File… .
-
Name the file
restconf-get.py.Important
Be careful to use this exact filename for the autograder to grade your work properly! Notice that
ncclienthas two C's. -
Enter the following commands to import the modules that are required and disable SSL certificate warnings:
Pythonimport json import requests requests.packages.urllib3.disable_warnings()The
jsonmodule includes methods to convert JSON data to Python objects and vice versa. Therequestsmodule has methods that will let you send REST requests to a URL.
Step 2: Create the variables that will be the components of the request🔗
-
Create a variable named
api_urland assign it the URL that will access the interface information on the CSR1kv. Remember to use the IP address of your CSR1kv VM, which may be different than the example.Pythonapi_url = "https://10.0.2.5/restconf/data/ietf-interfaces:interfaces" -
Create a dictionary variable named
headersthat has keys forAcceptandContent-typeand assign the keys the valueapplication/yang-data+json.Pythonheaders = { "Accept": "application/yang-data+json", "Content-type": "application/yang-data+json", } -
Create a Python tuple variable named
basicauththat has two keys needed for authentication,usernameandpassword.Pythonbasicauth = ("cisco", "cisco123!")
Step 3: Create a variable to send the request and store the JSON response🔗
Use the variables that were created in the previous step as parameters for the requests.get() method. This method sends an HTTP GET request to the RESTCONF API on the CSR1kv. Assign the result of the request to a variable named resp. That variable will hold the JSON response from the API. If the request is successful, the JSON will contain the returned YANG data model.
-
Add the following code to your
restconf-get.pyfile:Pythonresp = requests.get(api_url, auth=basicauth, headers=headers, verify=False)The table below lists the various elements of this statement:
Element Explanation respThe variable to hold the response from the API requests.get()The method that actually makes the GET request api_urlThe variable that holds the URL address string authtuple variable created to hold the authentication information headers=headersA parameter that is assigned the headers variable verify=FalseDisables verification of the SSL certificate when the request is made -
Add a
print()statement to see the HTTP response code.Pythonprint(resp) -
Save and run your script. You should get the output shown below. If not, verify all previous steps in this part as well as the SSH and RESTCONF configuration for the CSR1kv.
devasc@labvm:~/labs/devnet-src/data-modeling$ python3 restconf-get.py
<Response [200]>
devasc@labvm:~/labs/devnet-src/data-modeling$
Step 4: Format and display the JSON data received from the CSR1kv🔗
Now you can extract the YANG model response values from the response JSON.
-
The response JSON is not compatible with Python
dictionaryandlistobjects, so it must be converted to Python format. Create a new variable calledresponse_jsonand assign the variablerespto it. Add thejson()method to convert the JSON. The statement is as follows:Pythonresponse_json = resp.json() -
Add a
print()statement to display the JSON data.Pythonprint(response_json) -
Save and run your script. You should get output similar to the following:
devasc@labvm:~/labs/devnet-src/data-modeling$ python3 restconf-get.py <Response [200]> 'ietf-interfaces:interfaces': {'interface': [{'name': 'GigabitEthernet1', 'description': 'VBox', 'type': 'iana-if-type:ethernetCsmacd', 'enabled': True, 'ietf-ip:ipv4': {'address': [{'ip': '10.0.2.5', 'netmask': '255.255.255.0'}]}, 'ietf-ip:ipv6': {}}, {'name': 'Loopback1', 'description': 'My first NETCONF loopback', 'type': 'iana-if-type:softwareLoopback', 'enabled': True, 'ietf-ip:ipv4': {'address': [{'ip': '10.1.1.1', 'netmask': '255.255.255.0'}]}, 'ietf-ip:ipv6': {}}, {'name': 'Loopback2', 'description': 'My first RESTCONF loopback', 'type': 'iana-if-type:softwareLoopback', 'enabled': True, 'ietf-ip:ipv4': {'address': [{'ip': '10.2.2.2', 'netmask': '255.255.255.0'}]}, 'ietf-ip:ipv6': {}}]}} devasc@labvm:~/labs/devnet-src/data-modeling$ -
To prettify the output, edit your print statement to use the
json.dumps()function with theindentparameter:Pythonprint(json.dumps(response_json, indent=4)) -
Save and run your script. You should get the output shown below. This output is virtually identical to the output of your first Postman GET request.
devasc@labvm:~/labs/devnet-src/data-modeling$ python3 restconf-get.py
<Response [200]>
{
    "ietf-interfaces:interfaces": {
        "interface": [
            {
                "name": "GigabitEthernet1",
                "description": "VBox",
                "type": "iana-if-type:ethernetCsmacd",
                "enabled": true,
                "ietf-ip:ipv4": {
                    "address": [
                        {
                            "ip": "10.0.2.5",
                            "netmask": "255.255.255.0"
                        }
                    ]
                },
                "ietf-ip:ipv6": {}
            },
            {
                "name": "Loopback1",
                "description": "My first NETCONF loopback",
                "type": "iana-if-type:softwareLoopback",
                "enabled": true,
                "ietf-ip:ipv4": {
                    "address": [
                        {
                            "ip": "10.1.1.1",
                            "netmask": "255.255.255.0"
                        }
                    ]
                },
                "ietf-ip:ipv6": {}
            },
            {
                "name": "Loopback2",
                "description": "My first RESTCONF loopback",
                "type": "iana-if-type:softwareLoopback",
                "enabled": true,
                "ietf-ip:ipv4": {
                    "address": [
                        {
                            "ip": "10.2.2.2",
                            "netmask": "255.255.255.0"
                        }
                    ]
                },
                "ietf-ip:ipv6": {}
            }
        ]
    }
}
devasc@labvm:~/labs/devnet-src/data-modeling$
Part 6: Use a Python Script to Send a PUT Request🔗
In this Part, you will create a Python script to send a PUT request to the CSR1kv. As was done in Postman, you will create a new loopback interface.
Step 1: Import modules and disable SSL warnings🔗
-
In the VS CODE EXPLORER pane hover over DATA-MODELING and click the icon for New File… .
-
Name the file
restconf-put.py.Important
Be careful to use this exact filename for the autograder to grade your work properly! Notice that
ncclienthas two C's. -
Enter the following commands to import the modules that are required and disable SSL certificate warnings:
Pythonimport json import requests requests.packages.urllib3.disable_warnings()
Step 2: Create the variables that will be the components of the request🔗
-
Create a variable named
api_urland assign it the URL that targets a new Loopback3 interface.Important
This variable specification should be on one line in your script. Make sure you use your CSR1000v IP address
Pythonapi_url = "https://10.0.2.5/restconf/data/ietf-interfaces:interfaces/interface=Loopback3" -
Create a dictionary variable named
headersthat has keys forAcceptandContent-typeand assign the keys the valueapplication/yang-data+json.Pythonheaders = { "Accept": "application/yang-data+json", "Content-type": "application/yang-data+json", } -
Create a Python tuple variable named
basicauththat has two values needed for authentication,usernameandpassword.Pythonbasicauth = ("cisco", "cisco123!") -
Create a Python dictionary variable
yangConfigthat will hold the YANG data that is required to create the new interface Loopback3. You can use the same dictionary that you used previously in Postman. However, change the interface number and address.Important
Boolean values in Python must be capitalized. Therefore, make sure that the
Tis capitalized in the key/value pair for"enabled": True.yangConfig = { "ietf-interfaces:interface": { "name": "Loopback3", "description": "My second RESTCONF loopback", "type": "iana-if-type:softwareLoopback", "enabled": True, "ietf-ip:ipv4": { "address": [ { "ip": "10.3.3.3", "netmask": "255.255.255.0" } ] }, "ietf-ip:ipv6": {} } }
Step 3: Create a variable to send the request and store the JSON response🔗
Use the variables created in the previous step as parameters for the requests.put() method. This method sends an HTTP PUT request to the RESTCONF API. Assign the result of the request to a variable named resp. That variable will hold the JSON response from the API. If the request is successful, the JSON will contain the returned YANG data model.
-
Before entering statements, please note that this variable specification should be on only one line in your script. Enter the following code:
Pythonresp = requests.put(api_url, data=json.dumps(yangConfig), auth=basicauth, headers=headers, verify=False) -
Enter the code below to handle the response. If the response is one of the HTTP success messages, the first message will be printed. Any other code value is considered an error. The response code and error message will be printed in the event that an error has been detected. Note that the second print() statement should be on one line.
Pythonif(resp.status_code >= 200 and resp.status_code <= 299): print("STATUS OK: {}".format(resp.status_code)) else: print('Error. Status Code: {} \nError message: {}'.format(resp.status_code,resp.json()))The table below lists the various elements of these statements:
Element Explanation respThe variable to hold the response from the API. requests.put()The method that makes the PUT request. api_urlThe variable that holds the URL address string. dataThe data to be sent to the API endpoint, which is formatted as JSON. authThe tuple variable created to hold the authentication information. headers=headersA parameter that is assigned the headers variable. verify=FalseA parameter that disables verification of the SSL certificate when the request is made. resp.status_codeThe HTTP status code in the API PUT request reply. -
Save and run the script to send the PUT request to the CSR1kv. You should get a
201 (Created)status message. If not, check your code and the configuration for the CSR1kv.devasc@labvm:~/labs/devnet-src/data-modeling$ python3 restconf-put.py STATUS OK: 201 devasc@labvm:~/labs/devnet-src/data-modeling$ -
You can verify that the interface was created by entering
show ip interface briefon the CSR1kv.CSR1kv# show ip interface brief Interface IP-Address OK? Method Status Protocol GigabitEthernet1 10.0.2.5 YES manual up up Loopback1 10.1.1.1 YES other up up Loopback2 10.2.2.2 YES other up up Loopback3 10.3.3.3 YES other up up CSR1kv#
Step 4: Commit the changes to the repository🔗
-
Add the
restconf-get.pyandrestconf-put.pyfiles to the staging area then commit the changes to the local repository using the message Lab Complete!.devasc@labvm:~/labs/devnet-src/data-modeling$ git add restconf-get.py restconf-put.py devasc@labvm:~/labs/devnet-src/data-modeling$ git commit -m "Lab Complete!" [main 9ebf3ae] Lab Complete! 2 files changed, 55 insertions(+) create mode 100644 restconf-get.py create mode 100644 restconf-put.py
Step 5: Push all changes to the remote repository on GitHub🔗
-
Push all the changes you made in the local repository back to the GitHub repository to complete the lab. Remember to use your Personal Access Token when asked for your GitHub password.
Tip
If you’ve configured your VM to use SSH to connect to GitHub instead of HTTPS, you will not be asked for a username and password, although you may be asked for a passphrase for your SSH key, if you configured one.
devasc@labvm:~/labs/devnet-src/data-modeling$ git push origin main Username for 'https://github.com': <username> Password for 'https://<username>@github.com': Personal Access Token E numerating objects: 8, done. Counting objects: 100% (8/8), done. Delta compression using up to 2 threads Compressing objects: 100% (7/7), done. Writing objects: 100% (7/7), 1.77 KiB | 1.77 MiB/s, done. Total 7 (delta 2), reused 0 (delta 0), pack-reused 0 (from 0) remote: Resolving deltas: 100% (2/2), done. To github.com:Ontario-Tech-NITS/lab-8-model-driven-programmability-<username>.git 46b8c20..9ebf3ae main -> main devasc@labvm:~/labs/devnet-src/data-modeling$ -
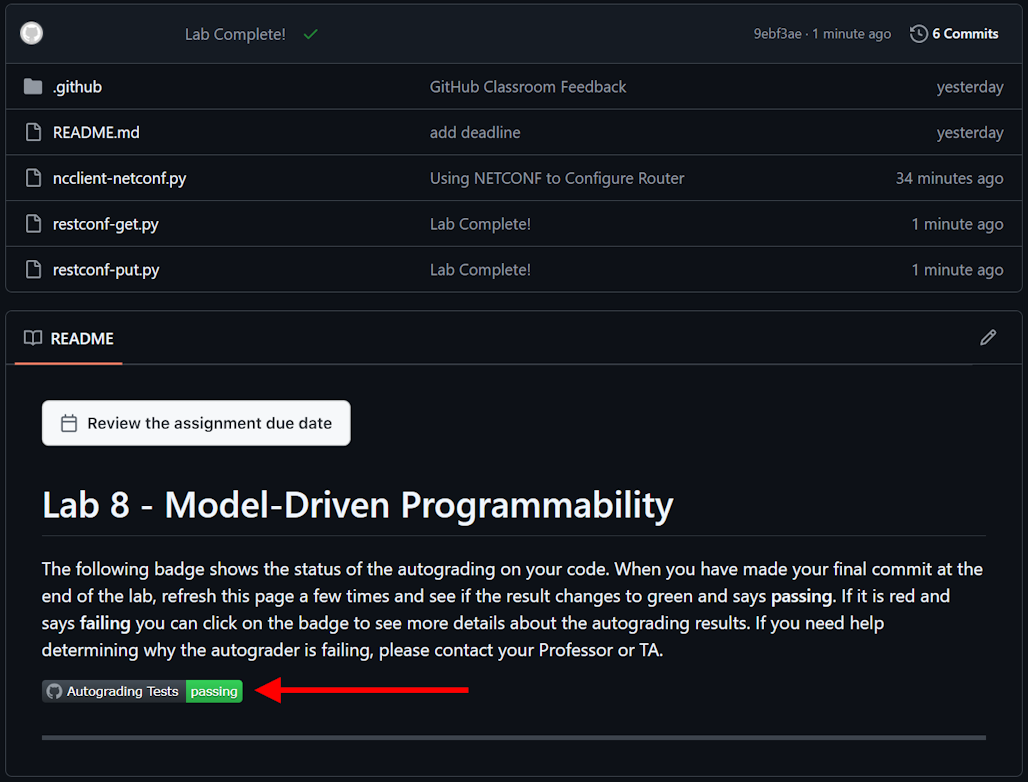
In your browser, return to the repository on github.com and verify all your changes are present, along with the corresponding commit messages. Wait a few moments and verify that the Autograding Tests show as "passing". If they show as "failing" check the test log and troubleshoot until all tests pass.