Lab 7 - Automated Testing🔗
Lab 7.1 Automated Testing Using pyATS and Genie
Lab 7.2 Use pyATS with Ansible
Lab 7.3 Set up GitHub Repository
7.1 Automated Testing Using pyATS and Genie🔗
Objectives🔗
Part 1: Launch the VMs
Part 2: Create a Python Virtual Environment
Part 3: Use the pyATS Testing Library
Part 4: Use Genie to Parse IOS Command Output
Part 5: Use Genie to Compare Configurations
Part 6: Lab Cleanup and Further Investigation
Background🔗
In this lab, you will explore the fundamentals of pyATS (pronounced "py" followed by each letter individually, "A", "T". "S") and Genie. The pyATS tool is an end-to-end testing ecosystem, specializing in data-driven and reusable testing, and engineered to be suitable for Agile, rapid development iterations. Extensible by design, pyATS enables developers to start with small, simple, and linear test cases, and scale towards large, complex, and asynchronous test suites.
Genie extends and builds on pyATS to be used in a networking environment. Examples of features Genie provides include:
-
Device connectivity, parsers, and APIs
-
Platform-agnostic Python object models for features such as OSPF and BGP
-
Pool of reusable test cases
-
YAML-driven test-runner engine
Instructions🔗
Part 1: Launch the VMs🔗
You will need both the DEVASC and the CSR1000v VMs for this lab.
-
Start both the DEVASC and CSR1000v VMs and ensure that the CSR1kv VM receives an IP address from DHCP. Use
show ip interface briefand make a note of this address for use in future steps.CSR1kv> enable CSR1kv# show ip interface brief Interface IP-Address OK? Method Status Protocol GigabitEthernet1 10.0.2.5 YES DHCP up up CSR1kv#
Part 2: Create a Python Virtual Environment🔗
In this part, you will create a Python virtual environment or "venv".
Step 1: Open a terminal in the DEVASC-LABVM🔗
- Double-click the Terminal icon on the desktop.
Step 2: Creating Python virtual environment (venv)🔗
The pyATS tool is best installed for individual work within a venv. A venv environment is copied from your Python base environment but kept separate from it. This enables you to avoid installing software that might permanently change the overall state of your computer. The venv environment was covered in detail in Lab 2 - Data Parsing and Version Control earlier in the course.
-
Create a
pyatsdirectory and change to that directory. You can use the characters&&to combine the two commands on one line.devasc@labvm:~$ mkdir labs/devnet-src/pyats && cd labs/devnet-src/pyats devasc@labvm:~/labs/devnet-src/pyats$ -
Create a new Python virtual environment that creates the directory
csr1kvin thepyatsdirectory.devasc@labvm:~/labs/devnet-src/pyats$ python3 -m venv csr1kv devasc@labvm:~/labs/devnet-src/pyats$
Step 3: Review your Python virtual environment (venv)🔗
-
Change directories to your new "target" directory
csr1kvand list the files. Venv creates a self-contained directory tree that contains a Python installation for a particular version of Python, plus a number of additional packages. It also creates abinsubdirectory containing a copy of the Python binary.Notice in particular the
binsubdirectory and thepyvenv.cfgfiles that were created.devasc@labvm:~/labs/devnet-src/pyats$ cd csr1kv devasc@labvm:~/labs/devnet-src/pyats/csr1kv$ ls -l total 20 drwxrwxr-x 2 devasc devasc 4096 Mar 17 19:48 bin drwxrwxr-x 2 devasc devasc 4096 Mar 17 19:48 include drwxrwxr-x 3 devasc devasc 4096 Mar 17 19:48 lib lrwxrwxrwx 1 devasc devasc 3 Mar 17 19:48 lib64 -> lib -rw-rw-r-- 1 devasc devasc 69 Mar 17 19:48 pyvenv.cfg drwxrwxr-x 3 devasc devasc 4096 Mar 17 19:48 share devasc@labvm:~/labs/devnet-src/pyats/csr1kv$ -
Examine the contents of the
pyvenv.cfgfile. Notice that this file points to the location of your Python installation in/usr/bin.devasc@labvm:~/labs/devnet-src/pyats/csr1kv$ cat pyvenv.cfg home = /usr/bin include-system-site-packages = false version = 3.8.2 devasc@labvm:~/labs/devnet-src/pyats/csr1kv$ -
A symbolic link (also known as a symlink) is a special type of file that serves as a reference to another file or directory. To get a better understanding of the venv and how it uses symbolic links, list Python files in the
/usr/bindirectory referenced in thepyvenv.cfgfile. Use thels -1option (number one, not a lowercase "L") to list the files each on one line.devasc@labvm:~/labs/devnet-src/pyats/csr1kv$ ls -1 /usr/bin/python* /usr/bin/python3 /usr/bin/python3.8 /usr/bin/python3.8-config /usr/bin/python3-config /usr/bin/python-argcomplete-check-easy-install-script3 /usr/bin/python-argcomplete-tcsh3 devasc@labvm:~/labs/devnet-src/pyats/csr1kv$ -
Now examine the contents of the venv-created
binsubdirectory. Notice there are two files in this subdirectory, both of which are symlinks (denoted by the lowercase "L" at the start of the line). In this case, it is a link to the Python binaries in/usr/bin. Symlinks are used to link libraries and make sure files there have consistent access to these files without having to move or create a copy of the original file. There is also a file,activate, that will be discussed next.devasc@labvm:~/labs/devnet-src/pyats/csr1kv$ ls -l bin total 44 -rw-r--r-- 1 devasc devasc 2225 May 31 16:07 activate -rw-r--r-- 1 devasc devasc 1277 May 31 16:07 activate.csh -rw-r--r-- 1 devasc devasc 2429 May 31 16:07 activate.fish -rw-r--r-- 1 devasc devasc 8471 May 31 16:07 Activate.ps1 -rwxrwxr-x 1 devasc devasc 267 May 31 16:07 easy_install -rwxrwxr-x 1 devasc devasc 267 May 31 16:07 easy_install-3.8 -rwxrwxr-x 1 devasc devasc 258 May 31 16:07 pip -rwxrwxr-x 1 devasc devasc 258 May 31 16:07 pip3 -rwxrwxr-x 1 devasc devasc 258 May 31 16:07 pip3.8 lrwxrwxrwx 1 devasc devasc 7 May 31 16:07 python -> python3 lrwxrwxrwx 1 devasc devasc 16 May 31 16:07 python3 -> /usr/bin/python3 devasc@labvm:~/labs/devnet-src/pyats/csr1kv$ -
Launch the virtual environment using
bin/activate. Notice your prompt is now preceded with(csr1kv). All the commands done from this point on are within this virtual environment (venv).devasc@labvm:~/labs/devnet-src/pyats/csr1kv$ source bin/activate (csr1kv) devasc@labvm:~/labs/devnet-src/pyats/csr1kv$Note
The
deactivatecommand is used to exit the venv environment and return to the normal shell environment.
Part 3: Use the pyATS Testing Library🔗
In this part, you will use pyATS, a python testing library.
Step 1: Installing pyATS🔗
-
Install pyATS using
pip3. This may take a few minutes.(csr1kv) devasc@labvm:~/labs/devnet-src/pyats/csr1kv$ pip3 install pyats[full] Collecting pyats[full] Downloading pyats-24.9-cp38-cp38-manylinux2014_x86_64.whl (5.4 MB) |████████████████████████████████| 5.4 MB 5.5 MB/s Collecting pyats.kleenex<24.10.0,>=24.9.0 <output omitted> Successfully installed IxNetwork-9.30.2212.8 MarkupSafe-2.1.5 aiofiles-24.1.0 aiohappyeyeballs-2.4.4 aiohttp-3.10.11 aiosignal-1.3.1 arrow-1.4.0 <output omitted> (csr1kv) devasc@labvm:~/labs/devnet-src/pyats/csr1kv$Note
During installation you may see some errors. These can usually be ignored as long as pyATS can be verified as shown in the next step.
Step 2: Verifying pyATS🔗
-
Verify that pyATS was successfully installed using the
pyats --helpcommand. Notice you can get additional help on any pyats command with thepyats <command> --helpcommand.(csr1kv) devasc@labvm:~/labs/devnet-src/pyats/csr1kv$ pyats --help Usage: pyats <command> [options] Commands: clean runs the provided clean file create create scripts and libraries from template develop Puts desired pyATS packages into development mode diff Command to diff two snapshots saved to file or directory dnac Command to learn DNAC features and save to file (Prototype) learn Command to learn device features and save to file logs command enabling log archive viewing in local browser migrate utilities for migrating to future versions of pyATS parse Command to parse show commands run runs the provided script and output corresponding results. secret utilities for working with secret strings. shell enter Python shell, loading a pyATS testbed file and/or pickled data undevelop Removes desired pyATS packages from development mode validate utilities that help to validate input files version commands related to version display and manipulation General Options: -h, --help Show help Run 'pyats <command> --help' for more information on a command. (csr1kv) devasc@labvm:~/labs/devnet-src/pyats/csr1kv$
Step 3: Clone and examine the pyATS sample scripts from GitHub🔗
-
Clone the Github pyATS sample scripts repository
CiscoTestAutomation.(csr1kv) devasc@labvm:~/labs/devnet-src/pyats/csr1kv$ git clone https://github.com/CiscoTestAutomation/examples Cloning into 'examples'... remote: Enumerating objects: 1519, done. remote: Counting objects: 100% (367/367), done. remote: Compressing objects: 100% (192/192), done. remote: Total 1519 (delta 175), reused 264 (delta 143), pack-reused 1152 (from 1) Receiving objects: 100% (1519/1519), 1.20 MiB | 7.85 MiB/s, done. Resolving deltas: 100% (747/747), done. (csr1kv) devasc@labvm:~/labs/devnet-src/pyats/csr1kv$ -
Verify the clone was successful by listing the files in the current directory. Notice there is a new subdirectory named
examples.(csr1kv) devasc@labvm:~/labs/devnet-src/pyats/csr1kv$ ls -l total 24 drwxrwxr-x 3 devasc devasc 4096 Mar 17 19:55 bin drwxrwxr-x 24 devasc devasc 4096 Mar 17 19:59 examples drwxrwxr-x 2 devasc devasc 4096 Mar 17 19:48 include drwxrwxr-x 3 devasc devasc 4096 Mar 17 19:48 lib lrwxrwxrwx 1 devasc devasc 3 Mar 17 19:48 lib64 -> lib -rw-rw-r-- 1 devasc devasc 69 Mar 17 19:48 pyvenv.cfg drwxrwxr-x 3 devasc devasc 4096 Mar 17 19:48 share (csr1kv) devasc@labvm:~/labs/devnet-src/pyats/csr1kv$ -
List the files in the
examplessubdirectory. Notice there is a subdirectory,basic, along with several other files.(csr1kv) devasc@labvm:~/labs/devnet-src/pyats/csr1kv$ ls -l examples total 96 drwxrwxr-x 3 devasc devasc 4096 Mar 17 19:59 abstraction_example drwxrwxr-x 3 devasc devasc 4096 Mar 17 19:59 basic <output omitted> drwxrwxr-x 2 devasc devasc 4096 Mar 17 19:59 uids (csr1kv) devasc@labvm:~/labs/devnet-src/pyats/csr1kv$ -
List the files in this
basicsubdirectory. This is the location of the scripts you will be using in the next step.(csr1kv) devasc@labvm:~/labs/devnet-src/pyats/csr1kv$ ls -l examples/basic total 16 -rw-rw-r-- 1 devasc devasc 534 Mar 17 19:59 basic_example_job.py -rwxrwxr-x 1 devasc devasc 4510 Mar 17 19:59 basic_example_script.py drwxrwxr-x 2 devasc devasc 4096 Mar 17 19:59 results (csr1kv) devasc@labvm:~/labs/devnet-src/pyats/csr1kv$
Step 4: Examine the basic script files🔗
The test declaration syntax for pyATS is based on popular Python unit-testing frameworks like pytest. It supports basic testing statements, such as an assertion that a variable has a given value, along with explicitly providing results via specific APIs.
-
The Python script you will use is
basic_example_script.py. Display the content of the Python script using thecatcommand. Pipe it tomoreif you want to view it one screen or line at a time. Notice that this script contains the following sections as highlighted in the output below:-
A common Setup block
-
Multiple Test blocks
-
A common Cleanup block
These blocks contain statements that prepare and/or determine readiness of the test topology (a process that can include problem injection), perform tests, and then return the topology to a known state.
The Testing blocks - often referred to in pyATS documentation as the Test Cases - can each contain multiple tests, with their own Setup and Cleanup code. Best practice suggests, though, that the common Cleanup section, at the end, be designed for idempotency, meaning it should check and restore all changes made by Setup and Test, and restore the topology to its original desired state.
Note
Although it is not necessary to understand the code, you will find it helpful to read the comments within the Python script. This example script does not do any testing, but instead prints out messages from the various sections of the test.
(csr1kv) devasc@labvm:~/labs/devnet-src/pyats/csr1kv$ cat examples/basic/basic_example_script.py | more
#!/usr/bin/env python
###################################################################
# basic_example.py : A very simple test script example which include:
#     common_setup
#     Tescases
#     common_cleanup
# The purpose of this sample test script is to show the "hello world"
# of aetest.
###################################################################

# To get a logger for the script
import logging

# Needed for aetest script
from pyats import aetest

# Get your logger for your script
log = logging.getLogger(__name__)

###################################################################
###                  COMMON SETUP SECTION                       ###
###################################################################

# This is how to create a CommonSetup
# You can have one of no CommonSetup
# CommonSetup can be named whatever you want

class common_setup(aetest.CommonSetup):
    """ Common Setup section """

    # CommonSetup have subsection.
    # You can have 1 to as many subsection as wanted
    # here is an example of 2 subsections

    # First subsection
    @aetest.subsection
    def sample_subsection_1(self):
        """ Common Setup subsection """
        log.info("Aetest Common Setup ")

    # If you want to get the name of current section,
    # add section to the argument of the function.

    # Second subsection
    @aetest.subsection
    def sample_subsection_2(self, section):
        """ Common Setup subsection """
        log.info("Inside %s" % (section))

        # And how to access the class itself ?

        # self refers to the instance of that class, and remains consistent
        # throughout the execution of that container.
        log.info("Inside class %s" % (self.uid))

###################################################################
###                     TESTCASES SECTION                       ###
###################################################################

# This is how to create a testcase
# You can have 0 to as many testcase as wanted

# Testcase name : tc_one
class tc_one(aetest.Testcase):
    """ This is user Testcases section """

    # Testcases are divided into 3 sections
    # Setup, Test and Cleanup.

    # This is how to create a setup section
    @aetest.setup
    def prepare_testcase(self, section):
        """ Testcase Setup section """
        log.info("Preparing the test")
        log.info(section)

    # This is how to create a test section
    # You can have 0 to as many test section as wanted

    # First test section
    @ aetest.test
    def simple_test_1(self):
        """ Sample test section. Only print """
        log.info("First test section ")

    # Second test section
    @ aetest.test
    def simple_test_2(self):
        """ Sample test section. Only print """
        log.info("Second test section ")

    # This is how to create a cleanup section
    @aetest.cleanup
    def clean_testcase(self):
        """ Testcase cleanup section """
        log.info("Pass testcase cleanup")

# Testcase name : tc_two
class tc_two(aetest.Testcase):
    """ This is user Testcases section """

    @ aetest.test
    def simple_test_1(self):
        """ Sample test section. Only print """
        log.info("First test section ")
        self.failed('This is an intentional failure')

    # Second test section
    @ aetest.test
    def simple_test_2(self):
        """ Sample test section. Only print """
        log.info("Second test section ")

    # This is how to create a cleanup section
    @aetest.cleanup
    def clean_testcase(self):
        """ Testcase cleanup section """
        log.info("Pass testcase cleanup")

#####################################################################
####                       COMMON CLEANUP SECTION                 ###
#####################################################################

# This is how to create a CommonCleanup
# You can have 0 , or 1 CommonCleanup.
# CommonCleanup can be named whatever you want :)
class common_cleanup(aetest.CommonCleanup):
    """ Common Cleanup for Sample Test """

    # CommonCleanup follow exactly the same rule as CommonSetup regarding
    # subsection
    # You can have 1 to as many subsection as wanted
    # here is an example of 1 subsections

    @aetest.subsection
    def clean_everything(self):
        """ Common Cleanup Subsection """
        log.info("Aetest Common Cleanup ")

if __name__ == '__main__': # pragma: no cover
    result = aetest.main()
    aetest.exit_cli_code(result)
(csr1kv) devasc@labvm:~/labs/devnet-src/pyats/csr1kv$
A pyATS script is a Python file where pyATS tests are declared. It can be run directly as a standalone Python script file, generating output only to your terminal window. Alternatively, one or more pyATS scripts can be compiled into a "job" and run together as a batch, through the pyATS EasyPy module. EasyPy enables parallel execution of multiple scripts, collects logs in one place, and provides a central point from which to inject changes to the topology under test.
-
-
Use
catto display your pyATS job file,pyats_sample_job.py. Notice the instructions on how to run this file, highlighted below.(csr1kv) devasc@labvm:~/labs/devnet-src/pyats/csr1kv$ cat examples/basic/basic_example_job.py """ <PYATS_JOBFILE> """ # To run the job: # pyats run job basic_example_job.py # Description: This example shows the basic functionality of pyats # with few passing tests import os from pyats.easypy import run # All run() must be inside a main function def main(): # Find the location of the script in relation to the job file test_path = os.path.dirname(os.path.abspath(__file__)) testscript = os.path.join(test_path, 'basic_example_script.py') # Execute the testscript run(testscript=testscript) (csr1kv) devasc@labvm:~/labs/devnet-src/pyats/csr1kv$
Step 5: Run pyATS manually to invoke the basic test case🔗
-
Using the pyATS
jobandscriptfiles, run pyATS manually to invoke the basic test case. This will verify the pyATSjobandscriptfiles work properly. The information in the output is beyond the scope of this lab, however you will notice that thejobandscriptpassed all required tasks. You may want to make the terminal window full screen so the output is formatted better.Note
The output below was truncated. The Cisco Test Automation repository on GitHub is subject to change, which includes the pyATS job and scripts files. Your output is subject to change but should not affect your outcome. For example, an intentional failure was added to the
basic_example_script.pyfile. This is an intentional failure and does not cause any problems. It is an example that repositories are dynamic. It is one of the highlighted lines below.(csr1kv) devasc@labvm:~/labs/devnet-src/pyats/csr1kv$ pyats run job examples/basic/basic_example_job.py 2026-03-22T19:59:26: %EASYPY-INFO: Starting job run: basic_example_job 2026-03-22T19:59:26: %EASYPY-INFO: Runinfo directory: /home/devasc/.pyats/runinfo/basic_example_job.2026Mar22_19:59:25.830397 2026-03-22T19:59:26: %EASYPY-INFO: -------------------------------------------------------------------------------- 2026-03-22T19:59:28: %EASYPY-INFO: +------------------------------------------------------------------------------+ 2026-03-22T19:59:28: %EASYPY-INFO: | Bringup/Clean Information | 2026-03-22T19:59:28: %EASYPY-INFO: +------------------------------------------------------------------------------+ <output omitted> 2026-03-22T19:59:28: %AETEST-INFO: +------------------------------------------------------------------------------+ 2026-03-22T19:59:28: %AETEST-INFO: | Starting common setup | 2026-03-22T19:59:28: %AETEST-INFO: +------------------------------------------------------------------------------+ 2026-03-22T19:59:28: %AETEST-INFO: +------------------------------------------------------------------------------+ <output omitted> 2026-03-22T19:59:28: %AETEST-INFO: +------------------------------------------------------------------------------+ 2026-03-22T19:59:28: %AETEST-INFO: | Starting section simple_test_1 | 2026-03-22T19:59:28: %AETEST-INFO: +------------------------------------------------------------------------------+ 2026-03-22T19:59:28: %SCRIPT-INFO: First test section 2026-03-22T19:59:28: %AETEST-ERROR: Failed reason: This is an intentional failure 2026-03-22T19:59:28: %AETEST-INFO: The result of section simple_test_1 is => FAILED 2026-03-22T19:59:28: %AETEST-INFO: +------------------------------------------------------------------------------+ 2026-03-22T19:59:28: %AETEST-INFO: | Starting section simple_test_2 | 2026-03-22T19:59:28: %AETEST-INFO: +------------------------------------------------------------------------------+ <output omitted> 2026-03-22T19:59:29: %EASYPY-INFO: +------------------------------------------------------------------------------+ 2026-03-22T19:59:29: %EASYPY-INFO: | Easypy Report | 2026-03-22T19:59:29: %EASYPY-INFO: +------------------------------------------------------------------------------+ <output omitted> 2026-03-22T19:59:29: %EASYPY-INFO: Overall Stats 2026-03-22T19:59:29: %EASYPY-INFO: Passed : 3 2026-03-22T19:59:29: %EASYPY-INFO: Passx : 0 2026-03-22T19:59:29: %EASYPY-INFO: Failed : 1 2026-03-22T19:59:29: %EASYPY-INFO: Aborted : 0 2026-03-22T19:59:29: %EASYPY-INFO: Blocked : 0 2026-03-22T19:59:29: %EASYPY-INFO: Skipped : 0 2026-03-22T19:59:29: %EASYPY-INFO: Errored : 0 2026-03-22T19:59:29: %EASYPY-INFO: 2026-03-22T19:59:29: %EASYPY-INFO: TOTAL : 4 2026-03-22T19:59:29: %EASYPY-INFO: 2026-03-22T19:59:29: %EASYPY-INFO: Success Rate : 75.00 % <output omitted> 2026-03-22T19:59:29: %EASYPY-INFO: +------------------------------------------------------------------------------+ 2026-03-22T19:59:29: %EASYPY-INFO: | Task Result Summary | 2026-03-22T19:59:29: %EASYPY-INFO: +------------------------------------------------------------------------------+ 2026-03-22T19:59:29: %EASYPY-INFO: Task-1: basic_example_script.common_setup PASSED 2026-03-22T19:59:29: %EASYPY-INFO: Task-1: basic_example_script.tc_one PASSED 2026-03-22T19:59:29: %EASYPY-INFO: Task-1: basic_example_script.tc_two FAILED 2026-03-22T19:59:29: %EASYPY-INFO: Task-1: basic_example_script.common_cleanup PASSED 2026-03-22T19:59:29: %EASYPY-INFO: 2026-03-22T19:59:29: %EASYPY-INFO: +------------------------------------------------------------------------------+ 2026-03-22T19:59:29: %EASYPY-INFO: | Task Result Details | 2026-03-22T19:59:29: %EASYPY-INFO: +------------------------------------------------------------------------------+ 2026-03-22T19:59:29: %EASYPY-INFO: Task-1: basic_example_script 2026-03-22T19:59:29: %EASYPY-INFO: |-- common_setup PASSED 2026-03-22T19:59:29: %EASYPY-INFO: | |-- sample_subsection_1 PASSED 2026-03-22T19:59:29: %EASYPY-INFO: | `-- sample_subsection_2 PASSED 2026-03-22T19:59:29: %EASYPY-INFO: |-- tc_one PASSED 2026-03-22T19:59:29: %EASYPY-INFO: | |-- prepare_testcase PASSED 2026-03-22T19:59:29: %EASYPY-INFO: | |-- simple_test_1 PASSED 2026-03-22T19:59:29: %EASYPY-INFO: | |-- simple_test_2 PASSED 2026-03-22T19:59:29: %EASYPY-INFO: | `-- clean_testcase PASSED 2026-03-22T19:59:29: %EASYPY-INFO: |-- tc_two FAILED 2026-03-22T19:59:29: %EASYPY-INFO: | |-- simple_test_1 FAILED 2026-03-22T19:59:29: %EASYPY-INFO: | |-- simple_test_2 PASSED 2026-03-22T19:59:29: %EASYPY-INFO: | `-- clean_testcase PASSED 2026-03-22T19:59:29: %EASYPY-INFO: `-- common_cleanup PASSED 2026-03-22T19:59:29: %EASYPY-INFO: `-- clean_everything PASSED 2026-03-22T19:59:29: %EASYPY-INFO: Sending report email... 2026-03-22T19:59:29: %EASYPY-INFO: Missing SMTP server configuration, or failed to reach/authenticate/send mail. Result notification email failed to send. 2026-03-22T19:59:29: %EASYPY-INFO: Done! Pro Tip ------- Did you hear? You can now make revisions to existing parsers! Follow the link to find out more: https://pubhub.devnetcloud.com/media/pyats-development-guide/docs/writeparser/writeparser.html#revising-a-parser (csr1kv) devasc@labvm:~/labs/devnet-src/pyats/csr1kv$
Part 4: Use Genie to Parse IOS Command Output🔗
In this Part, you will use Genie to take unstructured IOS output and parse it into JSON output.
Note
Not all IOS commands are supported. Complete Genie documentation can be found at: https://developer.cisco.com/docs/genie-docs/
Step 1: Create a testbed YAML file🔗
The pyATS and Genie tools use a YAML file to know which devices to connect to and what the proper credentials are. This file is known as a testbed file. Genie includes built-in functionality to build the testbed file for you.
-
Enter the command
genie --helpto see all the available commands. For additional help on any command, use the<command>parameter, as shown below, for thecreatecommand. Notice thattestbedis one of the options for thecreatecommand.(csr1kv) devasc@labvm:~/labs/devnet-src/pyats/csr1kv$ genie --help Usage: genie <command> [options] Commands: create Create Testbed, parser, triggers, ... develop Puts desired pyATS packages into development mode diff Command to diff two snapshots saved to file or directory dnac Command to learn DNAC features and save to file (Prototype) learn Command to learn device features and save to file parse Command to parse show commands run Run Genie triggers & verifications in pyATS runtime environment shell enter Python shell, loading a pyATS testbed file and/or pickled data undevelop Removes desired pyATS packages from development mode General Options: -h, --help Show help Run 'genie <command> --help' for more information on a command. (csr1kv) devasc@labvm:~/labs/devnet-src/pyats/csr1kv$ genie create --help sage: genie create <subcommand> [options] Subcommands: parser create a new Genie parser from template testbed create a testbed file automatically trigger create a new Genie trigger from template General Options: -h, --help Show help -v, --verbose Give more output, additive up to 3 times. -q, --quiet Give less output, additive up to 3 times, corresponding to WARNING, ERROR, and CRITICAL logging levels (csr1kv) devasc@labvm:~/labs/devnet-src/pyats/csr1kv$ -
To create your testbed YAML file, enter the command below. The
--outputparameter will create atestbed.ymlfile in a directory namedyaml. The directory will be automatically created. The--encode-passwordparameter will encode the passwords in the YAML file. The parameterinteractivemeans you will be asked a series of questions. Answernoto the first three questions. And then provide the following answers to create thetestbed.yamlfile:
Device hostname- This must match the hostname of the device, which for this lab isCSR1kv(case sensitive!).IP address- This must match your CSR1kv IPv4 address you discovered earlier in this lab. Shown here is10.0.2.5.Username- This is the local username used for ssh, which iscisco.Default password- This is the local password used for ssh, which iscisco123!.Enable password- Leave blank. There is no privileged password configured on the router.Protocol-SSHalong with the key exchange group expected by the router.-
OS- The OS on the router, in this case Cisco IOS-XE (iosxe).(csr1kv) devasc@labvm:~/labs/devnet-src/pyats/csr1kv$ genie create testbed interactive --output yaml/testbed.yml --encode-password Start creating Testbed yaml file ... Do all of the devices have the same username? [y/n] n Do all of the devices have the same default password? [y/n] n Do all of the devices have the same enable password? [y/n] n Device hostname: CSR1kv IP (ip, or ip:port): 10.0.2.5 Username: cisco Default Password (leave blank if you want to enter on demand): cisco123! Enable Password (leave blank if you want to enter on demand): Protocol (ssh, telnet, ...): ssh -o KexAlgorithms=diffie-hellman-group14-sha1 OS (iosxr, iosxe, ios, nxos, linux, ...): iosxe More devices to add ? [y/n] n Testbed file generated: yaml/testbed.yml (csr1kv) devasc@labvm:~/labs/devnet-src/pyats/csr1kv$
-
Use
catto view thetestbed.ymlfile in theyamldirectory. Notice your entries in the YAML file. Your SSH password is encrypted and the enable password will "ASK" the user to enter the password if one is required.(csr1kv) devasc@labvm:~/labs/devnet-src/pyats/csr1kv$ cat yaml/testbed.yml devices: CSR1kv: connections: cli: ip: 10.0.2.5 protocol: ssh -o KexAlgorithms=diffie-hellman-group14-sha1 credentials: default: password: '%ENC{w5PDosOUw5fDosKQwpbCmMKH}' username: cisco enable: password: '%ASK{}' os: iosxe type: iosxe (csr1kv) devasc@labvm:~/labs/devnet-src/pyats/csr1kv$
Step 2: Use Genie to parse output from the show ip interface brief command into JSON🔗
-
Using your
testbedYAML file, invoke Genie to parse unstructured output from theshow ip interface briefcommand into structured JSON. This command includes the IOS command to be parsed (show ip interface brief), the YAML testbed file (testbed.yml), and the specified device in the testbed file (CSR1kv).(csr1kv) devasc@labvm:~/labs/devnet-src/pyats/csr1kv$ genie parse "show ip interface brief" --testbed-file yaml/testbed.yml --devices CSR1kv Using the default YAML encoding key since no key was specified in configuration. THIS IS A SHARED KEY AND IS NOT SECURE, PLEASE RUN `pyats secret keygen` AND ADD TO YOUR pyats.conf FILE BEFORE ENCODING ANY VALUES. Enter enable password for device CSR1kv: <Enter> 2026-03-17T21:08:11: UNICON-WARNING: Device 'CSR1kv' connection 'cli' does not have IP and/or port specified, ignoring Device 'CSR1kv' connection 'cli' does not have IP and/or port specified, ignoring 0%| | 0/1 [00:00<?, ?it/s] { "interface": { "GigabitEthernet1": { "interface_is_ok": "YES", "ip_address": "10.0.2.5", "method": "DHCP", "protocol": "up", "status": "up" } } } 100%|███████████████████████████████████████████████████| 1/1 [00:00<00:00, 2.22it/s] (csr1kv) devasc@labvm:~/labs/devnet-src/pyats/csr1kv$Important
If the command fails with "
Issue with the parser show ip interface brief" and "device is not connected, output must be provided", it’s likely that an old SSH key has been saved in theknown_hostsfile on the DEVASC VM from a previous lab. Delete it with the following command (replace the IP address with the IP of your CSR1kv), then run thegenie parsecommand again:(csr1kv) devasc@labvm:~/labs/devnet-src/pyats/csr1kv$ ssh-keygen -R 10.0.2.5 # Host 10.0.2.5 found: line 8 /home/devasc/.ssh/known_hosts updated. Original contents retained as /home/devasc/.ssh/known_hosts.old
Step 3: Use Genie to parse output from the show version command into JSON🔗
-
For another example, parse unstructured output from the
show versioncommand into structured JSON.(csr1kv) devasc@labvm:~/labs/devnet-src/pyats/csr1kv$ genie parse "show version" --testbed-file yaml/testbed.yml --devices CSR1kv Using the default YAML encoding key since no key was specified in configuration. THIS IS A SHARED KEY AND IS NOT SECURE, PLEASE RUN `pyats secret keygen` AND ADD TO YOUR pyats.conf FILE BEFORE ENCODING ANY VALUES. Enter enable password for device CSR1kv: <Enter> 2026-03-17T21:09:52: UNICON-WARNING: Device 'CSR1kv' connection 'cli' does not have IP and/or port specified, ignoring Device 'CSR1kv' connection 'cli' does not have IP and/or port specified, ignoring 0%| | 0/1 [00:00<?, ?it/s] "version": { "chassis": "CSR1000V", "chassis_sn": "9EPZWAQ9R1G", "compiled_by": "mcpre", "compiled_date": "Thu 30-Jan-20 18:48", "copyright_years": "1986-2020", "curr_config_register": "0x2102", "disks": { "bootflash:.": { "disk_size": "7774207", "type_of_disk": "virtual hard disk" }, "webui:.": { "disk_size": "0", "type_of_disk": "WebUI ODM Files" } }, "hostname": "CSR1kv", "image_id": "X86_64_LINUX_IOSD-UNIVERSALK9-M", "image_type": "production image", "label": "RELEASE SOFTWARE (fc1)", "last_reload_reason": "reload", "license_level": "ax", "license_type": "Default. No valid license found.", "location": "Fuji", "main_mem": "2182252", "mem_size": { "non-volatile configuration": "32768", "physical": "3985032" }, "next_reload_license_level": "ax", "number_of_intfs": { "Gigabit Ethernet": "1" }, "os": "IOS-XE", "platform": "Virtual XE", "processor_type": "VXE", "returned_to_rom_by": "reload", "rom": "IOS-XE ROMMON", "rtr_type": "CSR1000V", "system_image": "bootflash:packages.conf", "uptime": "1 hour, 31 minutes", "uptime_this_cp": "1 hour, 36 minutes", "version": "16.9.5", "version_short": "16.9", "xe_version": "16.09.05" } } 100%|███████████████████████████████████████████████████| 1/1 [00:00<00:00, 2.06it/s] (csr1kv) devasc@labvm:~/labs/devnet-src/pyats/csr1kv$
Part 5: Use Genie to Compare Configurations🔗
As you have seen Genie can be used to parse show commands into structured JSON. Genie can also be used to:
- Take snapshots of configs and make comparisons between them.
- Automate testing deployments against a virtual environment for testing before deployment in production.
- Troubleshoot configurations by doing comparisons between devices.
In parts 5 and 6, you will see how to perform a comparison between two different outputs.
Step 1: Add an IPv6 address to CSR1kv🔗
-
On the CSR1kv VM add the following IPv6 address to the GigabitEthernet1 interface:
CSR1kv# config t
Enter configuration commands, one per line. End with CNTL/Z.
CSR1kv(config)# interface gig 1
CSR1kv(config-if)# ipv6 address 2001:db8:acad:56::101/64
CSR1kv(config-if)# end
CSR1kv#
Step 2: Use Genie to verify configuration and parse output in JSON🔗
-
Parse unstructured output from the
show ipv6 interfacecommand into structured JSON. Use the--outputparameter to send the output to a directoryverify-ipv6-1. Notice in the output that Genie tells you that two files were created.(csr1kv) devasc@labvm:~/labs/devnet-src/pyats/csr1kv$ genie parse "show ipv6 interface gig 1" --testbed-file yaml/testbed.yml --devices CSR1kv --output verify-ipv6-1 Using the default YAML encoding key since no key was specified in configuration. THIS IS A SHARED KEY AND IS NOT SECURE, PLEASE RUN `pyats secret keygen` AND ADD TO YOUR pyats.conf FILE BEFORE ENCODING ANY VALUES. Enter enable password for device CSR1kv: <Enter> 2026-03-17T21:14:17: UNICON-WARNING: Device 'CSR1kv' connection 'cli' does not have IP and/or port specified, ignoring Device 'CSR1kv' connection 'cli' does not have IP and/or port specified, ignoring 100%|███████████████████████████████████████████████████| 1/1 [00:00<00:00, 2.08it/s] +==============================================================================+ | Genie Parse Summary for CSR1kv | +==============================================================================+ | Connected to CSR1kv | | - Log: verify-ipv6-1/connection_CSR1kv.txt | |------------------------------------------------------------------------------| | Parsed command 'show ipv6 interface gig 1' | | - Parsed structure: verify-ipv6-1/CSR1kv_show-ipv6-interface- | | gig-1_parsed.txt | | - Device Console: verify-ipv6-1/CSR1kv_show-ipv6-interface- | | gig-1_console.txt | |------------------------------------------------------------------------------| (csr1kv) devasc@labvm:~/labs/devnet-src/pyats/csr1kv$ -
List the files created by Genie in the directory
verify-ipv6-1. Notice there were two files created with similar names but one ending in_console.txtand the other in_parsed.txt. The name of each file includes the device name and the IOS command used in the Genieparsecommand.(csr1kv) devasc@labvm:~/labs/devnet-src/pyats/csr1kv$ ls -l verify-ipv6-1 total 16 -rw-rw-rw- 1 devasc devasc 4653 Mar 17 21:14 connection_CSR1kv.txt -rw-rw-r-- 1 devasc devasc 760 Mar 17 21:14 CSR1kv_show-ipv6-interface-gig-1_console.txt -rw-rw-r-- 1 devasc devasc 877 Mar 17 21:14 CSR1kv_show-ipv6-interface-gig-1_parsed.txt (csr1kv) devasc@labvm:~/labs/devnet-src/pyats/csr1kv$ -
Use
catto examine the contents of the_console.txtfile. This file contains the raw, unparsed output from theshowcommand exactly as it appears on the router console. Notice both the IPv6 global unicast address that you configured and an automatic EUI-64 link-local address.(csr1kv) devasc@labvm:~/labs/devnet-src/pyats/csr1kv$ cat verify-ipv6-1/CSR1kv_show-ipv6-interface-gig-1_console.txt +++ CSR1kv with via 'cli': executing command 'show ipv6 interface gig 1' +++ show ipv6 interface gig 1 GigabitEthernet1 is up, line protocol is up IPv6 is enabled, link-local address is FE80::A00:27FF:FEB3:1F9D No Virtual link-local address(es): Description: VBox Global unicast address(es): 2001:DB8:ACAD:56::101, subnet is 2001:DB8:ACAD:56::/64 Joined group address(es): FF02::1 FF02::1:FF00:101 FF02::1:FFB3:1F9D MTU is 1500 bytes ICMP error messages limited to one every 100 milliseconds ICMP redirects are enabled ICMP unreachables are sent ND DAD is enabled, number of DAD attempts: 1 ND reachable time is 30000 milliseconds (using 30000) ND NS retransmit interval is 1000 milliseconds CSR1kv# (csr1kv) devasc@labvm:~/labs/devnet-src/pyats/csr1kv$Note
Your "link-local" address may be different than the one shown in the output because it is generated using the MAC address of your CSR1kv instance.
-
Use
catto examine the contents of the_parsed.txtfile. This is the parsed JSON file of theshow ipv6 interface gig 1command.(csr1kv) devasc@labvm:~/labs/devnet-src/pyats/csr1kv$ cat verify-ipv6-1/CSR1kv_show-ipv6-interface-gig-1_parsed.txt { "GigabitEthernet1": { "enabled": true, "ipv6": { "2001:DB8:ACAD:56::101/64": { "ip": "2001:DB8:ACAD:56::101", "prefix_length": "64", "status": "valid" }, "FE80::A00:27FF:FEB3:1F9D": { "ip": "FE80::A00:27FF:FEB3:1F9D", "origin": "link_layer", "status": "valid" }, "enabled": true, "icmp": { "error_messages_limited": 100, "redirects": true, "unreachables": "sent" }, "nd": { "dad_attempts": 1, "dad_enabled": true, "ns_retransmit_interval": 1000, "reachable_time": 30000, "suppress": false, "using_time": 30000 } }, "joined_group_addresses": [ "FF02::1", "FF02::1:FF00:101", "FF02::1:FFB3:1F9D" ], "mtu": 1500, "oper_status": "up" }, "_exclude": [] (csr1kv) devasc@labvm:~/labs/devnet-src/pyats/csr1kv$
Step 3: Modify the IPv6 Link-Local address🔗
-
On the CSR1kv VM add the following IPv6 address to interface GigabitEthernet1:
CSR1kv# config t
Enter configuration commands, one per line. End with CNTL/Z.
CSR1kv(config)# interface gig 1
CSR1kv(config-if)# ipv6 address fe80::56:1 link-local
CSR1kv(config-if)# end
CSR1kv#
Step 4: Use Genie to verify configuration and parse output in JSON🔗
-
Parse unstructured output from the
show ipv6 interfacecommand into structured JSON. Use the--outputparameter to send the output to a different directoryverify-ipv6-2. You can use the command history to recall the previous command (Up). Just make sure you change the1to a2to create a newverify-ipv6-2directory.(csr1kv) devasc@labvm:~/labs/devnet-src/pyats/csr1kv$ genie parse "show ipv6 interface gig 1" --testbed-file yaml/testbed.yml --devices CSR1kv --output verify-ipv6-2 Using the default YAML encoding key since no key was specified in configuration. THIS IS A SHARED KEY AND IS NOT SECURE, PLEASE RUN `pyats secret keygen` AND ADD TO YOUR pyats.conf FILE BEFORE ENCODING ANY VALUES. Enter enable password for device CSR1kv: <Enter> 2026-03-17T21:18:53: UNICON-WARNING: Device 'CSR1kv' connection 'cli' does not have IP and/or port specified, ignoring Device 'CSR1kv' connection 'cli' does not have IP and/or port specified, ignoring 100%|███████████████████████████████████████████████████| 1/1 [00:00<00:00, 2.24it/s] +==============================================================================+ | Genie Parse Summary for CSR1kv | +==============================================================================+ | Connected to CSR1kv | | - Log: verify-ipv6-2/connection_CSR1kv.txt | |------------------------------------------------------------------------------| | Parsed command 'show ipv6 interface gig 1' | | - Parsed structure: verify-ipv6-2/CSR1kv_show-ipv6-interface- | | gig-1_parsed.txt | | - Device Console: verify-ipv6-2/CSR1kv_show-ipv6-interface- | | gig-1_console.txt | |------------------------------------------------------------------------------| (csr1kv) devasc@labvm:~/labs/devnet-src/pyats/csr1kv$ -
List the files created by Genie in the directory
verify-ipv6-2. These are similar to the two files you created before changing the IPv6 link-local address.(csr1kv) devasc@labvm:~/labs/devnet-src/pyats/csr1kv$ ls -l verify-ipv6-2 total 16 -rw-rw-rw- 1 devasc devasc 4636 Mar 17 21:18 connection_CSR1kv.txt -rw-rw-r-- 1 devasc devasc 743 Mar 17 21:18 CSR1kv_show-ipv6-interface-gig-1_console.txt -rw-rw-r-- 1 devasc devasc 846 Mar 17 21:18 CSR1kv_show-ipv6-interface-gig-1_parsed.txt (csr1kv) devasc@labvm:~/labs/devnet-src/pyats/csr1kv$ -
Use the
catcommand to examine the contents of each file. The changes are highlighted in the output below.(csr1kv) devasc@labvm:~/labs/devnet-src/pyats/csr1kv$ cat verify-ipv6-2/CSR1kv_show-ipv6-interface-gig-1_console.txt +++ CSR1kv: executing command 'show ipv6 interface gig 1' +++ show ipv6 interface gig 1 GigabitEthernet1 is up, line protocol is up IPv6 is enabled, link-local address is FE80::56:1 No Virtual link-local address(es): Description: VBox Global unicast address(es): 2001:DB8:ACAD:56::101, subnet is 2001:DB8:ACAD:56::/64 Joined group address(es): FF02::1 FF02::1:FF00:101 FF02::1:FF56:1 MTU is 1500 bytes ICMP error messages limited to one every 100 milliseconds ICMP redirects are enabled ICMP unreachables are sent ND DAD is enabled, number of DAD attempts: 1 ND reachable time is 30000 milliseconds (using 30000) ND NS retransmit interval is 1000 milliseconds CSR1kv# (csr1kv) devasc@labvm:~/labs/devnet-src/pyats/csr1kv$ cat verify-ipv6-2/CSR1kv_show-ipv6-interface-gig-1_parsed.txt { "GigabitEthernet1": { "enabled": true, "ipv6": { "2001:DB8:ACAD:56::101/64": { "ip": "2001:DB8:ACAD:56::101", "prefix_length": "64", "status": "valid" }, "FE80::56:1": { "ip": "FE80::56:1", "origin": "link_layer", "status": "valid" }, "enabled": true, "icmp": { "error_messages_limited": 100, "redirects": true, "unreachables": "sent" }, "nd": { "dad_attempts": 1, "dad_enabled": true, "ns_retransmit_interval": 1000, "reachable_time": 30000, "suppress": false, "using_time": 30000 } }, "joined_group_addresses": [ "FF02::1", "FF02::1:FF00:101", "FF02::1:FF56:1" ], "mtu": 1500, "oper_status": "up" }, "_exclude": [] } (csr1kv) devasc@labvm:~/labs/devnet-src/pyats/csr1kv$
Step 5: Use Genie to compare the difference between the configurations🔗
In the previous step, it is fairly easy to find the change to the IPv6 link-local address. But assume you were looking for a problem in a complex configuration. Perhaps you are trying to find a difference between an OSPF configuration on a router that is receiving the proper routes and another router that is not, and you want to see the differences in their OSPF configurations. Or perhaps, you are trying to spot the difference in a long list of ACL statements between two routers that are supposed to have identical security policies. Genie can perform the comparison for you and make it easy to find the differences.
-
Use the following command to have Genie find the differences between the two parsed JSON files. Notice that the output tells you where you can find Genie's comparisons. In this case, the first filename is the previous configuration and the second filename is the current configuration.
(csr1kv) devasc@labvm:~/labs/devnet-src/pyats/csr1kv$ genie diff verify-ipv6-1 verify-ipv6-2 1it [00:00, 579.32it/s] +==============================================================================+ | Genie Diff Summary between directories verify-ipv6-1/ and verify-ipv6-2/ | +==============================================================================+ | File: CSR1kv_show-ipv6-interface-gig-1_parsed.txt | | - Diff can be found at ./diff_CSR1kv_show-ipv6-interface-gig-1_parsed.txt | |------------------------------------------------------------------------------| (csr1kv) devasc@labvm:~/labs/devnet-src/pyats/csr1kv$ -
Use
catto view the contents of the file with the differences. The plus "+" sign indicated additions and the minus "-" sign indicates what was removed.(csr1kv) devasc@labvm:~/labs/devnet-src/pyats/csr1kv$ cat ./diff_CSR1kv_show-ipv6-interface-gig-1_parsed.txt --- verify-ipv6-1/CSR1kv_show-ipv6-interface-gig-1_parsed.txt +++ verify-ipv6-2/CSR1kv_show-ipv6-interface-gig-1_parsed.txt GigabitEthernet1: ipv6: + FE80::56:1: + ip: FE80::56:1 + origin: link_layer + status: valid - FE80::A00:27FF:FE73:D79F: - ip: FE80::A00:27FF:FE73:D79F - origin: link_layer - status: valid joined_group_addresses: - index[2]: FF02::1:FF73:D79F + index[2]: FF02::1:FF56:1 (csr1kv) devasc@labvm:~/labs/devnet-src/pyats/csr1kv$
Part 6: Lab Cleanup and Further Investigation🔗
In this Part, you will deactivate your Python venv and investigate other Genie use cases.
Step 1: Deactivate your Python virtual environment🔗
-
When you have completed this lab, you can deactivate your Python virtual environment using the
deactivatecommand. Notice that your prompt is no longer preceded by "(csr1kv)".(csr1kv) devasc@labvm:~/labs/devnet-src/pyats/csr1kv$ deactivate devasc@labvm:~/labs/devnet-src/pyats/csr1kv$
Step 2: Explore more pyATS and Genie use cases🔗
Previously in this lab, you cloned the examples folder from the Cisco Test Automation with pyATS and Genie repository on GitHub.
There are many other use-cases in this GitHub repository. You may wish to explore other folders and the various other use-cases.
7.2 Use pyATS with Ansible🔗
Objectives🔗
Part 1: Setup the environment
Part 2: Use pyATS with Ansible to parse output
Part 3: Use pyATS with Ansible to compare configurations
Background🔗
While Ansible includes many modules for sending and receiving Cisco IOS CLI data, it doesn’t do a great job of parsing the returned data into a format easily used for further automation and testing. pyATS and Genie are great tools for working directly with Cisco IOS configurations, and in particular, for parsing output from Cisco IOS commands. In this lab you will integrate pyATS with Ansible to demonstrate the ability to automate capturing, parsing, and comparing configurations.
Instructions🔗
Part 1: Setup the environment🔗
This lab requires the ansible-pyats Ansible role to be installed. Ansible roles are a way of collecting all the files, variables, and tasks required for a specific implementation into a file structure that can be easily shared. In this case, CiscoDevNet hosts a role called ansible-pyats that makes it easy to integrate pyATS into Ansible playbooks. You can find the repository for this role here: https://github.com/CiscoDevNet/ansible-pyats
-
Ensure that you are in the
~/labs/devnet-src/pyats/csr1kvdirectory if you are not already there.devasc@labvm:~$ cd ~/labs/devnet-src/pyats/csr1kv/ devasc@labvm:~/labs/devnet-src/pyats/csr1kv$ -
Clone the
ansible-pyatsrepository into a local folder calledroles. This is the name of a specific folder that Ansible will search for when running playbooks that call for certain roles.devasc@labvm:~/labs/devnet-src/pyats/csr1kv$ git clone https://github.com/CiscoDevNet/ansible-pyats.git roles/ansible-pyats Cloning into 'roles/ansible-pyats'... remote: Enumerating objects: 87, done. remote: Total 87 (delta 0), reused 0 (delta 0), pack-reused 87 (from 1) Receiving objects: 100% (87/87), 22.04 KiB | 1.38 MiB/s, done. Resolving deltas: 100% (30/30), done. devasc@labvm:~/labs/devnet-src/pyats/csr1kv$In addition to the Cisco IOS Ansible modules you used in Lab 6 (
ios_commandandios_config), this lab will use theios_aclsmodule to help us easily work with ACLs. However, unlikeios_commandandios_config, theios_aclsmodule is not installed by default in Ansible, and you will need to install it using Ansible Galaxy.Ansible Galaxy is a site containing collections and roles created by the Ansible community that you can download and use in your own Ansible playbooks. Cisco has contributed several collections, consisting of hundreds of modules for working with their devices and platforms, including a collection called ios with 42 modules (at the time of writing this lab) for working with specific features of Cisco IOS, including the ACLs module you’ll use in this lab.
-
Install the
ioscollection from Ansible Galaxy to get access to theios_aclsmodule.devasc@labvm:~/labs/devnet-src/pyats/csr1kv$ ansible-galaxy collection install cisco.ios Process install dependency map Starting collection install process Installing 'cisco.ios:11.3.0' to '/home/devasc/.ansible/collections/ansible_collections/cisco/ios' Installing 'ansible.netcommon:8.4.0' to '/home/devasc/.ansible/collections/ansible_collections/ansible/netcommon' Installing 'ansible.utils:6.0.1' to '/home/devasc/.ansible/collections/ansible_collections/ansible/utils' devasc@labvm:~/labs/devnet-src/pyats/csr1kv$ -
Lastly, you’ll need a valid Ansible inventory file and ansible config file for this lab. If you completed Lab 6 you should be able to copy the files you created for that lab to this directory.
devasc@labvm:~/labs/devnet-src/pyats/csr1kv$ cp ../../ansible/ansible-csr1000v/{hosts,ansible.cfg} ./
devasc@labvm:~/labs/devnet-src/pyats/csr1kv$
Part 2: Use pyATS with Ansible to parse output🔗
Step 1: Create your Ansible playbook🔗
In this part of the lab, you will create a new Ansible playbook that will use pyATS to parse the output of a Cisco IOS CLI command and save the output to a JSON file.
-
In VS Code , create a new file in the
pyats/csr1kvdirectory calledansible-pyats-snapshot.yamlImportant
Be careful to use this exact filename for the autograder to grade your work properly!
-
Add the following information to the file (indents are 2 spaces each).
--- - name: USE pyATS TO PARSE THE OUTPUT OF "show ip route" hosts: CSR1kv gather_facts: false connection: network_cli roles: - ansible-pyats tasks: - name: SAVE THE PARSED OUTPUT TO A FILE NAMED AFTER THE DEVICE include_role: name: ansible-pyats tasks_from: snapshot_command vars: command: show ip route file: "{{ inventory_hostname }}_routes.json" -
Save the file.
Step 2: Examine your Ansible playbook🔗
The playbook you just created contains one play, with one task. The following is an explanation of your playbook:
---This is at the beginning of every YAML file, which indicates to YAML that this is a separate document. Each file may contain multiple documents separated by---name: USE pyATS TO PARSE THE OUTPUT OF "show ip route"- This is the name of the play.hosts: CSR1kv- This is the alias of the previously configuredhostsfile. By referring to this alias in your playbook, the playbook can use all the parameters associated with this inventory file entry which includes the username, password, and IP address of the device.gather_facts: false- At the start of a playbook, Ansible will gather facts about the remote device, such as the OS version, IP addresses, and hardware. This is not needed for our particular playbook, but is often very useful for automating many devices at once.connection: network_cli- Uses a plugin specifically for connecting to the CLI of network devices.roles:- This is a list of Ansible roles that will be used in this play. In this case, the play uses theansible-pyatsrole that we downloaded in the previous step, giving Ansible access to pyATS and Genie parsers.tasks:- This keyword indicates one or more tasks to be performed.
The first and only task is to parse the output of the show ip route command and save it to a file.
- name: SAVE THE PARSED OUTPUT TO A FILE NAMED AFTER THE DEVICE- This is the name of the task.include_role:- This tells Ansible that it should use specific code from theansible-pyatsrole. In this case, thetasks_fromparameter tells Ansible to run a task calledsnapshot_commandfrom theansible-pyatsrole. This allows you to reuse tasks in your playbooks that others have written as part of a role.
Note
You can see the contents of this task yourself by reading the contents of the snapshot_command.yml file in the roles directory you cloned in the previous step:
devasc@labvm:~/labs/devnet-src/pyats/csr1kv$ cat roles/ansible-pyats/tasks/snapshot_command.yml
vars:- Thesnapshot_commandtask inansible-pyatsrequires two variables as input:commandandfile.command:- This is the variable holding the command to be parsed bysnapshot_command. In this case, the output ofshow ip routewill be parsed by pyATS.file:- This variable indicates the file to which the parsed output should be saved. Notice that this variable makes use of the{{ inventory_hostname }}variable, which will resolve to the name of the host in the Ansible inventory file being used (in this case, it will resolve toCSR1kv)
Step 3: Run the Ansible backup Playbook🔗
-
Run the Ansible playbook you just created using the
ansible-playbookcommand:devasc@labvm:~/labs/devnet-src/pyats/csr1kv$ ansible-playbook ansible-pyats-snapshot.yaml PLAY [USE pyATS TO PARSE THE OUTPUT OF "show ip route"] ********************* TASK [SAVE THE PARSED OUTPUT TO A FILE NAMED AFTER THE DEVICE] ************** TASK [ansible-pyats : Parse command] **************************************** ok: [CSR1kv] TASK [ansible-pyats : Save snapshot to file CSR1kv_routes.json] ************* changed: [CSR1kv] PLAY RECAP ****************************************************************** CSR1kv : ok=2 changed=1 unreachable=0 failed=0 skipped=0 rescued=0 ignored=0 devasc@labvm:~/labs/devnet-src/pyats/csr1kv$The first time you run the playbook, the
PLAY RECAPshould displayok=2changed=1andfailed=0indicating a successful execution. Thechanged=1is a result of theCSR1kv_routes.jsonfile being created.
Step 4: Verify the parsed JSON file has been created🔗
-
In the terminal window use
catto view the contents of theCSR1kv_routes.jsonfile that was created by your playbook. Notice that the output is formatted in an easy-to-read (and even easier to parse) JSON format.devasc@labvm:~/labs/devnet-src/pyats/csr1kv$ cat CSR1kv_routes.json { "vrf": { "default": { "address_family": { "ipv4": { "routes": { "0.0.0.0/0": { "active": true, "metric": 0, "next_hop": { "next_hop_list": { "1": { "index": 1, "next_hop": "10.0.2.1" } } }, "route": "0.0.0.0/0", "route_preference": 254, "source_protocol": "static", "source_protocol_codes": "S*" }, <output omitted> } devasc@labvm:~/labs/devnet-src/pyats/csr1kv$This JSON file could now be used as the input to another task or be checked against a known-good output to verify the routing table has not changed.
Part 3: Use pyATS with Ansible to compare configurations🔗
Step 1: Create your Ansible playbook🔗
In this part of the lab, you will create a new Ansible playbook that will use pyATS to compare the router configuration before and after making a change.
-
In VS Code , create a new file in the
pyats/csr1kvdirectory calledansible-pyats-config.yaml.Important
Be careful to use this exact filename for the autograder to grade your work properly!
-
Add the following information to the file (indents are 2 spaces each)..
--- - name: PLAY TO CREATE A CONFIG CHANGE AND COMPARE THE BEFORE AND AFTER hosts: CSR1kv gather_facts: false connection: network_cli roles: - ansible-pyats tasks: - name: DELETE THE ACL IF IT ALREADY EXISTS cisco.ios.ios_acls: config: - afi: ipv4 acls: - name: ansible-pyats acl_type: extended state: deleted - name: COLLECT THE RUNNING CONFIG (BEFORE) ios_command: commands: - show run register: result_before - name: LOAD A NEW ACL ONTO THE ROUTER cisco.ios.ios_acls: config: - afi: ipv4 acls: - name: ansible-pyats acl_type: extended aces: - grant: permit protocol: ip source: host: 192.168.0.1 destination: any: true - grant: permit protocol: ip source: host: 192.168.0.2 destination: any: true - grant: permit protocol: ip source: host: 192.168.0.3 destination: any: true state: merged - name: COLLECT THE RUNNING CONFIG (AFTER) ios_command: commands: - show run register: result_after - name: USE pyATS TO COMPARE THE BEFORE AND AFTER TO SEE WHAT CHANGED debug: msg: "{{ result_before.stdout[0] | genie_config_diff(result_after.stdout[0], mode='add', exclude=exclude_list) }}" vars: exclude_list: - (^Using.*) - (Building.*) - (Current.*) - (crypto pki certificate chain.*) -
Save the file.
Step 2: Examine your Ansible playbook🔗
The playbook you just created contains one play, with five tasks. The first part of the playbook, describing the play, is identical to the previous playbook you created in Part 2.
The descriptions of the task are self-documenting. The tasks perform the following procedures:
-
Delete the ACL if it Already Exists: This task uses the newly installed
ios_aclsmodule to ensure that the access-list calledansible-pyatsdoes not exist, deleting it if it does (state: deleted). Note that this module required the prefacecisco.iosin front of it because it is not an Ansible native module, but rather, was installed by you using Ansible Galaxy in an earlier step. -
Collect the Running Config (Before): This task uses the
ios_commandmodule you learned about in Lab 6 to send theshow runcommand. It then saves the result in a variable calledresult_beforeso we can use it in a later step. -
Load a New ACL onto the Router: This task creates an IPv4 extended access list called
ansible-pyatsusing the newly installedios_aclsmodule. It adds three access control entries (ACEs) to the ACL, each one permitting all IP traffic from a specified source host to any destination. Thestatus: mergedparameter ensures that this ACL gets added to any existing ACLs in the configuration. -
Collect the Running Config (After): This task does the same thing as Collect the Running Config (Before), except now the running config will include the new ACL in it. It saves the result in a variable called
result_afterso we can use it in the next step. -
Use pyATS to Compare the Before and After to See What Changed: This task makes use of the newly installed
ansible-pyatsrole to parse theshow runoutput capture before the ACL was created and after it was created and output the difference.The contents of the
result_beforeandresult_aftervariables are fed into thegenie_config_diff()function. This function takes two IOS configurations and compares them to see what changed. Themode=addparameter instructs pyATS to only output lines that have been added to the config, ignoring any lines that were removed. Theexclude=excluded_listparameter tells pyATS to ignore certain lines in the configurations when looking for differences. The variableexcluded_listis defined right after this task. Lastly, the task uses the built-indebugmodule to display the results to the console. -
exclude_list: This variable holds regular expressions of configurations lines pyATS should ignore when doing its configuration comparison. In this case, you have told it to ignore lines that include the words "Using" "Building" "Current" and "crypto pki certificate chain". These are parts of the captured running configuration that may be different for reasons unrelated to the changes you made to the configuration, and so they should not show up in the resulting output of the pyATS diff.
Step 3: Run the Ansible backup Playbook🔗
-
Run the Ansible playbook you just created using the
ansible-playbookcommand:devasc@labvm:~/labs/devnet-src/pyats/csr1kv$ ansible-playbook ansible-pyats-config.yaml PLAY [PLAY TO CREATE A CONFIG CHANGE AND COMPARE THE BEFORE AND AFTER] ****** TASK [DELETE THE ACL IF IT ALREADY EXISTS] ********************************** ok: [CSR1kv] TASK [COLLECT THE RUNNING CONFIG (BEFORE)] ********************************** ok: [CSR1kv] TASK [LOAD A NEW ACL ONTO THE ROUTER] *************************************** changed: [CSR1kv] TASK [COLLECT THE RUNNING CONFIG (AFTER)] *********************************** ok: [CSR1kv] TASK [USE pyATS TO COMPARE THE BEFORE AND AFTER TO SEE WHAT CHANGED] ******** ok: [CSR1kv] => { "msg": [ "+ip access-list extended ansible-pyats: ", "+ permit ip host 192.168.0.1 any: ", "+ permit ip host 192.168.0.2 any: ", "+ permit ip host 192.168.0.3 any: " ] } PLAY RECAP ********************************************************************* CSR1kv : ok=5 changed=1 unreachable=0 failed=0 skipped=0 rescued=0 ignored=0 devasc@labvm:~/labs/devnet-src/pyats/csr1kv$The first time you run the playbook, the
PLAY RECAPshould displayok=5changed=1andfailed=0indicating a successful execution. The one change was creating the ACL.Note
If you run the playbook again, you will find that the number of tasks resulting in a change increases to 2, because the first task (
DELETE THE ACL IF IT ALREADY EXISTS) will result in a change as it must delete the ACL now that you’ve created it during the first run. -
Verify the output of the playbook matches above.
Notice that the playbook returns the exact Cisco IOS commands that were added to the running config as a result of the ACL you configured in one of the earlier tasks. Recall that the configuration you added to the playbook did not actually use any Cisco IOS commands, but rather, just a list of parameters that the ACL required.
This means that you don’t have to worry about specific Cisco IOS command line syntax when creating your ACLs; Ansible will take the configuration from the file and convert it to the applicable Cisco IOS commands at run-time!
7.3 Set up GitHub Repository🔗
Objectives🔗
Part 1: Join the GitHub Classroom
Part 2: Initialize the Local Repository
Part 3: Set up the Remote Repository
Instructions🔗
Part 1: Join the GitHub Classroom🔗
-
Follow the GitHub assignment link posted in Canvas. If you did not complete the setup in Lab 2.2 you will need to authorize GitHub Classroom to link with your account and select your name from the list of students.
-
Accept the assignment and refresh the page until it says your repository has been created. Click the link to proceed to the repository.
Important
GitHub Classroom is currently experiencing a bug where you might receive a Repository Access Issue error after accepting the assignment. If this happens, check the e-mail connected to your GitHub account for an invitation e-mail from GitHub. Use the View Invitation link in the e-mail to see the link to accept the invitation and proceed to the repository.
-
Select the Code dropdown and copy the HTTPS URL. Store it somewhere for use in a later step.
Tip
If you've configured your VM to use SSH to connect to GitHub instead of HTTPS, click on the Code dropdown, select the SSH tab, and copy the URL from there instead.
Part 2: Initialize the Local Repository🔗
You will be creating a local repository from a folder on the DEVASC VM. This folder already contains some files, so you will need to initialize a repository in the folder, pull down the files from the remote GitHub Classroom repository, then add the local files to the local repository to combine the remote and local files into a single repository.
-
Inside the DEVASC VM, open a terminal and change to the
~/labs/devnet-src/pyats/csr1kvdirectory if you’re not already there.devasc@labvm:~$ cd ~/labs/devnet-src/pyats/csr1kv/ devasc@labvm:~/labs/devnet-src/pyats/csr1kv$ -
View the listing of the files and folders currently in the
csr1kvdirectory.devasc@labvm:~/labs/devnet-src/pyats/csr1kv$ ls -la total 2096 drwxrwxr-x 11 devasc devasc 4096 Mar 18 21:17 . drwxrwxr-x 3 devasc devasc 4096 Mar 17 19:48 .. -rw-r--r-- 1 devasc devasc 268 Mar 18 18:27 ansible.cfg -rw-rw-r-- 1 devasc devasc 1855 Mar 18 20:28 ansible-pyats-config.yaml -rw-rw-r-- 1 devasc devasc 413 Mar 18 19:59 ansible-pyats-snapshot.yaml drwxrwxr-x 3 devasc devasc 4096 Mar 17 19:55 bin -rw-rw-r-- 1 devasc devasc 2157 Mar 18 20:00 CSR1kv_routes.json -rw-rw-r-- 1 devasc devasc 413 Mar 17 21:22 diff_CSR1kv_show-ipv6-interface-gig-1_parsed.txt drwxrwxr-x 24 devasc devasc 4096 Mar 17 19:59 examples -rw-r--r-- 1 devasc devasc 148 Mar 18 18:27 hosts drwxrwxr-x 2 devasc devasc 4096 Mar 17 19:48 include drwxrwxr-x 3 devasc devasc 4096 Mar 17 19:48 lib lrwxrwxrwx 1 devasc devasc 3 Mar 17 19:48 lib64 -> lib -rw-rw-r-- 1 devasc devasc 69 Mar 17 19:48 pyvenv.cfg drwxrwxr-x 3 devasc devasc 4096 Mar 18 18:56 roles drwxrwxr-x 3 devasc devasc 4096 Mar 17 19:48 share drwxrwxr-x 2 devasc devasc 4096 Mar 18 02:30 verify-ipv6-1 drwxrwxr-x 2 devasc devasc 4096 Mar 17 21:18 verify-ipv6-2 drwxrwxr-x 2 devasc devasc 4096 Mar 18 21:15 yaml devasc@labvm:~/labs/devnet-src/pyats/csr1kv$ -
Initialize this directory as a Git repository (don’t miss the . at the end of the command).
devasc@labvm:~/labs/devnet-src/pyats/csr1kv$ git init .
Initialized empty Git repository in /home/devasc/labs/devnet-src/pyats/csr1kv/.git/
devasc@labvm:~/labs/devnet-src/pyats/csr1kv$
Part 3: Set up the Remote Repository🔗
-
Since we initialized our own local repository, rather than cloning an existing remote repository, we need to tell Git the location of the remote repository to synchronize with. Configure the location of the remote repository using the
git remote addcommand. Use the URL to the GitHub Classroom repository you copied at the end of Part 1, not the one in the command below.Tip
If you've configured your VM to use SSH to connect to GitHub, use the SSH URL that you copied in step 1, rather than the HTTPS link.
devasc@labvm:~/labs/devnet-src/pyats/csr1kv$ git remote add origin https://github.com/Ontario-Tech-NITS/lab-7-automated-testing-<username>.git
devasc@labvm:~/labs/devnet-src/pyats/csr1kv$
Important
Make sure you use your GitHub URL that you copied in Part 1, not the one in the command example! Also, if you're using SSH, your URL will start with
git@github.comrather thanhttps://. -
Verify that the remote is properly configured with the
git remote --verbosecommand.devasc@labvm:~/labs/devnet-src/pyats/csr1kv$ git remote --verbose origin https://github.com/Ontario-Tech-NITS/lab-7-automated-testing-<username>.git (fetch) origin https://github.com/Ontario-Tech-NITS/lab-7-automated-testing-<username>.git (push) devasc@labvm:~/labs/devnet-src/pyats/csr1kv$ -
Pull down the files from the remote repository into the local repository. Remember to use your Personal Access Token as the password.
Tip
If you've configured your VM to use SSH to connect to GitHub instead of HTTPS, you will not be asked for a username and password, although you may be asked for a passphrase for your SSH key, if you configured one.
devasc@labvm:~/labs/devnet-src/pyats/csr1kv$ git pull origin main Username for 'https://github.com': username Password for 'https://username@github.com': Personal Access Token remote: Enumerating objects: 14, done. remote: Counting objects: 100% (14/14), done. remote: Compressing objects: 100% (11/11), done. remote: Total 14 (delta 1), reused 4 (delta 0), pack-reused 0 (from 0) Unpacking objects: 100% (14/14), 5.23 KiB | 595.00 KiB/s, done. From github.com:Ontario-Tech-NITS/lab-7-automated-testing-<username> * branch main -> FETCH_HEAD * [new branch] main -> origin/main devasc@labvm:~/labs/devnet-src/pyats/csr1kv$ -
Use
git statusto verify all the local files and folders are currently untracked. A large portion of these files are from the example repository you downloaded in the first part of this lab, and your Python virtual environment, none of which needs to be pushed to your assignment repository on GitHub. Ensure the highlighted files and folders, in particular, are present in your output.devasc@labvm:~/labs/devnet-src/pyats/csr1kv$ git status On branch main Untracked files: (use "git add <file>..." to include in what will be committed) CSR1kv_routes.json ansible-pyats-config.yaml ansible-pyats-snapshot.yaml ansible.cfg bin/ diff_CSR1kv_show-ipv6-interface-gig-1_parsed.txt examples/ hosts lib/ lib64 pyvenv.cfg roles/ share/ verify-ipv6-1/ verify-ipv6-2/ yaml/ nothing added to commit but untracked files present (use "git add" to track) devasc@labvm:~/labs/devnet-src/pyats/csr1kv$ -
Add the files from the local working folder to the staging area. Specifically, only add the three folders and four files highlighted in the previous output. The rest of the files and folders are unnecessary.
devasc@labvm:~/labs/devnet-src/pyats/csr1kv$ git add CSR1kv_routes.json ansible-pyats-config.yaml ansible-pyats-snapshot.yaml diff_CSR1kv_show-ipv6-interface-gig-1_parsed.txt verify-ipv6-1/ verify-ipv6-2/ yaml/ devasc@labvm:~/labs/devnet-src/pyats/csr1kv$ -
Use
git statusto verify only the expected files are being committed. If your output includes extra files, usegit restoreto remove them from the staging area and try again.devasc@labvm:~/labs/devnet-src/pyats/csr1kv$ git status On branch main Changes to be committed: (use "git restore --staged <file>..." to unstage) new file: CSR1kv_routes.json new file: ansible-pyats-config.yaml new file: ansible-pyats-snapshot.yaml new file: diff_CSR1kv_show-ipv6-interface-gig-1_parsed.txt new file: verify-ipv6-1/CSR1kv_show-ipv6-interface-gig-1_console.txt new file: verify-ipv6-1/CSR1kv_show-ipv6-interface-gig-1_parsed.txt new file: verify-ipv6-1/connection_CSR1kv.txt new file: verify-ipv6-2/CSR1kv_show-ipv6-interface-gig-1_console.txt new file: verify-ipv6-2/CSR1kv_show-ipv6-interface-gig-1_parsed.txt new file: verify-ipv6-2/connection_CSR1kv.txt new file: yaml/testbed.yml Untracked files: (use "git add <file>..." to include in what will be committed) ansible.cfg bin/ examples/ hosts lib/ lib64 pyvenv.cfg roles/ share/ devasc@labvm:~/labs/devnet-src/pyats/csr1kv$ -
Commit these new files to the local repository using the commit message Lab Complete!.
devasc@labvm:~/labs/devnet-src/pyats/csr1kv$ git commit -m "Lab Complete!" [main 82de53e] Lab Complete! 11 files changed, 539 insertions(+) create mode 100644 CSR1kv_routes.json create mode 100644 ansible-pyats-config.yaml create mode 100644 ansible-pyats-snapshot.yaml create mode 100644 diff_CSR1kv_show-ipv6-interface-gig-1_parsed.txt create mode 100644 verify-ipv6-1/CSR1kv_show-ipv6-interface-gig-1_console.txt create mode 100644 verify-ipv6-1/CSR1kv_show-ipv6-interface-gig-1_parsed.txt create mode 100644 verify-ipv6-1/connection_CSR1kv.txt create mode 100644 verify-ipv6-2/CSR1kv_show-ipv6-interface-gig-1_console.txt create mode 100644 verify-ipv6-2/CSR1kv_show-ipv6-interface-gig-1_parsed.txt create mode 100644 verify-ipv6-2/connection_CSR1kv.txt create mode 100644 yaml/testbed.yml devasc@labvm:~/labs/devnet-src/pyats/csr1kv$ -
Push all the changes you made in the local repository back to the GitHub repository to complete the lab. Remember to use your Personal Access Token when asked for your GitHub password.
Tip
If you’ve configured your VM to use SSH to connect to GitHub instead of HTTPS, you will not be asked for a username and password, although you may be asked for a passphrase for your SSH key, if you configured one.
devasc@labvm:~/labs/devnet-src/pyats/csr1kv$ git push origin main Username for 'https://github.com': username Password for 'https://username@github.com': Personal Access Token Enumerating objects: 17, done. Counting objects: 100% (17/17), done. Delta compression using up to 2 threads Compressing objects: 100% (15/15), done. Writing objects: 100% (16/16), 5.11 KiB | 1.71 MiB/s, done. Total 16 (delta 4), reused 0 (delta 0), pack-reused 0 (from 0) remote: Resolving deltas: 100% (4/4), done. To github.com:Ontario-Tech-NITS/lab-7-automated-testing-<username>.git 8605590..82de53e main -> main devasc@labvm:~/labs/devnet-src/pyats/csr1kv$ -
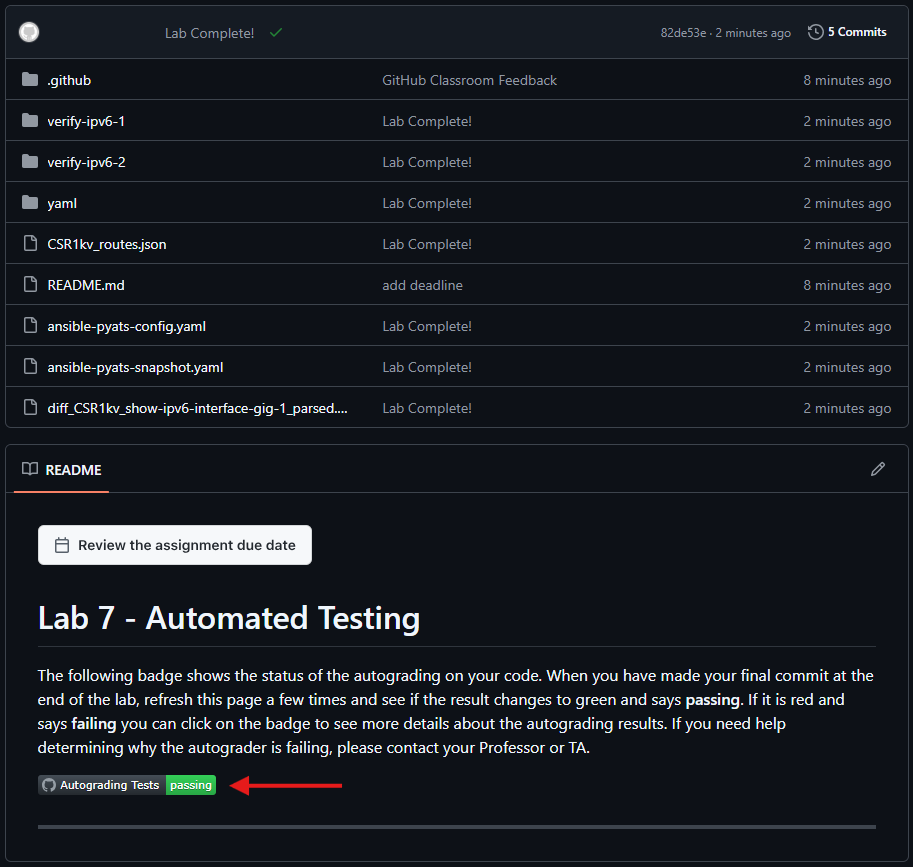
In your browser, return to the repository on github.com and verify all your changes are present, along with the corresponding commit messages. Wait a few moments and verify that the Autograding Tests show as "passing". If they show as "failing" check the test log and troubleshoot until all tests pass.