Lab 5 - Deploying Applications🔗
Lab 5.1 Set up GitHub Repository
Lab 5.2 Build a Sample Web App in a Docker Container
Lab 5.3 Build a CI/CD Pipeline
5.1 Set up GitHub Repository🔗
Objectives🔗
Part 1: Join the GitHub Classroom
Part 2: Initialize the Local Repository
Part 3: Set up the Remote Repository
Instructions🔗
Part 1: Join the GitHub Classroom🔗
-
Follow the GitHub assignment link posted in Canvas. If you did not complete the setup in Lab 2.2 you will need to authorize GitHub Classroom to link with your account and select your name from the list of students.
-
Accept the assignment and refresh the page until it says your repository has been created. Click the link to proceed to the repository.
Important
GitHub Classroom is currently experiencing a bug where you might receive a Repository Access Issue error after accepting the assignment. If this happens, check the e-mail connected to your GitHub account for an invitation e-mail from GitHub. Use the View Invitation link in the e-mail to see the link to accept the invitation and proceed to the repository.
-
Select the Code dropdown and copy the HTTPS URL. Store it somewhere for use in a later step.
Tip
If you've configured your VM to use SSH to connect to GitHub instead of HTTPS, click on the Code dropdown, select the SSH tab, and copy the URL from there instead.
Part 2: Initialize the Local Repository🔗
You will be creating a local repository from a folder on the DEVASC VM. This folder already contains some files, so you will need to initialize a repository in the folder, pull down the files from the remote GitHub Classroom repository, then add the local files to the local repository to combine the remote and local files into a single repository.
Important
If you did not complete Lab 2, or you have reset your VM since then, you'll need to update Git to the newest version as well as configure your name, e-mail address, and default branch name, before beginning this lab.
Open Lab 2 and complete steps 1, 2, and the first 3 tasks of step 3 of the Initializing Git instructions before continuing.
-
Inside the DEVASC VM, open a terminal and change to the
~/labs/devnet-src/sample-appdirectory.devasc@labvm:~$ cd labs/devnet-src/sample-app/ devasc@labvm:~/labs/devnet-src/sample-app$ -
View the listing of all files currently in the
sample-appdirectory.devasc@labvm:~/labs/devnet-src/sample-app$ ls -la total 20 drwxr-xr-x 4 devasc devasc 4096 Jun 1 2020 . drwxr-xr-x 15 devasc devasc 4096 Feb 12 21:41 .. -rw-r--r-- 1 devasc devasc 42 Apr 23 2020 sample_app.py -rw-r--r-- 1 devasc devasc 0 Apr 23 2020 sample-app.sh drwxr-xr-x 2 devasc devasc 4096 Jun 1 2020 static drwxr-xr-x 2 devasc devasc 4096 Jun 1 2020 templates devasc@labvm:~/labs/devnet-src/sample-app$ -
Initialize this directory as a Git repository (don't miss the . at the end of the command!).
devasc@labvm:~/labs/devnet-src/sample-app$ git init .
Initialized empty Git repository in /home/devasc/labs/devnet-src/sample-app/.git/
devasc@labvm:~/labs/devnet-src/sample-app$
Part 3: Set up the Remote Repository🔗
-
Since we initialized our own local repository, rather than cloning an existing remote repository, we need to tell Git the location of the remote repository to synchronize with. Configure the location of the remote repository using the
git remote addcommand. Use the URL to the GitHub Classroom repository you copied at the end of Part 1, not the one in the command below.Tip
If you've configured your VM to use SSH to connect to GitHub, use the SSH URL that you copied in step 1, rather than the HTTPS link.
devasc@labvm:~/labs/devnet-src/sample-app$ git remote add origin https://github.com/Ontario-Tech-NITS/lab-5-application-deployment-<username>.gitImportant
Make sure you use your GitHub URL that you copied in Part 1, not the one in the command example! Also, if you're using SSH, your URL will start with
git@github.comrather thanhttps://. -
Verify that the remote is properly configured with the
git remote --verbosecommand.devasc@labvm:~/labs/devnet-src/sample-app$ git remote --verbose origin https://github.com/Ontario-Tech-NITS/lab-5-application-deployment-<username>.git (fetch) origin https://github.com/Ontario-Tech-NITS/lab-5-application-deployment-<username>.git (push) devasc@labvm:~/labs/devnet-src/sample-app$ -
Pull down the files from the remote repository into the local repository. Remember to use your Personal Access Token as the password.
Tip
If you've configured your VM to use SSH to connect to GitHub instead of HTTPS, you will not be asked for a username and password, although you may be asked for a passphrase for your SSH key, if you configured one.
devasc@labvm:~/labs/devnet-src/sample-app$ git pull origin main Username for 'https://github.com': username Password for 'https://username@github.com': Personal Access Token remote: Enumerating objects: 14, done. remote: Counting objects: 100% (14/14), done. remote: Compressing objects: 100% (11/11), done. remote: Total 14 (delta 1), reused 6 (delta 0), pack-reused 0 (from 0) Unpacking objects: 100% (14/14), 5.01 KiB | 5.01 MiB/s, done. From github.com:Ontario-Tech-NITS/lab-5-application-deployment-<username> * branch main -> FETCH_HEAD * [new branch] main -> origin/main devasc@labvm:~/labs/devnet-src/sample-app$ -
Use
git statusto verify all the local files are currently untracked.devasc@labvm:~/labs/devnet-src/sample-app$ git status On branch main Untracked files: (use "git add <file>..." to include in what will be committed) sample-app.sh sample_app.py static/ templates/ nothing added to commit but untracked files present (use "git add" to track) devasc@labvm:~/labs/devnet-src/sample-app$ -
Add the files from the local working folder to the staging area (don't miss the . at the end of the command!).
devasc@labvm:~/labs/devnet-src/sample-app$ git add . devasc@labvm:~/labs/devnet-src/sample-app$ -
Commit these new files to the local repository. Use the commit message Initializing the repository.
devasc@labvm:~/labs/devnet-src/sample-app$ git commit -m "Initializing the repository" [main d832df6] Initializing the repository 4 files changed, 11 insertions(+) create mode 100644 sample-app.sh create mode 100644 sample_app.py create mode 100644 static/style.css create mode 100644 templates/index.html devasc@labvm:~/labs/devnet-src/sample-app$ -
Use
git statusagain to verify that all files have been committed to the local repository and that you are working on a clean tree.devasc@labvm:~/labs/devnet-src/sample-app$ git status On branch main nothing to commit, working tree clean devasc@labvm:~/labs/devnet-src/sample-app$ -
Push the local repository to the remote repository on GitHub, adding the files from the DEVASC VM to the existing repository. Remember to use your Personal Access Token when prompted for your password.
Tip
If you've configured your VM to use SSH to connect to GitHub instead of HTTPS, you will not be asked for a username and password, although you may be asked for a passphrase for your SSH key, if you configured one.
devasc@labvm:~/labs/devnet-src/sample-app$ git push origin main Username for 'https://github.com': username Password for 'https://username@github.com': Personal Access Token Enumerating objects: 9, done. Counting objects: 100% (9/9), done. Delta compression using up to 2 threads Compressing objects: 100% (3/3), done. Writing objects: 100% (8/8), 770 bytes | 770.00 KiB/s, done. Total 8 (delta 0), reused 0 (delta 0), pack-reused 0 (from 0) To github.com:Ontario-Tech-NITS/lab-5-application-deployment-<username>.git 49f5c26..c638a4b main -> main devasc@labvm:~/labs/devnet-src/sample-app$ -
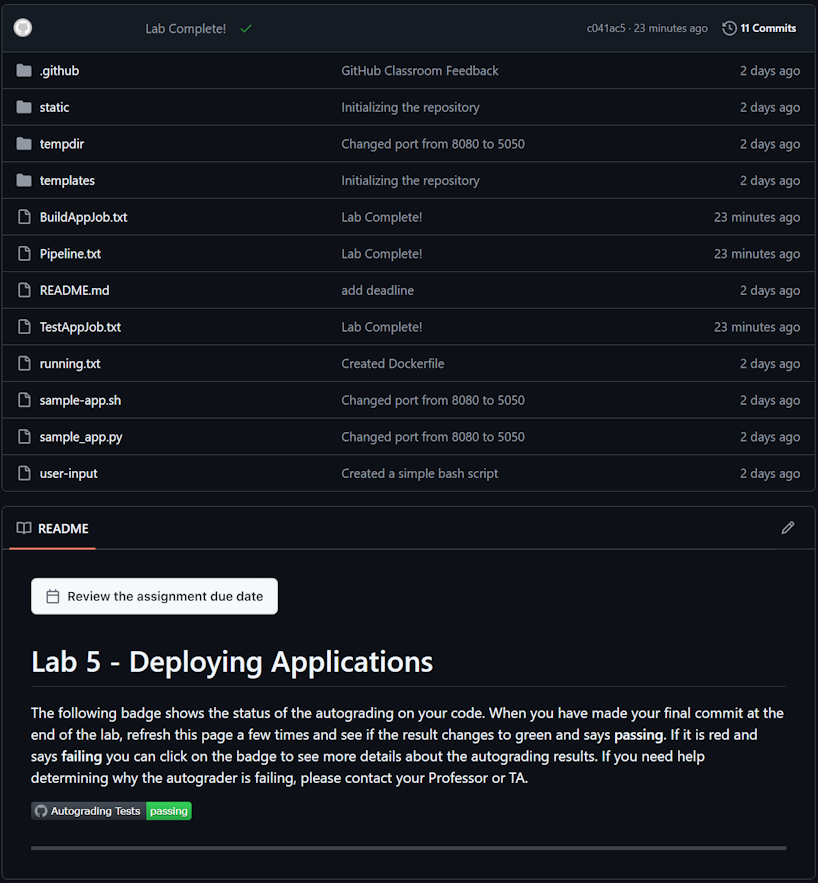
Using a web browser, open the remote repository on GitHub and verify that you see the newly tracked files. Your local and remote repositories are now synchronized, and you are ready to complete the rest of the lab, committing your changes as you go (when instructed).
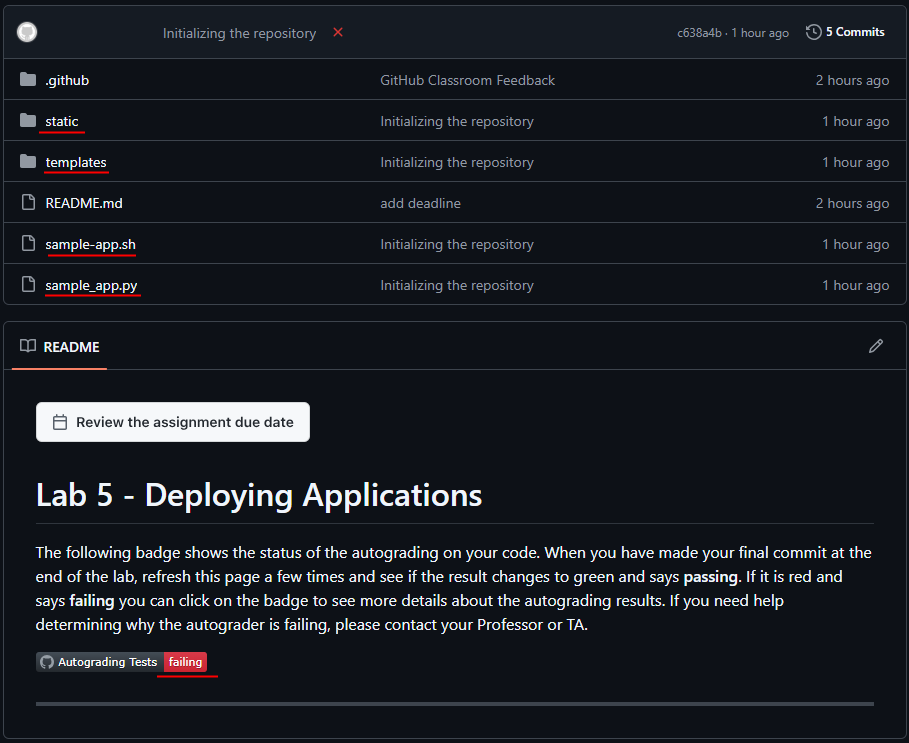
Note
The Autograding Tests will say "failing" at this point because you haven't finished the lab. This is normal.
5.2 Build a Sample Web App in a Docker Container🔗
Objectives🔗
Part 1: Create a Simple Bash Script
Part 2: Create a Sample Web App
Part 3: Configure the Web App to Use Website Files
Part 4: Create a Bash Script to Build and Run a Docker Container
Part 5: Build, Run, and Verify the Docker Container
Background🔗
In this lab, you will review basic bash scripting techniques because bash scripting is a prerequisite for the rest of the lab. You will then build and modify a Python script for a simple web application. Next, you will create a bash script to automate the process for creating a Dockerfile, building the Docker container, and running the Docker container. Finally, you will use Docker commands to investigate the intricacies of the Docker container instance.
Instructions🔗
Part 1: Create a Simple Bash Script🔗
Bash knowledge is crucial for working with continuous integration, continuous deployment, containers, and with your development environment. Bash scripts help programmers automate a variety of tasks in one script file. In this part, you will briefly review how to create a bash script. Later in the lab, you will use a bash script to automate the creation of a web app inside of a Docker container.
Step 1: Create an empty bash script file🔗
-
In the ~/labs/devnet-src/sample-app folder, add a new file called user-input.sh.
devasc@labvm:~/labs/devnet-src/sample-app$ touch user-input.sh
devasc@labvm:~/labs/devnet-src/sample-app$
Note
The
touchcommand creates an empty file with the specified name, or modifies the timestamps of an existing file.
Step 2: Open the file in the nano text editor🔗
-
Use the
nanocommand to open the nano text editor. (You could also tryvimif you're feeling brave)devasc@labvm:~/labs/devnet-src/sample-app$ nano user-input.sh
Step 3: Add the shebang to the top of the script🔗
From here you can enter commands for your bash script. Use the arrow keys to navigate in nano. Notice the commands at the bottom for managing the file. The carat symbol (^) indicates that you use the Ctrl or Cmd key on your keyboard. For example, to exit nano, type Ctrl+X.
-
Add the shebang, which tells the system that this file includes commands that need to be run in the
bashshell.Shell script#!/bin/bashNote
You could use a graphical text editor or open the file with VS Code. However, you should be familiar with command-line text editors like nano and vim.
Step 4: Add simple bash commands to the script🔗
-
Enter some simple bash commands for your script. The following commands will ask the user for a name, set the name to a variable called
userName, and display a string of text with the user's name.Shell scriptecho -n "Enter Your Name: " read userName echo "Your name is $userName."
Step 5: Exit nano and save your script🔗
- Press Ctrl+X, then Y, then Enter to exit nano and save your script.
Step 6: Run your script from the command line🔗
-
You can run your script directly from the command line using the following command:
devasc@labvm:~/labs/devnet-src/sample-app$ bash user-input.sh
Enter Your Name: Josh
Your name is Josh.
devasc@labvm:~/labs/devnet-src/sample-app$
Step 7: Change the mode of the script to an executable file for all users🔗
-
Change the mode of the script to an executable using the
chmodcommand. Set the options toa+xto make the script executable (x) by all users (a). After usingchmod, notice permissions have been modified for users, groups, and others to include x (executable).devasc@labvm:~/labs/devnet-src/sample-app$ ls -l user-input.sh -rw-rw-r-- 1 devasc devasc 84 Jun 7 16:43 user-input.sh devasc@labvm:~/labs/devnet-src/sample-app$ chmod a+x user-input.sh devasc@labvm:~/labs/devnet-src/sample-app$ ls -l user-input.sh -rwxrwxr-x 1 devasc devasc 84 Jun 7 16:43 user-input.sh devasc@labvm:~/labs/devnet-src/sample-app$
Step 8: Rename the file to remove the .sh extension🔗
-
You can rename the file to remove the extension so that users do not have to add
.shto the command to execute the script.devasc@labvm:~/labs/devnet-src/sample-app$ mv user-input.sh user-input devasc@labvm:~/labs/devnet-src/sample-app$
Step 9: Execute the script from the command line🔗
-
Now the script can be run from the command line without the
bashcommand or the.shextension. To run this bash script without the source command, you must preface the script with "./".devasc@labvm:~/labs/devnet-src/sample-app$ ./user-input Enter Your Name: Bob Your name is Bob. devasc@labvm:~/labs/devnet-src/sample-app$
Step 10: Commit the changes to the repository🔗
-
Add the
user-inputfile to the staging area then commit the changes to the local repository using the message Created a simple bash script.devasc@labvm:~/labs/devnet-src/sample-app$ git add user-input devasc@labvm:~/labs/devnet-src/sample-app$ git commit -m "Created a simple bash script" [main 431f101] Created a simple bash script 1 file changed, 4 insertions(+) create mode 100755 user-input devasc@labvm:~/labs/devnet-src/sample-app$
Part 2: Create a Sample Web App🔗
Before we can launch an application in a Docker container, we first need to have the app. In this part, you will create a very simple Python script that will display the IP address of the client when the client visits the web page.
Step 1: Install Flask and open a port on the DEVASC VM firewall🔗
Web application developers using Python typically leverage a framework. A framework is a code library to make it easier for developers to create reliable, scalable, and maintainable web applications. Flask is a web application framework written in Python. Other examples of python web frameworks include Tornado and Pyramid.
You will use this framework to create the sample web app. Flask receives requests and then provides a response to the user in the web app. This is useful for dynamic web applications because it allows user interaction and dynamic content. What makes your sample web app dynamic is that it will be displaying the IP address of the client.
Note
Understanding Flask functions, methods, and libraries are beyond the scope of this course. It is used in this lab to show how quickly you can get a web application up and running. If you want to learn more, search the internet for more information and tutorials on the Flask framework.
-
Open a terminal window and install
flask.devasc@labvm:~/labs/devnet-src/sample-app$ pip3 install flask Requirement already satisfied: flask in /home/devasc/.local/lib/python3.8/site-packages (1.1.2) Requirement already satisfied: Jinja2>=2.10.1 in /home/devasc/.local/lib/python3.8/site-packages (from flask) (2.11.2) Requirement already satisfied: click>=5.1 in /home/devasc/.local/lib/python3.8/site-packages (from flask) (7.1.2) Requirement already satisfied: itsdangerous>=0.24 in /home/devasc/.local/lib/python3.8/site-packages (from flask) (1.1.0) Requirement already satisfied: Werkzeug>=0.15 in /home/devasc/.local/lib/python3.8/site-packages (from flask) (1.0.1) Requirement already satisfied: MarkupSafe>=0.23 in /home/devasc/.local/lib/python3.8/site-packages (from Jinja2>=2.10.1->flask) (1.1.1) devasc@labvm:~/labs/devnet-src/sample-app$Note
Flask may already be installed on your VM, in which case you'll receive
Requirement already satisfiedmessages as in the above output. This is fine.
Step 2: Open the sample_app.py file🔗
-
Open the sample_app.py file located in the ~/labs/devnet-src/sample-app directory. You can do this inside VS Code or you can use a command-line text editor like nano or vim.
Important
MAKE SURE YOU OPEN THE PYTHON FILE (.py) NOT THE SCRIPT (.sh)
Step 3: Import methods from flask🔗
-
Add the following commands to import the required methods from the flask library.
Pythonfrom flask import Flask from flask import request
Step 4: Create an instance of the Flask class🔗
-
Leave a blank line and create an instance of the Flask class named sample. Be sure to use two underscores (_) before and after the word "name".
Pythonsample = Flask(__name__)
Step 5: Define a method to display the client IP address🔗
-
Next, leave another blank line and configure Flask so that when a user visits the default page (root directory, represented by "/"), it displays a message with the IP address of the client.
Python@sample.route("/") def main(): return f"You are calling me from {request.remote_addr}\n"Note
Notice the
@sample.route("/")Flask statement. Frameworks such as Flask use a routing technique (.route) to refer to an application URL (this not to be confused with network routing). Here the "/" (root directory) is bound to themain()function. So, when the user goes tohttp://localhost:8080/(root directory) URL, themain()function is executed and the output of thereturnstatement will be displayed in the browser.
Step 6: Configure the app to run locally🔗
-
Finally, leave another blank line and configure Flask to run the app locally at
http://0.0.0.0:8080, which is alsohttp://localhost:8080. Be sure to use two underscores before and after "name", and before and after "main". This should not be part of themain()function you created in the previous step, so ensure theifstatement is not indented.Pythonif __name__ == "__main__": sample.run(host="0.0.0.0", port=8080)
Step 7: Save and run your sample web app🔗
-
Save your script and run it from the command line. You should see the following output which indicates that your sample-app server is running. If you do not see the following output or if you receive an error message, check your sample_app.py script carefully.
Note
The CLI will freeze after this output since it is running the script in the foreground. This is normal and expected.
devasc@labvm:~/labs/devnet-src/sample-app$ python3 sample_app.py
* Serving Flask app "sample-app" (lazy loading)
* Environment: production
  WARNING: This is a development server. Do not use it in a production deployment.
  Use a production WSGI server instead.
* Debug mode: off
* Running on http://0.0.0.0:8080/ (Press CTRL+C to quit)
Step 8: Verify the server is running🔗
You can verify the server is running in one of two ways.
-
Open the Chromium web browser and enter
0.0.0.0:8080in the URL field. You should get the following output:You are calling me from 127.0.0.1If you receive an HTTP 400 Bad Request response, check your sample_app.py script carefully.
-
Open a new terminal window and use the command-line URL tool (
cURL) to verify the server's response.Important
DO NOT CLOSE THE TERMINAL THAT IS RUNNING THE PYTHON SCRIPT.
devasc@labvm:~/labs/devnet-src/sample-app$ curl http://0.0.0.0:8080
You are calling me from 127.0.0.1
devasc@labvm:~/labs/devnet-src/sample-app$
Note
If you return to the terminal window where the script is running, you can see the GET requests appearing in real time.
Step 9: Stop the server🔗
- Return to the terminal window where the server is running and press Ctrl+C to stop the server.
Step 10: Commit the changes to the repository🔗
-
Add the sample_app.py file to the staging area then commit the changes to the local repository using the message Created sample_app.py.
devasc@labvm:~/labs/devnet-src/sample-app$ git add sample_app.py
devasc@labvm:~/labs/devnet-src/sample-app$ git commit -m "Created sample_app.py"
[main 7f70a67] Created sample_app.py
 1 file changed, 11 insertions(+)
devasc@labvm:~/labs/devnet-src/sample-app$
Part 3: Configure the Web App to use Website Files🔗
In this part, build out the sample web app to include an index.html page and style.css specification. The index.html is typically the first page loaded in a client's web browser when visiting your website. The style.css is a style sheet used to customize the look of the web page.
Step 1: Explore the directories that will be used by the web app🔗
-
The directories
templatesandstaticare already in thesample-appdirectory. Open theindex.htmlandstyle.cssto view their contents. If you are familiar with HTML and CSS, feel free to customize these directories and files as much as you like. However, be sure you keep theYou are calling me from {{request.remote_addr}}Python code in theindex.htmlfile as this is the dynamic aspect of the sample web app.devasc@labvm:~/labs/devnet-src/sample-app$ cat templates/index.html <html> <head> <title>Sample app</title> <link rel="stylesheet" href="/static/style.css" /> </head> <body> <h1>You are calling me from {{request.remote_addr}}</h1> </body> </html> devasc@labvm:~/labs/devnet-src/sample-app$ cat static/style.css body {background: lightsteelblue;} devasc@labvm:~/labs/devnet-src/sample-app$
Step 2: Update the Python code for the sample web app🔗
Now that you have explored the basic website files, you need to update the sample_app.py file so that it renders the index.html file instead of just returning data.
Generating HTML content using Python code can be cumbersome, especially when using conditional statements or repeating structures. The HTML file can be rendered in Flask automatically using the render_template() function. This requires importing the render_template() function from the flask library and editing the return function.
-
Make the highlighted edits to your script.
Pythonfrom flask import Flask from flask import request from flask import render_template sample = Flask(__name__) @sample.route("/") def main(): return render_template("index.html") if __name__ == "__main__": sample.run(host="0.0.0.0", port=8080)
Step 3: Save and run your script🔗
-
Save and run your
sample_app.pyscript. You should get output similar to the following:devasc@labvm:~/labs/devnet-src/sample-app$ python3 sample_app.py * Serving Flask app "sample-app" (lazy loading) * Environment: production WARNING: This is a development server. Do not use it in a production deployment. Use a production WSGI server instead. * Debug mode: off * Running on http://0.0.0.0:8080/ (Press CTRL+C to quit)Tip
If you get a traceback output and an error with a message similar to
OSError: [Errno 98] Address already in use, then you did not shut down your previous server in Part 2 Step 9. Return to the terminal window where that server is running and press Ctrl+C to end the server process, then re-run your script.
Step 4: Verify your program is running🔗
Again, you can verify your program is running in one of two ways.
-
Open the Chromium web browser and enter
0.0.0.0:8080in the URL field. You should get the same output as before. However, your background will be light steel blue and the text will be formatted as H1.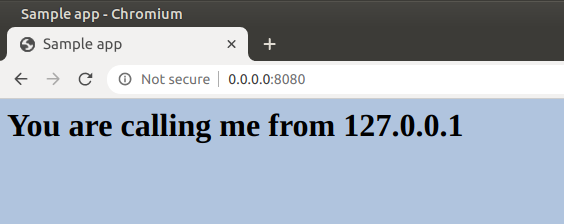
-
Open another terminal window and use the
curlcommand to verify the server's response. This is where you will see the result of the HTML code rendered automatically using therender_template()function. In this case, you will get all the HTML content. However, the dynamic Python code will be replaced with the value for{{request.remote_addr}}.devasc@labvm:~/labs/devnet-src/sample-app$ curl http://0.0.0.0:8080 <html> <head> <title>Sample app</title> <link rel="stylesheet" href="/static/style.css" /> </head> <body> <h1>You are calling me from 127.0.0.1</h1> </body> </html> devasc@labvm:~/labs/devnet-src/sample-app$
Step 5: Stop the server🔗
- Return to the terminal window where the server is running and press Ctrl+C to stop the server.
Step 6: Commit the changes to the repository🔗
-
Add the updated
sample_app.pyfile to the staging area then commit the changes to the local repository using the message Updated sample_app.py to use HTML files.devasc@labvm:~/labs/devnet-src/sample-app$ git add sample_app.py devasc@labvm:~/labs/devnet-src/sample-app$ git commit -m "Updated sample_app.py to use HTML files" [main 8358720] Updated sample_app.py to use HTML files 1 file changed, 2 insertions(+), 1 deletion(-) devasc@labvm:~/labs/devnet-src/sample-app$
Part 4: Create a Bash Script to Build and Run a Docker Container🔗
An application can be deployed on a bare metal server (physical server dedicated to a single-tenant environment) or in a virtual machine, like you just did in the previous part. It can also be deployed in a containerized solution like Docker. In this part, you will create a bash script and add commands to it that complete the following tasks to build and run a Docker container:
- Create temporary directories to store the website files.
- Copy the website directories and sample_app.py to the temporary directory.
- Build a Dockerfile.
- Build the Docker container.
- Start the container and verify it is running.
Note
In this lab you are using a bash script to create the Dockerfile, rather than creating the Dockerfile manually. The is because this bash script will be used in the next part of the lab to instruct Jenkins to automatically build the Docker container on demand for automated testing and deployment. This bash script will create the necessary files and folders then create and launch the Docker container. There are many other ways you could accomplish this; this is just one option.
Step 1: Create temporary directories to store the website files🔗
-
Open the
sample-app.shbash script file in the~/labs/devnet-src/sample-appdirectory. Add the 'shebang' and the commands to create a directory structure withtempdiras the parent folder.Important
NOTE THAT THIS IS THE BASH SCRIPT (.sh) NOT THE PYTHON FILE (.py).
Shell script#!/bin/bash mkdir tempdir mkdir tempdir/templates mkdir tempdir/static
Step 2: Copy the website directories and sample_app.py to the temporary directory🔗
-
In the
sample-app.shfile, leave a blank line then add the commands to copy the website directory and script totempdir.Important
Don't miss the periods at the end of each line!
Shell scriptcp sample_app.py tempdir/. cp -r templates/* tempdir/templates/. cp -r static/* tempdir/static/.
Step 3: Create a Dockerfile🔗
In this step, you enter the necessary bash echo commands to the sample-app.sh file to create a Dockerfile in the tempdir directory. This Dockerfile will be used to build the container.
Important
Use a capital "D" for all instances of "Dockerfile", as in the examples.
-
You need Python running in the container, so leave a blank line then add the Docker
FROMcommand to install Python in the container.Shell scriptecho "FROM python" > tempdir/Dockerfile -
Your
sample_app.pyscript needs Flask, so add the DockerRUNcommand to install Flask in the container. Note the double angle brackets (>>), which will append the output to the end of the Dockerfile rather than overwrite it.Shell scriptecho "RUN pip install flask" >> tempdir/Dockerfile -
Your container will need the website folders and the
sample_app.pyscript to run the app, so add the DockerCOPYcommands to add them to a directory in the Docker container. In this example, you will create/home/myappas the parent directory inside the Docker container. Besides copying thesample_app.pyfile to the Dockerfile, you will also be copying theindex.htmlfile from the templates directory and thestyle.cssfile from the static directory.Shell scriptecho "COPY ./static /home/myapp/static/" >> tempdir/Dockerfile echo "COPY ./templates /home/myapp/templates/" >> tempdir/Dockerfile echo "COPY sample_app.py /home/myapp/" >> tempdir/Dockerfile -
Use the Docker
EXPOSEcommand to expose port 8080 for use by the webserver.Shell scriptecho "EXPOSE 8080" >> tempdir/Dockerfile -
Finally, add the Docker
CMDcommand to execute the Python script.Shell scriptecho "CMD python3 /home/myapp/sample_app.py" >> tempdir/Dockerfile -
Leave a blank line and add the commands to the
sample-app.shfile to switch to thetempdirdirectory and build the Docker container. Thedocker buildcommand-toption allows you to specify the name of the container and the trailing period (.) indicates that you want the container built in the current directory.Shell scriptcd tempdir docker build -t sampleapp . -
Leave a blank line and add the
docker runcommand to thesample-app.shfile to start the container.Shell scriptdocker run -t -d -p 8080:8080 --name samplerunning sampleappNote
The
docker runoptions indicate the following:-
-tspecifies that you want a terminal created for the container so the you can access it at the command line. -
-dindicates that you want the container to run in the background and print the container ID when executing thedocker ps -acommand. -
-pspecifies that you want to publish the container's internal port to the host. The first8080references the port for the app running in the docker container (our sampleapp). The second8080tells docker to use this port on the local host. These values do not have to be the same. For example, to map an internal port 80 to external port 800 you could use80:800. -
--namespecifies what you want to call the instance of the container (samplerunning). The instance name can be anything you want. -
The last paramter is the container image that the instance will be based on (
sampleapp). The image name needs to match the container name you specified in thedocker buildcommand (sampleapp).
-
-
Leave another blank line and add the
docker ps -acommand to display all currently running Docker containers. This command will be the last one executed by the bash script.Shell scriptdocker ps -a
Step 4: Save your bash script🔗
- Save and close the
sample-app.shfile.
Part 5: Build, Run, and Verify the Docker Container🔗
In this part, you will execute the bash script you just created, which will make the directories, copy over the files, create a Dockerfile, build the Docker container, run an instance of the Docker container, and display output from the docker ps -a command showing details of the container currently running. Then you will investigate the Docker container, stop the container from running, and remove the container.
Important
Be sure you stopped any other web server processes you may still have running from the previous parts of this lab.
Step 1: Update Docker and Runc🔗
Before you can run the bash script you just wrote you must update Docker and its dependency, runc.
-
In a terminal window, use the following command to update the information about the latest versions of available packages.
devasc@labvm:~/labs/devnet-src/sample-app$ sudo apt-get update Get:1 http://security.ubuntu.com/ubuntu focal-security InRelease [128 kB] Hit:2 http://ppa.launchpad.net/git-core/ppa/ubuntu focal InRelease Hit:3 http://archive.ubuntu.com/ubuntu focal InRelease Get:4 http://archive.ubuntu.com/ubuntu focal-updates InRelease [128 kB] Get:5 http://security.ubuntu.com/ubuntu focal-security/main amd64 Packages [3,564 kB] Get:6 http://archive.ubuntu.com/ubuntu focal-backports InRelease [128 kB] Get:7 http://archive.ubuntu.com/ubuntu focal-updates/main amd64 Packages [3,957 kB] Get:8 http://security.ubuntu.com/ubuntu focal-security/main i386 Packages [881 kB] Get:9 http://archive.ubuntu.com/ubuntu focal-updates/main i386 Packages [1,114 kB] Fetched 9,900 kB in 2s (4,708 kB/s) Reading package lists... Done devasc@labvm:~/labs/devnet-src/sample-app$ -
Install the latest updated versions of Docker and runc. Note that the package name for Docker is
docker.io, not docker. The package called docker is an entirely different application. Don't miss theruncat the end of the command.devasc@labvm:~/labs/devnet-src/sample-app$ sudo apt-get install -y docker.io runc Reading package lists... Done Building dependency tree Reading state information... Done The following additional packages will be installed: libseccomp2 Suggested packages: aufs-tools btrfs-progs debootstrap docker-buildx docker-compose-v2 docker-doc rinse zfs-fuse | zfsutils The following packages will be upgraded: docker.io libseccomp2 runc 3 upgraded, 0 newly installed, 0 to remove and 670 not upgraded. <output omitted for brevity> Processing triggers for man-db (2.9.1-1) ... Processing triggers for libc-bin (2.31-0ubuntu9) ... devasc@labvm:~/labs/devnet-src/sample-app$ -
Verify the versions of Docker and runc. They should be greater than or equal to the version numbers shown in the sample output below
devasc@labvm:~/labs/devnet-src/sample-app$ docker -v
Docker version 26.1.3, build 26.1.3-0ubuntu1~20.04.1
devasc@labvm:~/labs/devnet-src/sample-app$ runc -v
runc version 1.1.12-0ubuntu2~20.04.1
spec: 1.0.2-dev
go: go1.21.1
libseccomp: 2.5.1
devasc@labvm:~/labs/devnet-src/sample-app$
Step 2: Execute the Bash script🔗
-
Execute the Bash script from the command line. You should see output similar to the following. After creating the
tempdirdirectories, the script executes the commands to build the Docker container. Notice thatStep 7/7in the output executes thesample_app.pythat creates the web server. Also, notice the container ID. Yours will be different than the one shown in the output, and you will see this in the Docker command prompt later in the lab.Note
You may see some warnings while the script is executing. They should not affect the function of the app.
devasc@labvm:~/labs/devnet-src/sample-app$ bash ./sample-app.sh
DEPRECATED: The legacy builder is deprecated and will be removed in a future release.
            Install the buildx component to build images with BuildKit:
            https://docs.docker.com/go/buildx/

Sending build context to Docker daemon  6.144kB
Step 1/7 : FROM python
latest: Pulling from library/python
866771c43bf5: Pull complete
ed881fbf1b07: Pull complete
9da421ddeb65: Pull complete
a793e3c6bce8: Pull complete
36a6d998ca16: Pull complete
ab1b8c92e120: Pull complete
6052218b0e44: Pull complete
Digest: sha256:61346539f7b26521a230e72c11da5ebd872924745074b19736e7d65ba748c366
Status: Downloaded newer image for python:latest
 ---> d8f278e9e42a
Step 2/7 : RUN pip install flask
 ---> Running in 735c9c328c96
Collecting flask
  Downloading flask-3.1.3-py3-none-any.whl.metadata (3.2 kB)
Collecting blinker>=1.9.0 (from flask)
  Downloading blinker-1.9.0-py3-none-any.whl.metadata (1.6 kB)
Collecting click>=8.1.3 (from flask)
  Downloading click-8.3.1-py3-none-any.whl.metadata (2.6 kB)
Collecting itsdangerous>=2.2.0 (from flask)
  Downloading itsdangerous-2.2.0-py3-none-any.whl.metadata (1.9 kB)
Collecting jinja2>=3.1.2 (from flask)
  Downloading jinja2-3.1.6-py3-none-any.whl.metadata (2.9 kB)
Collecting markupsafe>=2.1.1 (from flask)
  Downloading markupsafe-3.0.3-cp314-cp314-manylinux2014_x86_64.manylinux_2_17_x86_64.manylinux_2_28_x86_64.whl.metadata (2.7 kB)
Collecting werkzeug>=3.1.0 (from flask)
  Downloading werkzeug-3.1.6-py3-none-any.whl.metadata (4.0 kB)
Downloading flask-3.1.3-py3-none-any.whl (103 kB)
Downloading blinker-1.9.0-py3-none-any.whl (8.5 kB)
Downloading click-8.3.1-py3-none-any.whl (108 kB)
Downloading itsdangerous-2.2.0-py3-none-any.whl (16 kB)
Downloading jinja2-3.1.6-py3-none-any.whl (134 kB)
Downloading markupsafe-3.0.3-cp314-cp314-manylinux2014_x86_64.manylinux_2_17_x86_64.manylinux_2_28_x86_64.whl (23 kB)
Downloading werkzeug-3.1.6-py3-none-any.whl (225 kB)
Installing collected packages: markupsafe, itsdangerous, click, blinker, werkzeug, jinja2, flask

Successfully installed blinker-1.9.0 click-8.3.1 flask-3.1.3 itsdangerous-2.2.0 jinja2-3.1.6 markupsafe-3.0.3 werkzeug-3.1.6
WARNING: Running pip as the 'root' user can result in broken permissions and conflicting behaviour with the system package manager, possibly rendering your system unusable. It is recommended to use a virtual environment instead: https://pip.pypa.io/warnings/venv. Use the --root-user-action option if you know what you are doing and want to suppress this warning.

[notice] A new release of pip is available: 25.3 -> 26.0.1
[notice] To update, run: pip install --upgrade pip
 ---> Removed intermediate container 735c9c328c96
 ---> 9bbfe4f350b7
Step 3/7 : COPY ./static /home/myapp/static/
 ---> a97b003ffb64
Step 4/7 : COPY ./templates /home/myapp/templates/
 ---> 7f4d76b9aacd
Step 5/7 : COPY sample_app.py /home/myapp/
 ---> 22edb219b811
Step 6/7 : EXPOSE 8080
 ---> Running in 7d53e2bd202a
 ---> Removed intermediate container 7d53e2bd202a
 ---> d5f95163bf37
Step 7/7 : CMD python3 /home/myapp/sample_app.py
 ---> Running in c80bfe065ba3
 ---> Removed intermediate container c80bfe065ba3
 ---> 003328deaec5
Successfully built 003328deaec5
Successfully tagged sampleapp:latest
0d1adb17159e9a7ee0efb4b0fd84e5cc88738e10564f6d1675b830eb8afa2bee
CONTAINER ID   IMAGE       COMMAND                  CREATED        STATUS                  PORTS                                       NAMES
0d1adb17159e   sampleapp   "/bin/sh -c 'python3…"   1 second ago   Up Less than a second   0.0.0.0:8080->8080/tcp, :::8080->8080/tcp   samplerunning
devasc@labvm:~/labs/devnet-src/sample-app$
Note
If at any point you need to remove a docker container (for example, if there is an error in your code), you can do so with the command
docker rm <container_name>. You may need to stop the container first, with the commanddocker stop <container_name>.
Step 3: Investigate the running Docker container and the web app🔗
-
The creation of the
tempdirdirectories is not shown in the output for the script. You could addechocommands to print out messages when they are successfully created. You can also verify they are there with thelscommand. Remember, this directory has the files and folders used to build the container and launch the web app. It is not the container that was built.devasc@labvm:~/labs/devnet-src/sample-app$ ls tempdir/ Dockerfile sample_app.py static templates devasc@labvm:~/labs/devnet-src/sample-app$ -
Notice the Dockerfile created by your bash script. Open this file to see how it looks in its final form without the
echocommands.devasc@labvm:~/labs/devnet-src/sample-app$ cat tempdir/Dockerfile FROM python RUN pip install flask COPY ./static /home/myapp/static/ COPY ./templates /home/myapp/templates/ COPY sample_app.py /home/myapp/ EXPOSE 8080 CMD python3 /home/myapp/sample_app.py devasc@labvm:~/labs/devnet-src/sample-app$ -
The output for the
docker ps -acommand may be hard to read depending on the width of your terminal display. You can redirect it to a text file where you can view it better without word wrapping. Do that now.devasc@labvm:~/labs/devnet-src/sample-app$ docker ps -a >> running.txt devasc@labvm:~/labs/devnet-src/sample-app$ -
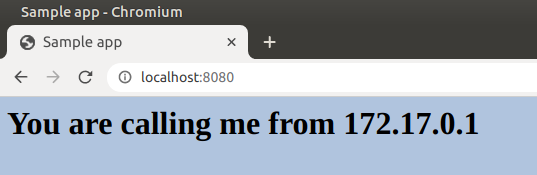
The Docker container creates its own IP address from a private network address space. Verify the web app is running and reporting the IP address. In Chromium, open
http://localhost:8080. You should see the message You are calling me from 172.17.0.1 formatted as H1 on a light steel blue background (notice this is 172.17.0.1 and not 127.0.0.1 as in previous examples).Important
DO NOT PROCEED FURTHER UNTIL THIS WORKS.
-
By default, Docker uses the 172.17.0.0/16 IPv4 subnet for container networking (this subnet can be changed if necessary). Use the command
ip addressto display the IP addresses used by your instance of the DEVASC VM. You should see the loopback address127.0.0.1that the web app used earlier in the lab and the new Docker interface with the IP address172.17.0.1.devasc@labvm:~/labs/devnet-src/sample-app$ ip address show dev lo 1: lo: <LOOPBACK,UP,LOWER_UP> mtu 65536 qdisc noqueue state UNKNOWN group default qlen 1000 link/loopback 00:00:00:00:00:00 brd 00:00:00:00:00:00 inet 127.0.0.1/8 scope host lo valid_lft forever preferred_lft forever inet6 ::1/128 scope host valid_lft forever preferred_lft forever devasc@labvm:~/labs/devnet-src/sample-app$ ip address show dev docker0 4: docker0: <BROADCAST,MULTICAST,UP,LOWER_UP> mtu 1500 qdisc noqueue state UP group default link/ether 02:42:c2:d1:8a:2d brd ff:ff:ff:ff:ff:ff inet 172.17.0.1/16 brd 172.17.255.255 scope global docker0 valid_lft forever preferred_lft forever inet6 fe80::42:c2ff:fed1:8a2d/64 scope link valid_lft forever preferred_lft forever devasc@labvm:~/labs/devnet-src/sample-app$
Step 4: Access and explore the running container🔗
Remember that a Docker container is a way of encapsulating everything you need to run your application so that it can easily be deployed in a variety of environments, not just in your DEVASC VM.
-
To access the running container, enter the
docker exec -itcommand specifying the name of the running container (samplerunning) and that you want a bash shell (/bin/bash). The-ioption specifies that you want it to be interactive and the-toption specifies that you want terminal access. The prompt changes toroot@containerID. Your container ID will be different than the one shown below. Notice the container ID matches the ID shown in the output fromdocker ps -a.devasc@labvm:~/labs/devnet-src/sample-app$ docker exec -it samplerunning /bin/bash root@0d1adb17159e:/# -
You are now connected as
rooton the command line of yoursamplerunningDocker container. From here, you can use Linux commands to explore the Docker container. Enterlsto see the directory structure at the root level.root@0d1adb17159e:/# ls bin boot dev etc home lib lib64 media mnt opt proc root run sbin srv sys tmp usr var root@0d1adb17159e:/# -
Recall that in your bash script, you added commands in the Dockerfile that copied your app directories and files to the
home/myappdirectory inside the Docker container. Enter thelscommand again for that folder to see yoursample_app.pyscript and directories. To get a better understanding of what is included in your Docker container, you may wish to use thelscommand to examine other directories such as/etcand/bin.root@0d1adb17159e:/# ls home/myapp/ sample_app.py static templates root@0d1adb17159e:/# -
Exit the Docker container to return to the DEVASC VM command line.
root@0d1adb17159e:/# exit
exit
devasc@labvm:~/labs/devnet-src/sample-app$
Step 5: Stop and remove the Docker container🔗
-
You can stop the Docker container with the
docker stopcommand specifying the name of the running container. It will take a few seconds to clean up and cache the container. You can see that it still exists by entering thedocker ps -acommand. However, if you refresh the web page forhttp://localhost:8080, you will see the web app is no longer running.devasc@labvm:~/labs/devnet-src/sample-app$ docker stop samplerunning samplerunning devasc@labvm:~/labs/devnet-src/sample-app$ docker ps -a CONTAINER ID IMAGE COMMAND CREATED STATUS PORTS NAMES 0d1adb17159e sampleapp "/bin/sh -c 'python3…" 16 minutes ago Exited (137) 4 seconds ago samplerunning devasc@labvm:~/labs/devnet-src/sample-app$ -
You can restart a stopped container with the
docker startcommand. The container will immediately spin up.devasc@labvm:~/labs/devnet-src/sample-app$ docker start samplerunning samplerunning devasc@labvm:~/labs/devnet-src/sample-app$ -
To permanently remove the container, first stop it and then remove it with the
docker rmcommand. You can always rebuild it again executing the sample-app program. Use thedocker ps -acommand to verify the container has been removed.devasc@labvm:~/labs/devnet-src/sample-app$ docker stop samplerunning samplerunning devasc@labvm:~/labs/devnet-src/sample-app$ docker rm samplerunning samplerunning devasc@labvm:~/labs/devnet-src/sample-app$ docker ps -a CONTAINER ID IMAGE COMMAND CREATED STATUS PORTS NAMES devasc@labvm:~/labs/devnet-src/sample-app$
Step 6: Commit these changes to the repository🔗
-
Use
git statusto see which files have been added and modified since the last commit.devasc@labvm:~/labs/devnet-src/sample-app$ git status On branch main Changes not staged for commit: (use "git add <file>..." to update what will be committed) (use "git restore <file>..." to discard changes in working directory) modified: sample-app.sh Untracked files: (use "git add <file>..." to include in what will be committed) running.txt tempdir/ no changes added to commit (use "git add" and/or "git commit -a") devasc@labvm:~/labs/devnet-src/sample-app$ -
Add all the files and folders to the staging area with
git add .(don't miss the "." at the end). Verify all files have now been staged withgit status.devasc@labvm:~/labs/devnet-src/sample-app$ git add . devasc@labvm:~/labs/devnet-src/sample-app$ git status On branch main Changes to be committed: (use "git restore --staged <file>..." to unstage) new file: running.txt modified: sample-app.sh new file: tempdir/Dockerfile new file: tempdir/sample_app.py new file: tempdir/static/style.css new file: tempdir/templates/index.html devasc@labvm:~/labs/devnet-src/sample-app$ -
Commit the changes to the local repository using the message Created Dockerfile.
devasc@labvm:~/labs/devnet-src/sample-app$ git commit -m "Created Dockerfile"
[main aa3f42d] Created Dockerfile
 6 files changed, 56 insertions(+)
 create mode 100644 running.txt
 create mode 100644 tempdir/Dockerfile
 create mode 100644 tempdir/sample_app.py
 create mode 100644 tempdir/static/style.css
 create mode 100644 tempdir/templates/index.html
devasc@labvm:~/labs/devnet-src/sample-app$
5.3 Build a CI/CD Pipeline🔗
Objectives🔗
Part 1: Modify the Sample App and Push Changes to Git
Part 2: Download and Run the Jenkins Docker Image
Part 3: Configure Jenkins
Part 4: Use Jenkins to Run a Build of Your App
Part 5: Use Jenkins to Test a Build
Part 6: Create a Pipeline in Jenkins
Background / Scenario🔗
In this lab, you will install a Docker container that includes the latest version of Jenkins. You will configure Jenkins and then use Jenkins to download and run your Sample App program. Next, you will create a testing job inside Jenkins that will verify your Sample App program successfully runs each time you build it. Finally, you will integrate your Sample App and testing job into a Continuous Integration/Continuous Development pipeline that will verify your Sample App is ready to be deployed each time you change the code.
Instructions🔗
Part 1: Modify the Sample App and Push Changes to Git🔗
In Part 2, you will install a Jenkins Docker image that will use port 8080. Recall that your sample-app files are also specifying port 8080. The Flask server and Jenkins server cannot both use 8080 at the same time.
In this part, you will change the port number used by the sample-app files, run the sample-app again to verify it works on the new port, and then push your changes to your GitHub repository.
Step 1: Open the sample-app files🔗
Make sure you are still in the ~/labs/devnet-src/sample-app directory as these are the files that are associated with your GitHub repository. Open both sample_app.py and sample-app.sh for editing.
Step 2: Edit the sample-app files🔗
-
In
sample_app.py, change the one instance of port 8080 to 5050 as shown below.Pythonfrom flask import Flask from flask import request from flask import render_template sample = Flask(__name__) @sample.route("/") def main(): return render_template("index.html") if __name__ == "__main__": sample.run(host="0.0.0.0", port=5050) -
In
sample-app.sh, change the three instances of port 8080 to 5050 as shown below.#!/bin/bash mkdir tempdir mkdir tempdir/templates mkdir tempdir/static cp sample_app.py tempdir/. cp -r templates/* tempdir/templates/. cp -r static/* tempdir/static/. echo "FROM python" >> tempdir/Dockerfile echo "RUN pip install flask" >> tempdir/Dockerfile echo "COPY ./static /home/myapp/static/" >> tempdir/Dockerfile echo "COPY ./templates /home/myapp/templates/" >> tempdir/Dockerfile echo "COPY sample_app.py /home/myapp/" >> tempdir/Dockerfile echo "EXPOSE 5050" >> tempdir/Dockerfile echo "CMD python3 /home/myapp/sample_app.py" >> tempdir/Dockerfile cd tempdir docker build -t sampleapp . docker run -t -d -p 5050:5050 --name samplerunning sampleapp docker ps -a
Step 3: Build and verify the sample-app🔗
-
Enter the
bashcommand to build your app using the new port 5050.devasc@labvm:~/labs/devnet-src/sample-app$ bash ./sample-app.sh Sending build context to Docker daemon 6.144kB Step 1/7 : FROM python ---> d8f278e9e42a Step 2/7 : RUN pip install flask ---> Using cache ---> 9bbfe4f350b7 Step 3/7 : COPY ./static /home/myapp/static/ ---> Using cache ---> a97b003ffb64 Step 4/7 : COPY ./templates /home/myapp/templates/ ---> Using cache ---> 7f4d76b9aacd Step 5/7 : COPY sample_app.py /home/myapp/ ---> 82bab0a44d53 Step 6/7 : EXPOSE 5050 ---> Running in 80a695244045 ---> Removed intermediate container 80a695244045 ---> a506392523eb Step 7/7 : CMD python3 /home/myapp/sample_app.py ---> Running in 462534633c42 ---> Removed intermediate container 462534633c42 ---> c44773869790 Successfully built c44773869790 Successfully tagged sampleapp:latest f68433915e7ab74cbfeafce2a223fcf5665afc76e35442ea42e2aa8b5e4a6fb2 CONTAINER ID IMAGE COMMAND CREATED STATUS PORTS NAMES f68433915e7a sampleapp "/bin/sh -c 'python3…" Less than a second ago Up Less than a second 0.0.0.0:5050->5050/tcp, :::5050->5050/tcp samplerunning devasc@labvm:~/labs/devnet-src/sample-app$ -
Open a Chromium browser tab and navigate to
http://localhost:5050. You should see the message You are calling me from 172.17.0.1.
-
Stop the docker container with
docker stop samplerunning.devasc@labvm:~/labs/devnet-src/sample-app$ docker stop samplerunning samplerunning devasc@labvm:~/labs/devnet-src/sample-app$ -
Remove the docker container with
docker rm samplerunning.devasc@labvm:~/labs/devnet-src/sample-app$ docker rm samplerunning samplerunning devasc@labvm:~/labs/devnet-src/sample-app$
Step 4: Push your changes to GitHub🔗
-
Now you are ready to commit your changes to your Git repository. Enter the following commands.
devasc@labvm:~/labs/devnet-src/sample-app$ git add . devasc@labvm:~/labs/devnet-src/sample-app$ git status On branch master Changes to be committed: (use "git restore --staged <file>..." to unstage) modified: sample-app.sh modified: sample_app.py modified: tempdir/Dockerfile modified: tempdir/sample_app.py devasc@labvm:~/labs/devnet-src/sample-app$ -
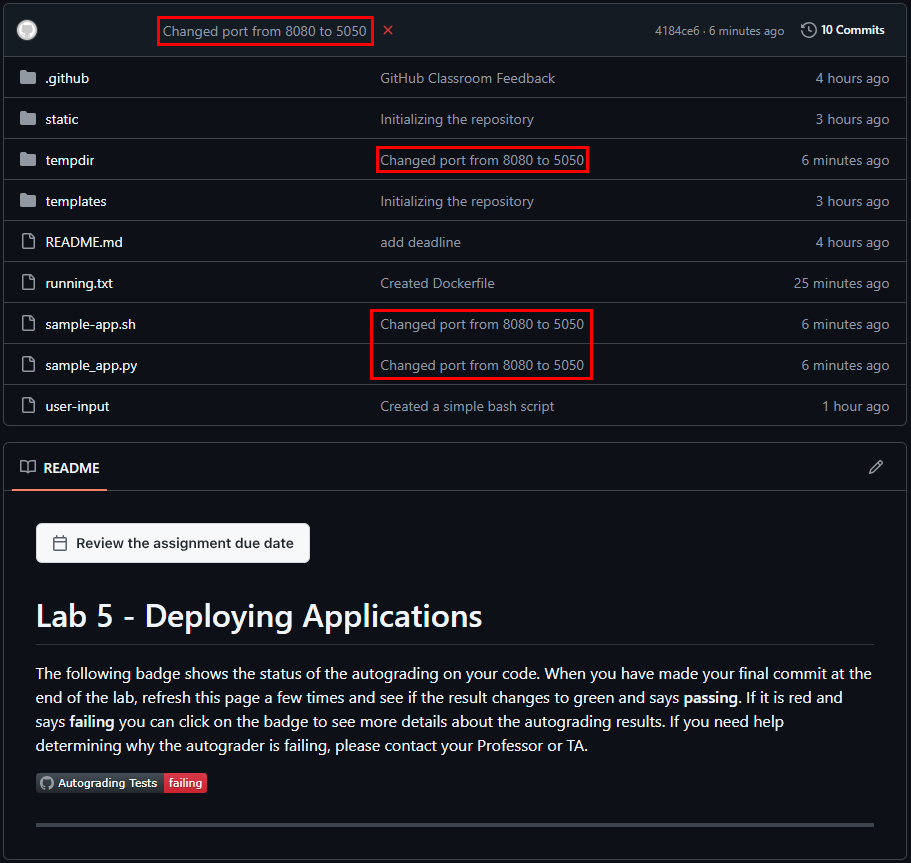
Commit the changes to the local repository using the message Changed port from 8080 to 5050.
devasc@labvm:~/labs/devnet-src/sample-app$ git commit -m "Changed port from 8080 to 5050" [main 4184ce6] Changed port from 8080 to 5050 4 files changed, 5 insertions(+), 5 deletions(-) devasc@labvm:~/labs/devnet-src/sample-app$ -
In an upcoming step, you will be configuring Jenkins to pull a copy of your code from GitHub, so let's push these changes to GitHub now. Remember to use your Personal Access Token when asked for your GitHub password.
devasc@labvm:~/labs/devnet-src/sample-app$ git push origin main Username for 'https://github.com': <username> Password for 'https://<username>@github.com': Personal Access Token Enumerating objects: 24, done. Counting objects: 100% (24/24), done. Delta compression using up to 2 threads Compressing objects: 100% (21/21), done. Writing objects: 100% (21/21), 2.73 KiB | 2.73 MiB/s, done. Total 21 (delta 8), reused 0 (delta 0), pack-reused 0 (from 0) remote: Resolving deltas: 100% (8/8), done. To github.com:Ontario-Tech-NITS/lab-5-application-deployment-<username>.git c638a4b..4184ce6 main -> main devasc@labvm:~/labs/devnet-src/sample-app$ -
In your browser, return to the repository on github.com and verify your changes are present, along with the corresponding commit messages.
Tip
As mentioned before, the Autograding Tests will show failing since you haven't completed the lab yet. They only show passing if all of the tests are successful. You may also get an e-mail alert from GitHub that your tests are failing. You can safely ignore that until the lab is complete.
Part 2: Download and Run the Jenkins Docker Image🔗
In this part, you will download the Jenkins Docker image. You will then start an instance of the image and verify that the Jenkins server is running.
Step 1: Download the Jenkins Docker image🔗
The Jenkins Docker image is stored here: https://hub.docker.com/r/jenkins/jenkins. At the time of the writing of this lab, that site specifies that you use the command docker pull jenkins/jenkins to download the latest Jenkins container.
-
Download the Jenkins Docker container from Docker Hub. You should get output similar to the following (your output may vary slightly):
devasc@labvm:~/labs/devnet-src/sample-app$ docker pull jenkins/jenkins
Using default tag: latest
latest: Pulling from jenkins/jenkins
53c88f1dfeb7: Pull complete
0a00411d4b37: Pull complete
701f6e686815: Pull complete
9be4edd19174: Pull complete
c8dc22cab1b3: Pull complete
a2a1d17a551e: Pull complete
d25669f3d454: Pull complete
e060a11317c3: Pull complete
49d42eeda86a: Pull complete
7065cd6dcc99: Pull complete
b16d777bb084: Pull complete
f07b36c014af: Pull complete
Digest: sha256:02b23d7053a0849e7c9c275ad1fb5d1308713189e644707300145dd270c2037b
Status: Downloaded newer image for jenkins/jenkins:latest
docker.io/jenkins/jenkins:latest
devasc@labvm:~/labs/devnet-src/sample-app$
Step 2: Start the Jenkins Docker container🔗
-
Enter the following command on one line (no line breaks). This command will start the Jenkins Docker container and then allow Docker commands to be executed inside your Jenkins server.
devasc@labvm:~/labs/devnet-src/sample-app$ docker run --rm -u root -p 8080:8080 -v jenkins-data:/var/jenkins_home -v $(which docker):/usr/bin/docker -v /var/run/docker.sock:/var/run/docker.sock -v "$HOME":/home --name jenkins_server jenkins/jenkinsThe options used in this docker run command are as follows:
-
--rmThis option automatically removes the Docker container when you stop running it. -
-uThis option specifies the user. You want this Docker container to run asrootso that all Docker commands entered inside the Jenkins server are allowed. -
-pThis option specifies the port the Jenkins server will run on locally. -
-vThese options bind mount volumes needed for Jenkins and Docker.- The first
-vspecifies where Jenkins data will be stored (/var/jenkins_home). - The second and third
-vspecifies where to find the Docker executable and socket so that you can run Docker inside the Docker container that is running the Jenkins server (nested Docker containers). - The last
-vspecifies the PATH variable for the home directory.
- The first
-
--nameThis is the name that the new Docker container will use. -
jenkins/jenkinsThis is the name of the Docker image that will be used to build the container. It's the image we pulled down from Docker Hub in the previous step.
-
Step 3: Verify the Jenkins server is running🔗
-
Watch for the following output on the screen (it may not be the very last line of the output, so look carefully):
INFO hudson.lifecycle.Lifecycle#onReady: Jenkins is fully up and running -
The Jenkins server should now be running. Copy the admin password that displays in the output (your password will be different than the one shown below).
Important
Don't use Ctrl+C to try to copy the password or you may kill your Jenkins Docker container.
<output omitted>
*************************************************************
*************************************************************
*************************************************************

Jenkins initial setup is required. An admin user has been created and a password generated.
Please use the following password to proceed to installation:

77dc402e31324c1b917f230af7bfebf2

This may also be found at: /var/jenkins_home/secrets/initialAdminPassword

*************************************************************
*************************************************************
*************************************************************
<output omitted>
2020-05-12 16:34:29.608+0000 [id=19] INFO hudson.WebAppMain$3#run: Jenkins is fully up and running
Important
Do not enter any commands in this server window. If you accidentally stop the Jenkins server, you will need to re-enter the
docker runcommand from Step 2 above.Note
If you lose the password or you need to restart the Jenkins sever, you can always retrieve the password by accessing the command line of Jenkins Docker container. Create a second terminal window and enter the following commands so that you do not stop the Jenkins server. You don't need to do this unless you can't find the password.
devasc@labvm:~/labs/devnet-src/sample-app$ docker exec -it jenkins_server /bin/bash
root@19d2a847a54e:/# cat /var/jenkins_home/secrets/initialAdminPassword
77dc402e31324c1b917f230af7bfebf2
root@19d2a847a54e:/# exit
exit
devasc@labvm:~/labs/devnet-src/sample-app$
Step 4: Investigate the levels of abstraction currently running on your computer🔗
-
The following ASCII diagram shows the levels of abstraction in this Docker-inside-Docker (DinD) implementation. This level of complexity is not unusual in today's networks and cloud infrastructures.
+----------------------------------------+
|    Your Computer's Operating System    |
|  +----------------------------------+  |
|  |            DEVASC VM             |  |
|  |  +----------------------------+  |  |
|  |  |       Docker container     |  |  |
|  |  |  +----------------------+  |  |  |
|  |  |  |    Jenkins server    |  |  |  |
|  |  |  |  +----------------+  |  |  |  |
|  |  |  |  |Docker container|  |  |  |  |
|  |  |  |  +----------------+  |  |  |  |
|  |  |  +----------------------+  |  |  |
|  |  +----------------------------+  |  |
|  +----------------------------------+  |
+----------------------------------------+
Part 3: Configure Jenkins🔗
In this Part, you will complete the initial configuration of the Jenkins server.
Step 1: Update Chromium🔗
-
Before using the Jenkins web interface, you will need to update the Chromium web browser to a newer version using Ubuntu Snap. Close all open Chromium browser windows and open a second terminal window, then refresh the Chromium snap to install the latest version.
devasc@labvm:~/labs/devnet-src/sample-app$ sudo snap refresh chromium
chromium 145.0.7632.116 from Canonical✓ refreshed
devasc@labvm:~/labs/devnet-src/sample-app$
Note
It will likely take a few minutes to complete the update. Wait until you are returned to the command prompt and you see ✓ refreshed before continuing to the next step.
Step 2: Open a web browser tab🔗
-
Open Chromium and navigate to
http://localhost:8080/, then login with your copied admin password.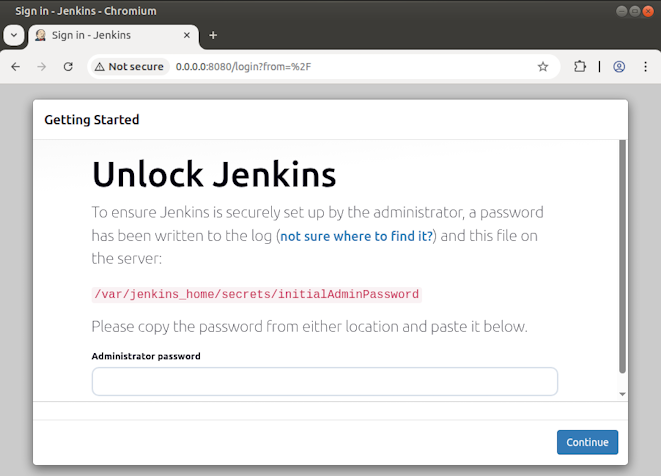
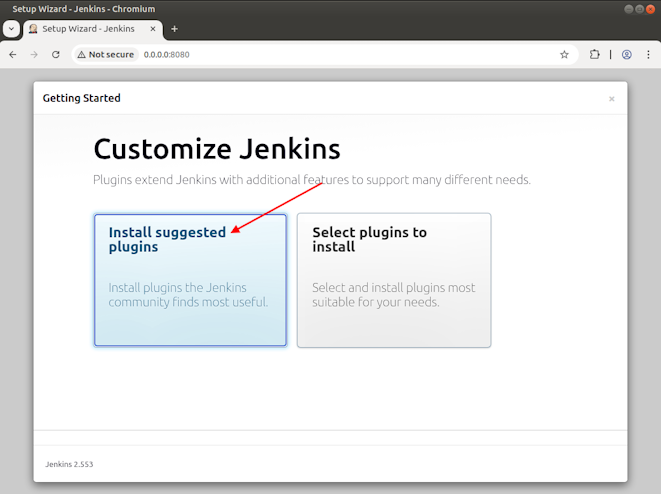
Step 3: Install the recommended Jenkins plugins🔗
-
Click Install suggested plugins and wait for Jenkins to download and install the plugins. In the terminal window, you will see log messages as the installation proceeds. Be sure that you do not close this terminal window. You can open another terminal window for access to the command line if necessary.
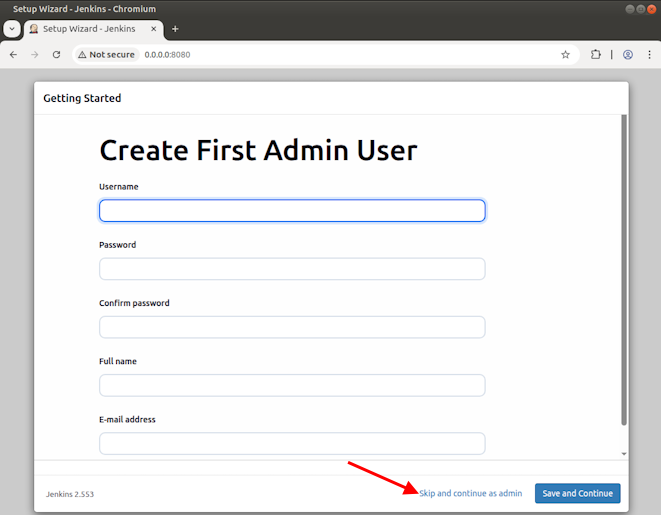
Step 4: Skip creating a new admin user🔗
-
After the installation finishes, you are presented with the Create First Admin User window. For now, click Skip and continue as admin at the bottom.
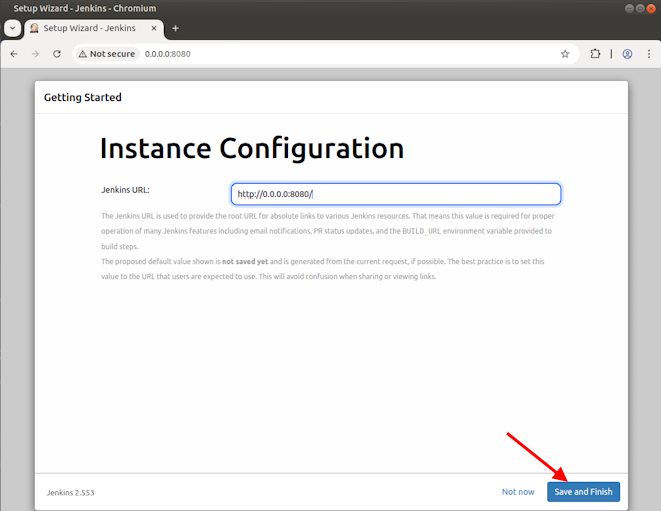
Step 5: Create an instance configuration🔗
-
In the Instance Configuration window, do not change anything. Click Save and Finish at the bottom.
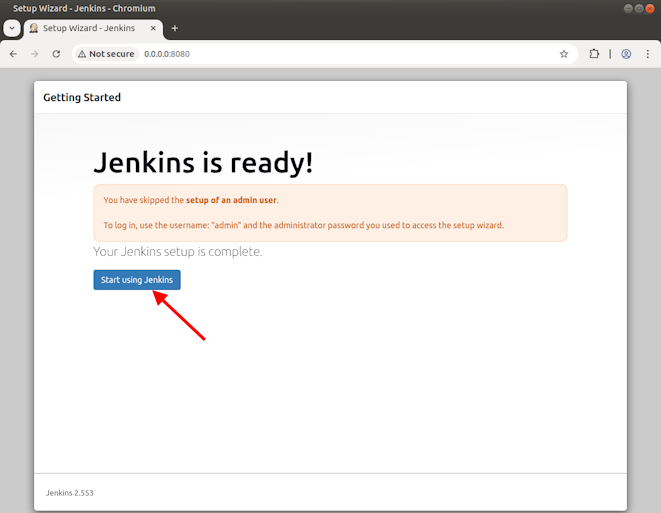
Step 6: Start using Jenkins🔗
-
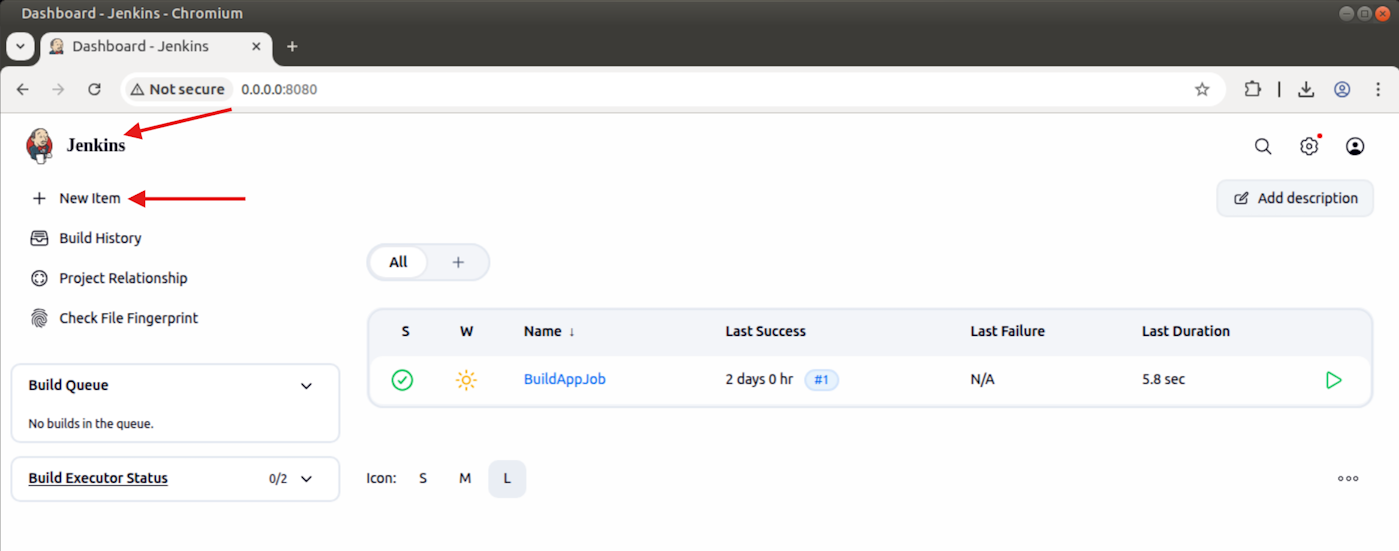
In the next window, click Start using Jenkins. You should now be on the main dashboard with a Welcome to Jenkins! message.
Part 4: Use Jenkins to Run a Build of Your App🔗
The fundamental unit of Jenkins is the job (also known as a project). You can create jobs that do a variety of tasks including the following:
-
Retrieve code from a source code management repository such as GitHub.
-
Build an application using a script or build tool.
-
Package an application and run it on a server.
In this part, you will create a simple Jenkins job that retrieves the latest version of your sample-app from GitHub and runs the build script. In Jenkins, you can then test your app and add it to a development pipeline.
Step 1: Create a new job🔗
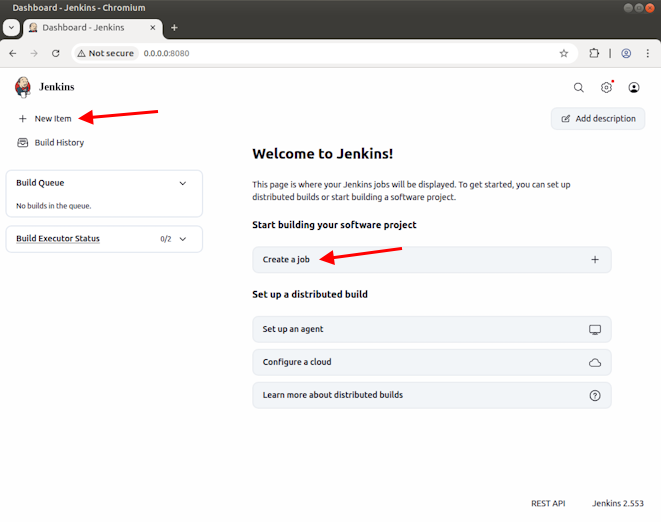
-
Click the Create a job link directly below the Welcome to Jenkins! message. Alternatively, you can click New Item in the menu on the left.
-
In the Enter an item name field, fill in the name
BuildAppJob. Click Freestyle project as the job type and click OK at the bottom of the screen.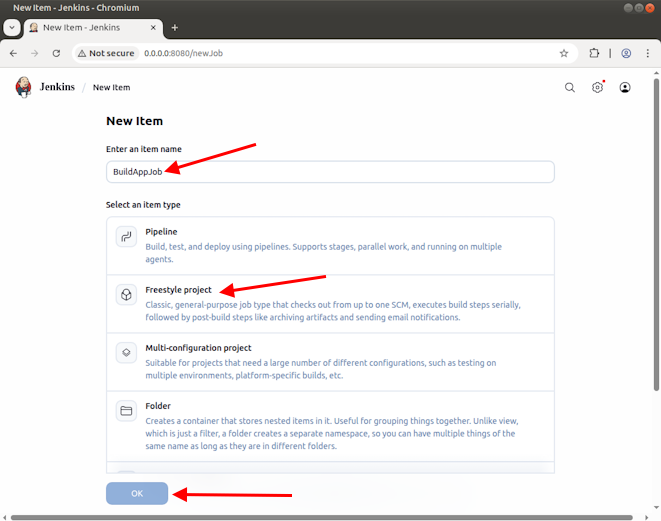
Note
The acronym SCM in the description of the Freestyle project stands for Source Code Management, which is a classification of software that is responsible for tracking and controlling changes in software (e.g., Git)
Step 2: Configure the Jenkins BuildAppJob🔗
You are now in the configuration window where you can enter details about your job. The tabs across the left side are just shortcuts to the sections below. Click through the tabs to explore the options you can configure. For this simple job, you only need to add a few configuration details.
-
Click the General tab, add a description for your job. For example,
My first Jenkins job. -
Click the Source Code Management tab and choose the Git radio button. In the Repository URL field, add your GitHub repository link for the
sample-apptaking care to enter your case-sensitive username. Be sure to add the.gitextension at the end of your URL. Use the HTTP URL, even if you have SSH configured. For example: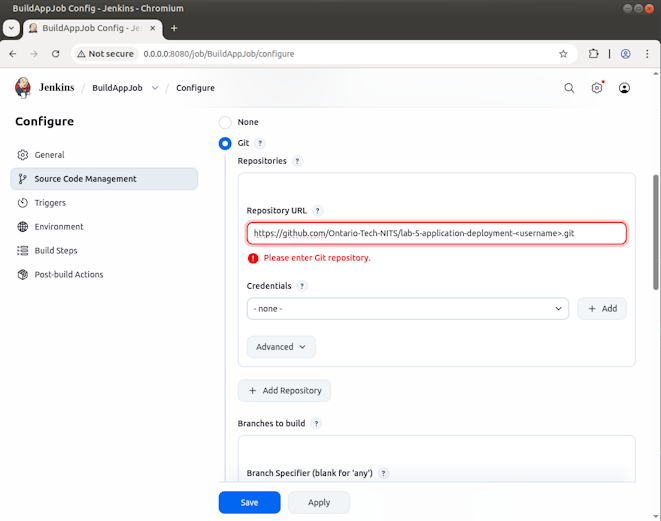
Note
You will receive an error message that the connection has failed. This is because you have not selected the credentials yet.
Note
It is also possible to connect to your GitHub repository using SSH, but it's several extra steps and is outside the scope of this lab.
-
For Credentials, click the Add button and choose Global.
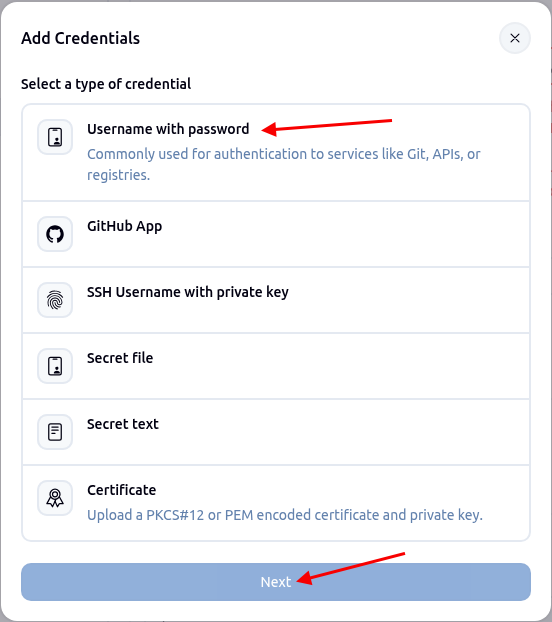
-
In the Add Credentials dialog box, select the Username with password option, then click Next.
-
Fill in your GitHub username in the Username field and your Personal Access Token in the password field, then click Create.
-
In the dropdown for Credentials where it currently says None, choose the credentials you just configured.
-
After you have added the correct URL and credentials, Jenkins tests access to the repository.You should have no error messages. If you do, verify your URL and credentials. You will need to add them again as there is no way at this point to delete the ones you previously entered.
-
Under Branches to build, change
*/masterto*/main.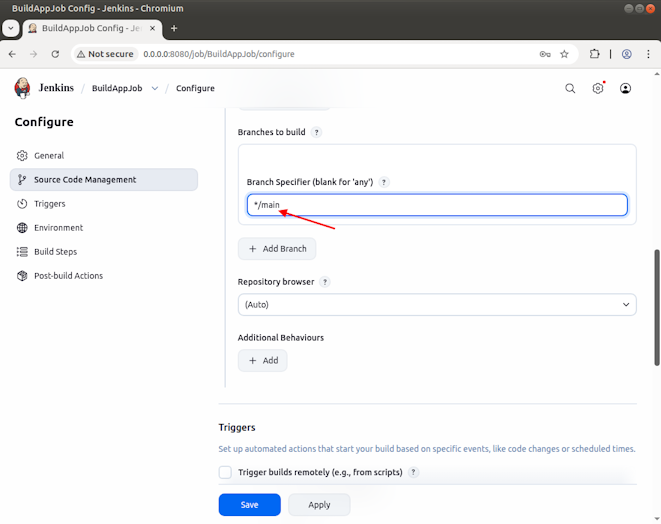
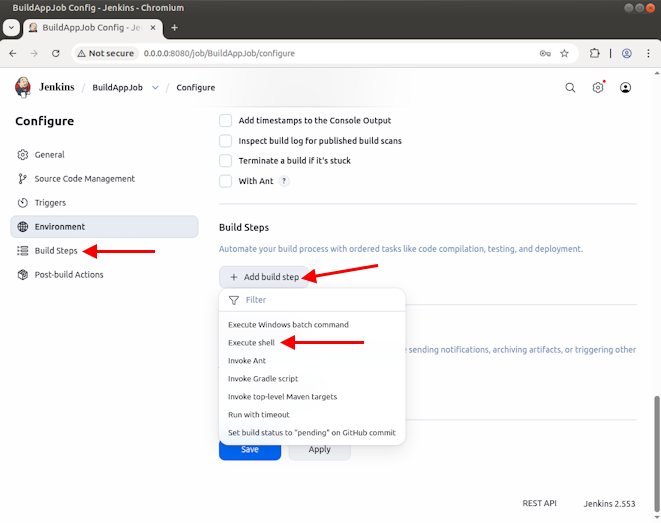
-
On the left of the BuildAppJob configuration window, click the Build Steps tab.
-
Click the From Add build step button, and choose Execute shell from the dropdown.
-
In the Command field, enter the command you use to run the build for
sample-app.shscript.bash ./sample-app.sh -
Click the Save button. You are returned to the Jenkins dashboard with the BuildAppJob selected.
Step 3: Have Jenkins build the app🔗
-
On the left side, click Build Now to start the job. Jenkins will download your Git repository and execute the build command
bash ./sample-app.sh. Your build should succeed because you have not changed anything in the code (green checkmark). Your build number should be #1 unless you have built the app multiple times.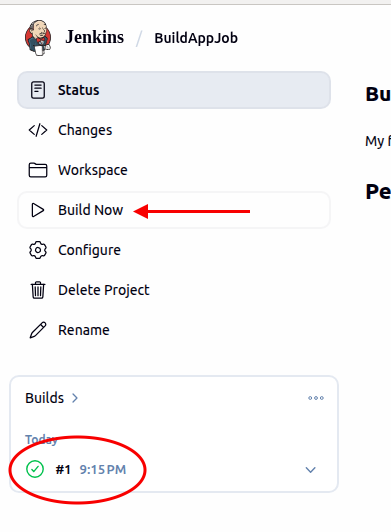
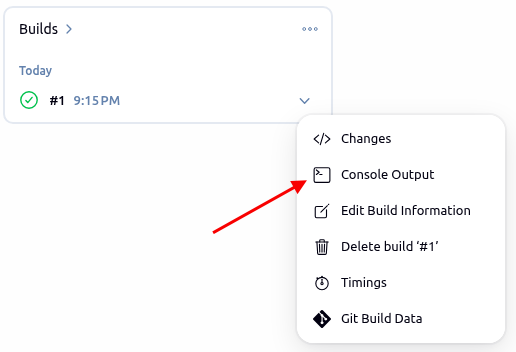
Step 4: View the console output🔗
-
On the left, click the dropdown error next to your successful build and select Console Output.
-
You should see output similar to the following. Notice the success messages at the bottom as well as the output from the
docker ps -acommand. Two docker containers are running: one for yoursample-apprunning on local port 5050 and one for Jenkins on local port 8080.Started by user admin Running as SYSTEM Building in workspace /var/jenkins_home/workspace/BuildAppJob The recommended git tool is: NONE using credential e3276386-7924-45f2-8558-4a8410522a2a Cloning the remote Git repository Cloning repository https://github.com/Ontario-Tech-NITS/lab-5-application-deployment-<username>.git > git init /var/jenkins_home/workspace/BuildAppJob # timeout=10 Fetching upstream changes from https://github.com/Ontario-Tech-NITS/lab-5-application-deployment-<username>.git > git --version # timeout=10 > git --version # 'git version 2.47.3' using GIT_ASKPASS to set credentials > git fetch --tags --force --progress -- https://github.com/Ontario-Tech-NITS/lab-5-application-deployment-<username>.git +refs/heads/*:refs/remotes/origin/* # timeout=10 > git config remote.origin.url https://github.com/Ontario-Tech-NITS/lab-5-application-deployment-<username>.git # timeout=10 > git config --add remote.origin.fetch +refs/heads/*:refs/remotes/origin/* # timeout=10 Avoid second fetch > git rev-parse refs/remotes/origin/main^{commit} # timeout=10 Checking out Revision 4184ce60df8d8aa62aba63f3bc197a5632fe8810 (refs/remotes/origin/main) > git config core.sparsecheckout # timeout=10 > git checkout -f 4184ce60df8d8aa62aba63f3bc197a5632fe8810 # timeout=10 Commit message: "Changed port from 8080 to 5050" First time build. Skipping changelog. [BuildAppJob] $ /bin/sh -xe /tmp/jenkins13901989557087737154.sh + bash ./sample-app.sh Sending build context to Docker daemon 6.144kB Step 1/7 : FROM python ---> d8f278e9e42a Step 2/7 : RUN pip install flask ---> Using cache ---> 9bbfe4f350b7 Step 3/7 : COPY ./static /home/myapp/static/ ---> 09232a2a3cda Step 4/7 : COPY ./templates /home/myapp/templates/ ---> ada98e832a47 Step 5/7 : COPY sample_app.py /home/myapp/ ---> 58adca85488e Step 6/7 : EXPOSE 5050 ---> Running in 06ef56509712 ---> Removed intermediate container 06ef56509712 ---> 8069b1a5d983 Step 7/7 : CMD python3 /home/myapp/sample_app.py ---> Running in c668d8511d89 ---> Removed intermediate container c668d8511d89 ---> 38b62db16e65 Successfully built 38b62db16e65 Successfully tagged sampleapp:latest cb9dda0d66d8579cac778933512b3bbff5d79788ace6ce21160a49f2cd465180 CONTAINER ID IMAGE COMMAND CREATED STATUS PORTS NAMES cb9dda0d66d8 sampleapp "/bin/sh -c 'python3…" 1 second ago Up Less than a second 0.0.0.0:5050->5050/tcp, :::5050->5050/tcp samplerunning bc86f30b8896 jenkins/jenkins "/usr/bin/tini -- /u…" 53 minutes ago Up 52 minutes 0.0.0.0:8080->8080/tcp, :::8080->8080/tcp, 50000/tcp jenkins_server Finished: SUCCESSNote
If you see errors about a duplicate container name, you need to stop and remove the existing samplerunning docker container from a terminal window (
docker stop samplerunningthendocker rm samplerunning) and try again.
Step 5: Save the Console Output🔗
In this step you will save a copy of the console output as a text file to be committed to your Git repository for grading.
-
In the top right side of the output window, click View as plain text.
-
Right-click in the new page that loads and choose Save as…
-
In the Save File dialog box that opens, navigate to
/home/devasc/labs/devnet-src/sample-app. -
In the Name field at the top of the dialog box, name the file
BuildAppJob.txt(CASE SENSITIVE!) then click Save.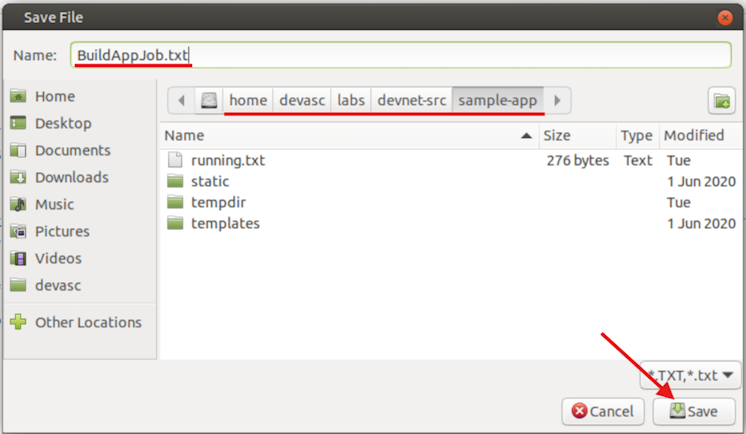
-
Click the back button on the browser to return to the Jenkins console.
Step 6: Open another web browser tab and verify sample app is running🔗
-
Open a new browser tab and type in the local address,
localhost:5050. You should see the content of yourindex.htmldisplayed in light steel blue background color with You are calling me from 172.17.0.1 displayed in an H1 tag.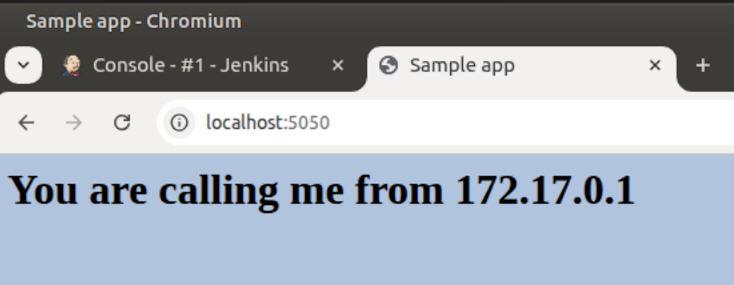
Part 5: Use Jenkins to Test a Build🔗
In this part, you will create a second job that tests the build to ensure that it is working properly.
-
You first need to stop and remove the
samplerunningdocker container. Open a new terminal window (don't use the one running Jenkins) and enter the following commands:devasc@labvm:~/labs/devnet-src/sample-app$ docker stop samplerunning samplerunning devasc@labvm:~/labs/devnet-src/sample-app$ docker rm samplerunning samplerunning
Step 1: Start a new job for testing your sample-app🔗
-
Return to the Jenkins web browser tab and click the Jenkins link in the top left corner to return to the main dashboard.
-
Click the New Item link to create a new job.
-
In the Enter an item name field, fill in the name
TestAppJob. -
Click Freestyle project as the job type.
-
Scroll to the bottom and click OK.

Step 2: Configure the Jenkins TestAppJob🔗
-
Add a description for your job. For example,
My first Jenkins test. -
Leave Source Code Management set to None.
-
Click the Triggers tab and check the box, Build after other projects are built. For Projects to watch, fill in the name
BuildAppJob.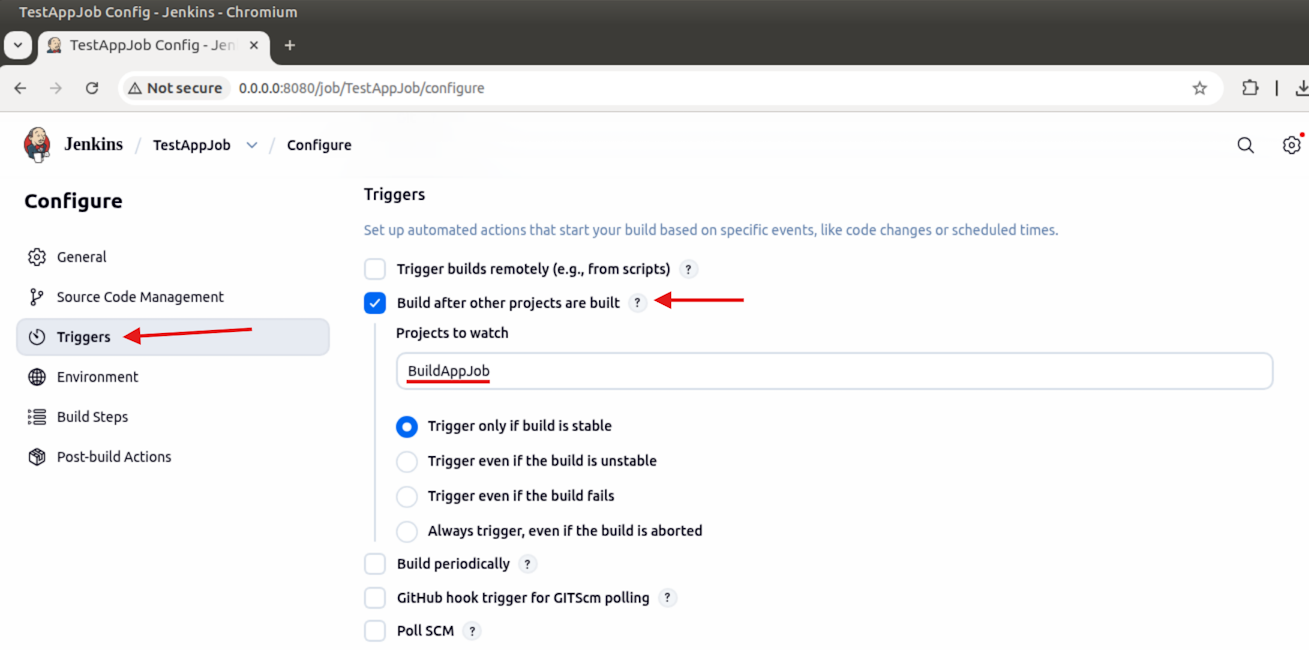
Step 3: Write the test script that should run after a stable build of the BuildAppJob🔗
-
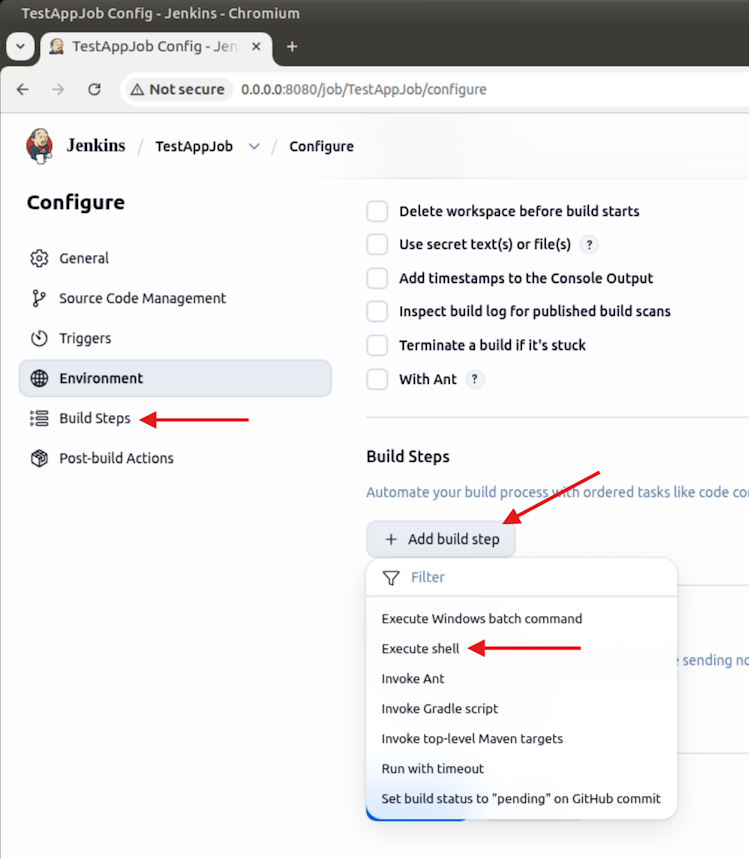
Click the Build Steps tab.
-
Click Add build step and choose Execute shell.
-
Enter the following script. The
ifcommand should be all on one line, ending with; then.This command will
grepthe output returned from thecurlcommand to see if You are calling me from 172.17.0.1 is returned. If true, the script exits with a code of0, which means that there are no errors in the BuildAppJob build. If false, the script exits with a code of1which means the BuildAppJob failed.if curl http://172.17.0.1:5050/ | grep "You are calling me from 172.17.0.1"; then exit 0 else exit 1 fi -
Click Save and then the Jenkins link on the left side to return to the Jenkins dashboard.
Step 4: Have Jenkins run the BuildAppJob job again🔗
-
Refresh the web page with the refresh button for your browser.
-
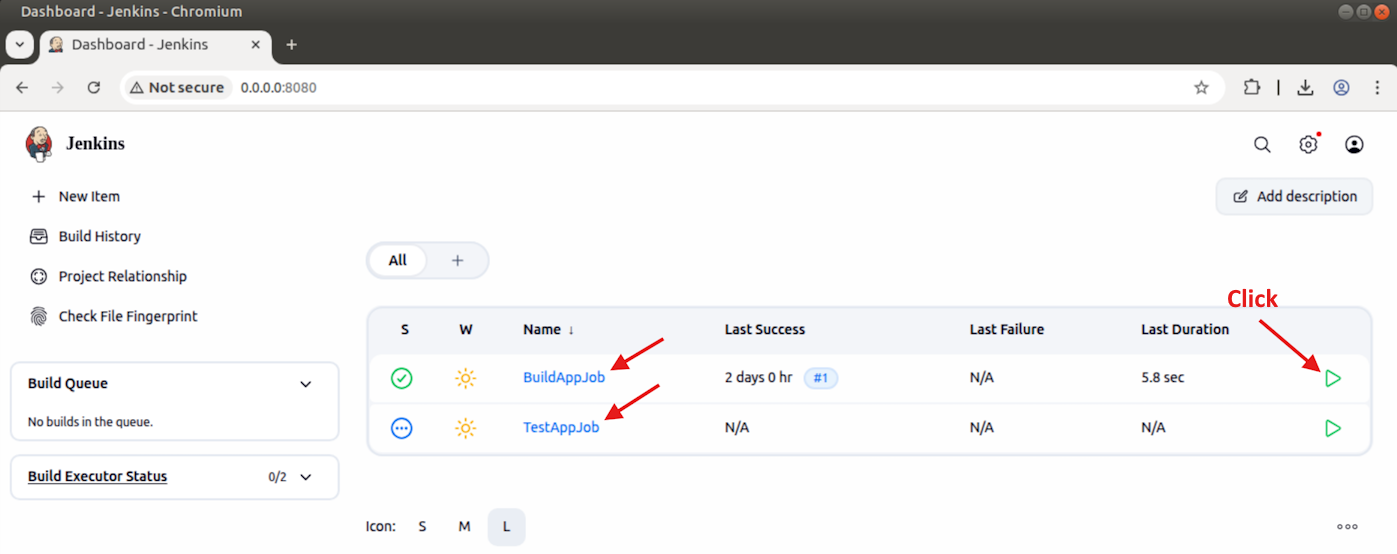
You should now see your two jobs listed in the table. For the BuildAppJob job, click the build button on the far right (a green triangle ).
Step 5: Verify both jobs completed🔗
-
If all goes well, you should see the timestamp for the Last Success column update for both BuildAppJob and TestAppJob. This means your code for both jobs ran without error. But you can also verify this for yourself.
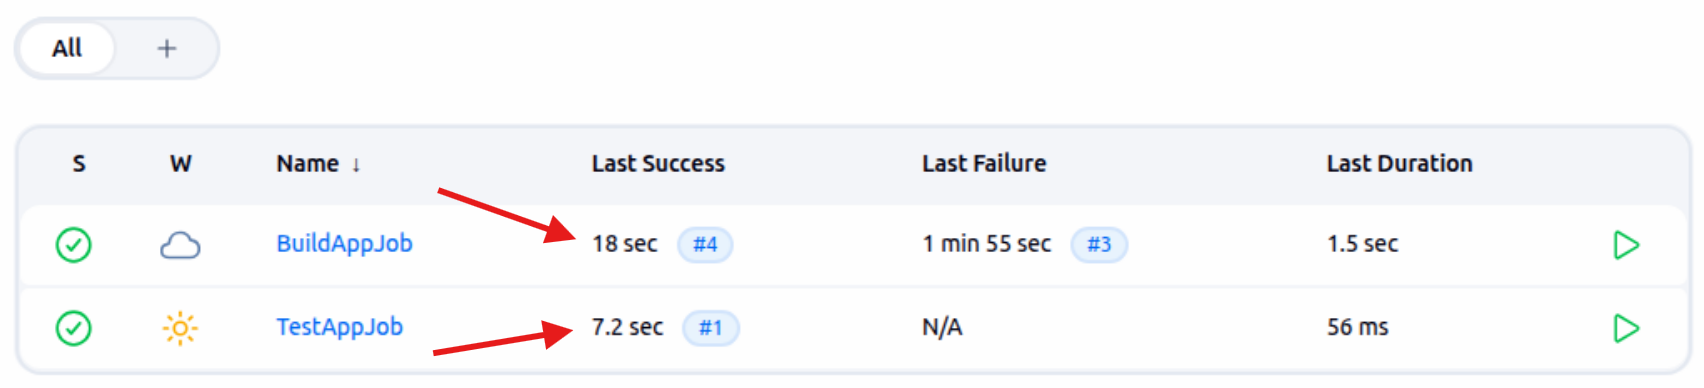
Note
If the timestamps do not update refresh the webpage.
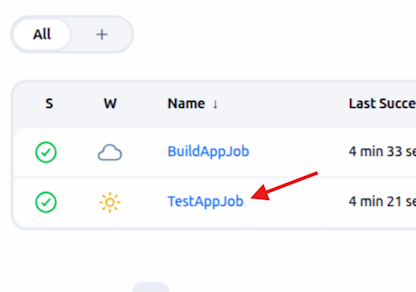
-
Click TestAppJob in the table on the Dashboard.
-
On the next page, under Permalinks, click the link for your last build, and then click Console Output in the menu on the left. You should see output similar to the following:
Started by upstream project "BuildAppJob" build number 3 originally caused by: Started by user admin Running as SYSTEM Building in workspace /var/jenkins_home/workspace/TestAppJob [TestAppJob] $ /bin/sh -xe /tmp/jenkins4597402301012103841.sh + + grep You are calling me from 172.17.0.1 curl http://172.17.0.1:5050/ % Total % Received % Xferd Average Speed Time Time Time Current Dload Upload Total Spent Left Speed 0 0 0 0 0 0 0 0 --:--:-- --:--:-- --:--:-- 0 100 177 100 177 0 0 42304 0 --:--:-- --:--:-- --:--:-- 44250 <h1>You are calling me from 172.17.0.1</h1> + exit 0 Finished: SUCCESS -
It is not necessary to verify your sample app is running because the TestAppJob already did this for you. However, you can open a new browser tab for
172.17.0.1:5050to see that it is indeed running.
Step 6: Save the Console Output🔗
In this step you will save a copy of the console output as a text file to be committed to your Git repository for grading.
-
On the right side of the console window, click View as plain text.
-
Right-click in the new page that loads and choose Save as…
-
In the Save File dialog box that opens, navigate to
/home/devasc/labs/devnet-src/sample-appif you are not already there. -
In the Name field at the top of the dialog box, name the file
TestAppJob.txt(CASE SENSITIVE!) then click Save.Note
The filename is different from the previous time you saved the output.

-
Click the back button on the browser to return to the Jenkins console.
Part 6: Create a Pipeline in Jenkins🔗
Although you can currently run your two jobs by simply clicking the Build Now button for the BuildAppJob, software development projects are typically much more complex. These projects can benefit greatly from automating builds for continuous integration of code changes and continuously creating development builds that are ready to deploy. This is the essence of CI/CD.
A pipeline can be automated to run based on a variety of triggers including periodically, based on GitHub repository changes, or from a script run remotely. However, in this part you will script a pipeline in Jenkins to run your two apps whenever you click the pipeline Build Now button.
Step 1: Create a Pipeline job🔗
-
Click the Jenkins link in the top left, and then click New Item.
-
In the Enter an item name field, type
SamplePipeline. -
Select Pipeline as the job type.
-
Scroll to the bottom and click OK.

Step 2: Configure the SamplePipeline job🔗
-
Investigate the Triggers section of the configuration page. Notice that there are a number of different ways to trigger a build. For the SamplePipeline job, you will trigger it manually (don't select any options).
-
In the Pipeline section, add the following script.
node {
    stage('Preparation') {
        catchError(buildResult: 'SUCCESS') {
            sh 'docker stop samplerunning'
            sh 'docker rm samplerunning'
        }
    }
    stage('Build') {
        build 'BuildAppJob'
    }
    stage('Results') {
        build 'TestAppJob'
    }
}
This script does the following:
-
It creates a single node build as opposed to a distributed or multi-node. Distributed or multi-node configurations are for larger pipelines than the one you are building in this lab and are beyond the scope of this course.
-
In the
Preparationstage, the SamplePipeline will first make sure that any previous instances of thesamplerunningdocker container are stopped and removed. But if there is not yet a running container then these two commands would give you errors. Therefore, you use thecatchErrorfunction to catch any errors and return a "SUCCESS" value to progress the script instead. This will ensure the pipeline continues to the next stage in the event that thesamplerunningcontainer is not already created. -
In the Build stage, the SamplePipeline will build your
BuildAppJob. -
In the Results stage, the SamplePipeline will build your
TestAppJob.
Note
This pipeline script follows the conventions of the Apache Groovy programming language. You can learn more about this syntax here: https://groovy-lang.org/syntax.html
-
-
Click Save and you will be returned to the Jenkins dashboard for the SamplePipeline job.
Step 3: Run the SamplePipeline🔗
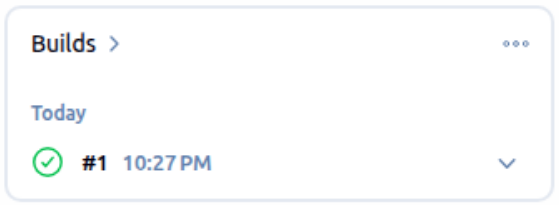
-
On the left, click Build Now to run the SamplePipeline job. Wait for the pipeline to complete. If you coded your Pipeline script without error, you should eventually see a green checkmark next to the build. If not, click Configure on the left to return to the SamplePipeline configuration and check your Pipeline script.
Step 4: Verify the SamplePipeline output🔗
-
Click the SamplePipeline link at the top of the page, then click the latest build link under Permalinks.
-
Click Console Output. You should see output similar to the following:
Started by user admin
[Pipeline] Start of Pipeline
[Pipeline] node
Running on Jenkins in /var/jenkins_home/workspace/SamplePipeline
[Pipeline] {
[Pipeline] stage
[Pipeline] { (Preparation)
[Pipeline] catchError
[Pipeline] {
[Pipeline] sh
+ docker stop samplerunning
samplerunning
[Pipeline] sh
+ docker rm samplerunning
samplerunning
[Pipeline] }
[Pipeline] // catchError
[Pipeline] }
[Pipeline] // stage
[Pipeline] stage
[Pipeline] { (Build)
[Pipeline] build (Building BuildAppJob)
Scheduling project: BuildAppJob
Starting building: BuildAppJob #5
Build BuildAppJob #5 completed: SUCCESS
[Pipeline] }
[Pipeline] // stage
[Pipeline] stage
[Pipeline] { (Results)
[Pipeline] build (Building TestAppJob)
Scheduling project: TestAppJob
Starting building: TestAppJob #2
Build TestAppJob #2 completed: SUCCESS
[Pipeline] }
[Pipeline] // stage
[Pipeline] }
[Pipeline] // node
[Pipeline] End of Pipeline
Finished: SUCCESS
Note
You could also configure Jenkins with GitHub integration so that a pipeline can be triggered any time commits are pushed to GitHub. You can't set this up during this lab because you don't have access to the administrator settings of your repository.
Step 5: Save the Console Output🔗
In this step you will save a copy of the console output as a text file to be committed to your Git repository for grading.
-
On the right side of the console window, click View as plain text.
-
Right-click in the new page that loads and choose Save as…
-
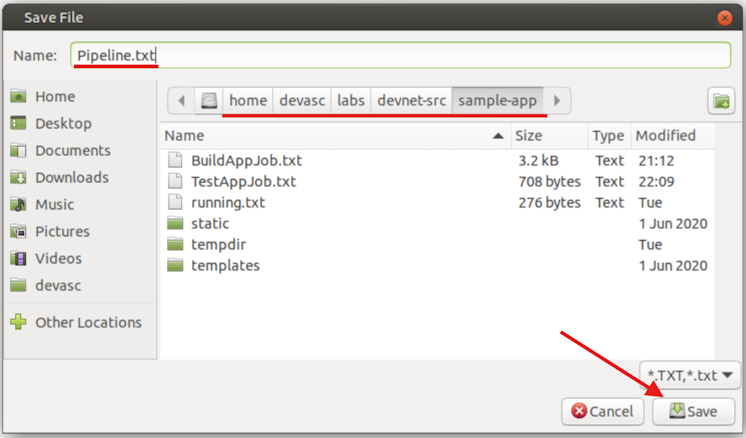
In the Save File dialog box that opens, navigate to
/home/devasc/labs/devnet-src/sample-appif you are not already there. -
In the Name field at the top of the dialog box, name the file
Pipeline.txt(CASE SENSITIVE!) then click SaveNote
The file name is different from the previous time you saved the output.
Step 6: Stop the Docker containers🔗
-
Close the web browser and return to the terminal window where Jenkins is running. Press Ctrl+C to stop the running server.
-
Use
docker ps -ato see all running containers. If thesamplerunningcontainer is still running (STATUSisUp), usedocker stop samplerunningto stop the container.devasc@labvm:~/labs/devnet-src/sample-app$ docker ps -a CONTAINER ID IMAGE COMMAND CREATED STATUS PORTS NAMES f057e09e8e3a sampleapp "/bin/sh -c 'python3…" 7 minutes ago Up 7 minutes 0.0.0.0:5050->5050/tcp, :::5050->5050/tcp samplerunning devasc@labvm:~/labs/devnet-src/sample-app$ docker stop samplerunning samplerunning devasc@labvm:~/labs/devnet-src/sample-app$
Step 7: Push your changes to GitHub🔗
-
Now you are ready to commit your final changes to your Git repository. Enter the following commands to add your files to the staging area and verify they are ready to commit (make sure you see the three console outputs you saved earlier):
devasc@labvm:~/labs/devnet-src/sample-app$ git add . devasc@labvm:~/labs/devnet-src/sample-app$ git status On branch main Changes to be committed: (use "git restore --staged <file>..." to unstage) new file: BuildAppJob.txt new file: Pipeline.txt new file: TestAppJob.txt devasc@labvm:~/labs/devnet-src/sample-app$ -
Commit the changes to the local repository using the message Lab Complete!.
devasc@labvm:~/labs/devnet-src/sample-app$ git commit -m "Lab Complete!" [main c041ac5] Lab Complete! 3 files changed, 111 insertions(+) create mode 100644 BuildAppJob.txt create mode 100644 Pipeline.txt create mode 100644 TestAppJob.txt -
Push all the changes you made in the local repository back to the GitHub repository to complete the lab. Remember to use your Personal Access Token when asked for your GitHub password.
Tip
If you’ve configured your VM to use SSH to connect to GitHub instead of HTTPS, you will not be asked for a username and password, although you may be asked for a passphrase for your SSH key, if you configured one.
devasc@labvm:~/labs/devnet-src/sample-app$ git push origin main Username for 'https://github.com': username Password for 'https://username@github.com': Personal Access Token Enumerating objects: 6, done. Counting objects: 100% (6/6), done. Delta compression using up to 2 threads Compressing objects: 100% (5/5), done. Writing objects: 100% (5/5), 2.35 KiB | 2.35 MiB/s, done. Total 5 (delta 1), reused 0 (delta 0), pack-reused 0 (from 0) remote: Resolving deltas: 100% (1/1), completed with 1 local object. To github.com:Ontario-Tech-NITS/lab-5-application-deployment-<username>.git 4184ce6..c041ac5 main -> main devasc@labvm:~/labs/devnet-src/sample-app$ -
In your browser, return to the repository on github.com and verify all your changes are present, along with the corresponding commit messages. Wait a minute or so for the autograder tests to complete and ensure that it says passing in green.
Note
Since the autograder has to build your Docker containers, it will take longer than usual to complete the grading. Please refresh the page until it either passes or fails.