Lab 4 - REST APIs🔗
Lab 4.1 Set up GitHub Repository
Lab 4.2 Explore REST APIs with API Simulator and Postman
Lab 4.3 Integrate a REST API in a Python Application
4.1 Set up GitHub Repository🔗
Objectives🔗
Part 1: Join the GitHub Classroom
Part 2: Clone the Remote Repository
Instructions🔗
Part 1: Join the GitHub Classroom🔗
-
Follow the GitHub assignment link posted in Canvas. If you did not complete the setup in Lab 2.2 you will need to authorize GitHub Classroom to link with your account and select your name from the list of students.
-
Accept the assignment and refresh the page until it says your repository has been created. Click the link to proceed to the repository.
Important
GitHub Classroom is currently experiencing a bug where you might receive a Repository Access Issue error after accepting the assignment. If this happens, check the e-mail connected to your GitHub account for an invitation e-mail from GitHub. Use the View Invitation link in the e-mail to see the link to accept the invitation and proceed to the repository.
-
Select the Code dropdown and copy the HTTPS URL. Store it somewhere for use in a later step.
Tip
If you’ve configured your VM to use SSH to connect to GitHub instead of HTTPS, click on the Code dropdown, select the SSH tab, and copy the URL from there instead.
Part 2. Clone the Remote Repository🔗
Important
If you did not complete Lab 2, or you have reset your VM since then, you'll need to update Git to the newest version as well as configure your name, e-mail address, and default branch name, before beginning this lab.
Open Lab 2 and complete steps 1, 2, and the first 3 tasks of step 3 of the Initializing Git instructions before continuing.
-
On the DEVASC VM, create a new folder called
graphhopperin ~/labs/devnet-src directory.devasc@labvm:~$ mkdir ~/labs/devnet-src/graphhopper -
Change into the
graphhopperdirectory.devasc@labvm:~$ cd labs/devnet-src/graphhopper/ -
Use
git cloneto clone a copy of your Lab 4 repository into thegraphhopperdirectory. Use the URL to the GitHub Classroom repository you copied at the end of Part 1, not the one in the command below.Warning
DON’T MISS THE EXTRA PERIOD AT THE END OF THE COMMAND!
devasc@labvm:~/labs/devnet-src/graphhopper$ git clone https://github.com/Ontario-Tech-NITS/lab-4-rest-apis-<username>.git . # (1)! cloning into '.'... remote: Enumerating objects: 23, done. remote: Counting objects: 100% (23/23), done. remote: Compressing objects: 100% (16/16), done. Receiving objects: 100% (23/23), 8.53 KiB | 8.53 MiB/s, done. Resolving deltas: 100% (6/6), done. remote: Total 23 (delta 6), reused 13 (delta 4), pack-reused 0 (from 0) devasc@labvm:~/labs/devnet-src/graphhopper$- Don't miss this single period at the end of the line!
Tip
If you’ve configured your VM to use SSH to connect to GitHub, use the SSH URL that you copied in step 1, rather than the HTTPS link.
-
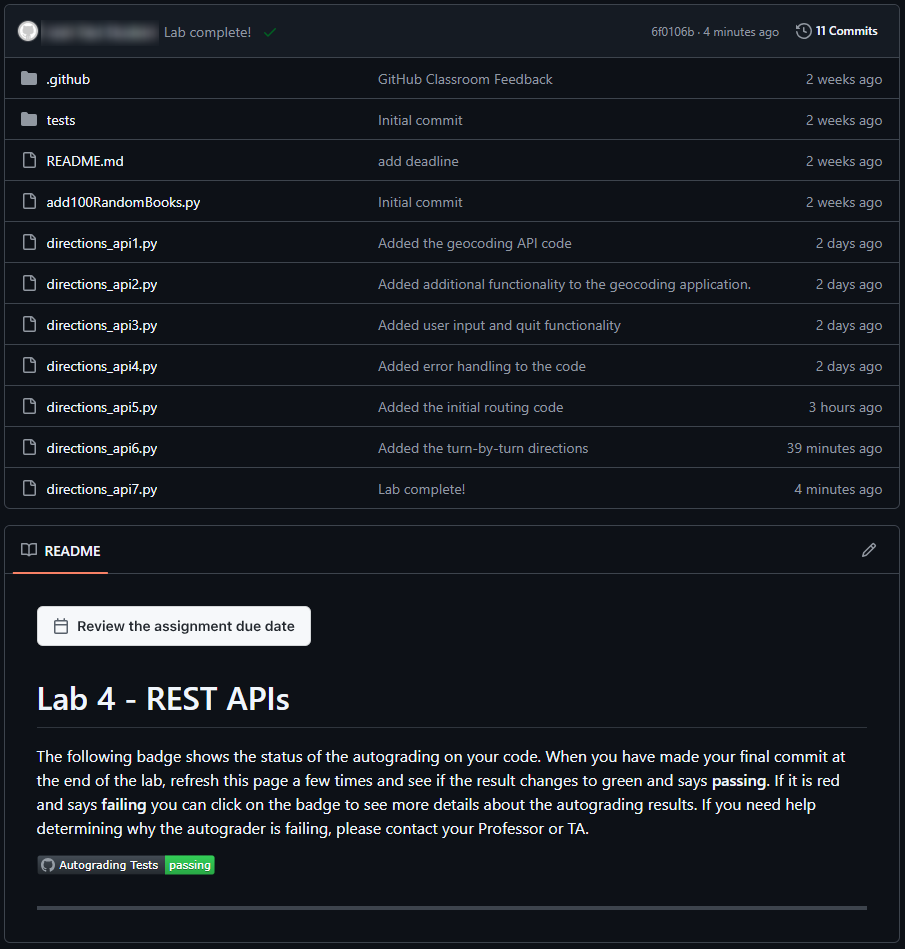
Verify that the local folder now contains the files from the GitHub repository.
devasc@labvm:~/labs/devnet-src/graphhopper$ ls -la total 28 drwxrwxr-x 5 devasc devasc 4096 Feb 8 20:12 . drwxr-xr-x 15 devasc devasc 4096 Feb 8 20:11 .. -rw-rw-r-- 1 devasc devasc 1297 Feb 8 20:12 add100RandomBooks.py drwxrwxr-x 7 devasc devasc 4096 Feb 8 20:12 .git drwxrwxr-x 3 devasc devasc 4096 Feb 8 20:12 .github -rw-rw-r-- 1 devasc devasc 773 Feb 8 20:12 README.md drwxrwxr-x 2 devasc devasc 4096 Feb 8 20:12 tests devasc@labvm:~/labs/devnet-src/graphhopper$ -
Verify that the remote repository values were automatically set correctly.
devasc@labvm:~/labs/devnet-src/graphhopper$ git remote -v origin https://github.com/Ontario-Tech-NITS/lab-4-rest-apis-\<username\>.git (fetch) origin https://github.com/Ontario-Tech-NITS/lab-4-rest-apis-\<username\>.git (push) devasc@labvm:~/labs/devnet-src/graphhopper$ -
Use
git statusto verify you are on the main branch and that you are don't have anything to commit.devasc@labvm:~/labs/devnet-src/graphhopper$ git status On branch main Your branch is up to date with 'origin/main'. nothing to commit, working tree clean devasc@labvm:~/labs/devnet-src/graphhopper$ -
Leave the terminal window open for later steps in the lab.
4.2 Explore REST APIs with API Simulator and Postman🔗
Objectives🔗
Part 1: Explore API Documentation Using the API Simulator
Part 2: Use Postman to Make API Calls to the API Simulator
Part 3: Use Python to Add 100 Books to the API Simulator
Background🔗
The DEVASC VM includes a School Library API simulator with API documentation and an associated database. You can use the simulator offline to explore APIs and test their functionality.
In this lab, you will learn how to use the School Library API simulator to make API calls to list, add, and delete books. Later, you will use Postman to make these same API calls.
Instructions🔗
Part 1: Explore API Documentation Using the API Simulator🔗
To understand how to make calls to a REST API, developers typically start by studying the API documentation. The format for requests, responses, headers, and parameter for REST APIs are typically documented using the OpenAPI Specification (formerly Swagger Specification).
Step 1: Open the Chromium Web Browser🔗
- Double-click the Chromium Web Browser icon on the desktop.
Step 2: Connect to the School Library Web Site🔗
- If the browser does not automatically open the School Library website, in the address bar type:
library.demo.localand press Enter to go there.
Step 3: Go to the API docs page🔗
-
The web site defaults to the Our Books tab and displays a list of books. In the upper right corner where it states, Click here for API docs, click the word here to go to the API documentation web page.
You will now see a list of APIs in the /api/v1 Default namespace.
-
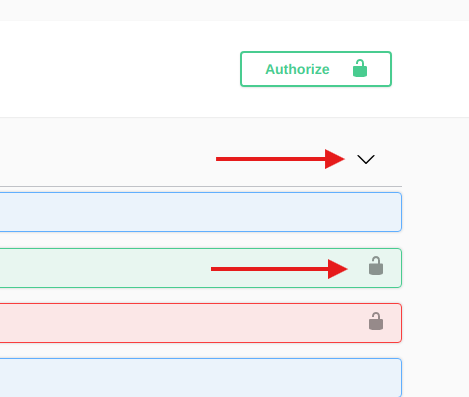
Notice the downward arrow to the far right. Clicking anywhere on the /api/v1 bar will minimize the API list and turn the arrow facing right . Click again on the same bar to re-display the API list.
Notice the lock to the far right of several of the APIs. The lock indicates that these APIs require a token to be used.
Step 4: List books using the GET /books API🔗
-
Click anywhere on the bar for the
GET /booksAPI. This API returns a list of books in the school library.- Parameters - There are several optional API parameters. These can be used to filter, sort, or paginate the output. These will be referred to later in this lab.
- Response content type - Click
application/jsonin the dropdown to see a list of the different types of data formats the information can be viewed. Leave the selection asapplication/json. - Code - The code displays
200by default, which indicates the API request from the sever was a success as displayed in the Description. (You have not sent an API request yet.)
Step 5: Use the "Try it out" feature in the API documentation🔗
One of the more powerful features of the OpenAPI Specification is the ability to test an API call to see if you constructed it correctly. You can also review the response to see if it is what you expected. You will see this same testing feature in API documentation for Cisco, Canvas, and other organizations that use this OpenAPI Specification feature.
-
In the GET /books API documentation, click the Try it out button.
-
Notice that you now have the option to enter information for the optional parameters. Leave the parameters blank and click the Execute button.
In the Responses section you will see:
- Curl: The
curlcommand you can use to access the same information for the /books API. - Request URL: This URL is used in the API request, which can be used to request the same information using curl, Postman, and Python.
- Code: This is the HTTP response code.
200indicates a successful call. - Response body: List of books in JSON format.
- Response headers: Information about the API returned from the server.
In the Response body you will see a list of books in JSON format:
JSON[ { "id": 0, "title": "IP Routing Fundamentals", "author": "Mark A. Sportack" }, { "id": 1, "title": "Python for Dummies", "author": "Stef Maruch Aahz Maruch" }, { "id": 2, "title": "Linux for Networkers", "author": "Cisco Systems Inc." }, { "id": 3, "title": "NetAcad: 20 Years Of Online-Learning", "author": "Cisco Systems Inc." } ] - Curl: The
Step 6: Use the curl command in a terminal window🔗
The GET /books API provides information to access the content displayed in the response body using curl. curl is a command line tool to transfer data to or from a server, using any of the supported protocols including HTTP and HTTPS.
-
Select the
curlcommand, right-click and Copy it to your clipboard: -
Return to the terminal window. Right-click and Paste the contents from the clipboard into the terminal and press Enter. Notice this provides the same information as the library's OpenAPI interface.
devasc@labvm:~/labs/devnet-src/graphhopper$ curl -X GET "http://library.demo.local/api/v1/books" -H "accept: application/json"
[
    {
        "id": 0,
        "title": "IP Routing Fundamentals",
        "author": "Mark A. Sportack"
    },
    {
        "id": 1,
        "title": "Python for Dummies",
        "author": "Stef Maruch Aahz Maruch"
    },
    {
        "id": 2,
        "title": "Linux for Networkers",
        "author": "Cisco Systems Inc."
    },
    {
        "id": 3,
        "title": "NetAcad: 20 Years Of Online-Learning",
        "author": "Cisco Systems Inc."
    }
]
devasc@labvm:~/labs/devnet-src/graphhopper$
Step 7: List books with their ISBN using the GET /books API🔗
-
Return to the School Library API web site's GET /books API.
-
In the Parameters section, select the down arrow next to the includeISBN parameter and select true.
-
Click Execute.
Notice the following changes in Responses:
- Curl now includes the parameter for ISBN.
curl -X GET "http://library.demo.local/api/v1/books?includeISBN=true" -H "accept: application/json" - Request URL now includes the parameter for ISBN.
http://library.demo.local/api/v1/books?includeISBN=true -
Response body has the same list of books as shown previously but now includes the book's ISBN.
JSON[ { "id": 0, "title": "IP Routing Fundamentals", "author": "Mark A. Sportack", "isbn": "978-1578700714" }, { "id": 1, "title": "Python for Dummies", "author": "Stef Maruch Aahz Maruch", "isbn": "978-0471778646" }, { "id": 2, "title": "Linux for Networkers", "author": "Cisco Systems Inc.", "isbn": "000-0000000123" }, { "id": 3, "title": "NetAcad: 20 Years Of Online-Learning", "author": "Cisco Systems Inc.", "isbn": "000-0000001123" } ]
To minimize the scrolling, when you are done with an API you can close that specific API window by clicking anywhere on the title bar. Now you can see all the APIs more easily.
- Curl now includes the parameter for ISBN.
Step 8: Get a token using the POST /loginViaBasic API🔗
-
Click the API POST /loginViaBasic.
-
Notice there are no parameters. Click Try it out, and then click Execute.
-
A Sign in box will prompt you for a username and password. Enter the following information and click Sign in:
- Username: cisco
- Password: Cisco123!
-
The token will be displayed in the Response body. Select the information between the quotes (starting with
cisco|), right-click and Copy the information into your clipboard.Important
Your token will be different than the one shown below.
JSON{ "token": "cisco|KZZzteQbC5iV3HKEzB7hCJ6qHQXen4rLGh72YJKeVfs" } -
Scroll up to the top of the School Library API page and click the green Authorize button. The Available authorizations dialogue box will appear.
-
Right-click and Paste the token in the box and click Authorize. Notice the Name is
X-API-KEY. This information along with the token will be used later in Postman. -
Close the Available authorizations dialogue box and return to the list of APIs. Notice the locks next to several of the APIs have now changed . These APIs are now available for you to use.
-
Click the bar for the API POST /loginViaBasic to close the window.
Step 9: Add books using the POST /books API🔗
-
Click the API POST /books.
Notice under Parameters that the payload is required. This means that this API requires information for this parameter in the format specified by the Parameter content type, which is application/json.
-
Click Try it out.
-
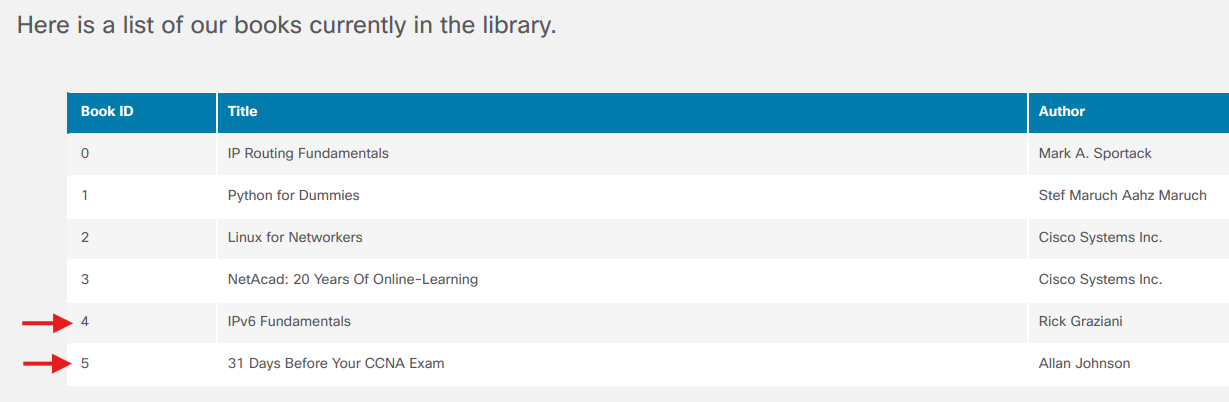
Modify the id, title and author with the information shown below.
JSON{ "id": 4, "title": "IPv6 Fundamentals", "author": "Rick Graziani" } -
Click Execute.
-
Verify that the post was successful in the Server response.
A Code of 200 means the post was a success. You should see the book you added in the Response body along with a new id. You will also see updated information for
curland the Request URL.Note
If you got a 401 Unauthorized response code, check the Response body text. Most likely you received an
error: Invalid API keyresponse. This is because you did not enter all the characters for your API key, or possibly, you added an unnecessary characters or spaces. Return to the previous step and repeat the authorization process, ensuring you are only using the value of the token (starting atcisco|). -
To add another book, modify the id, title, and author with the information shown below.
JSON{ "id": 5, "title": "31 Days Before Your CCNA Exam", "author": "Allan Johnson" } -
Click Execute.
-
Verify that the post was successful in the Server response. A code of 200 means the post was a success. You should see the book you added in the Response body along with a new id. You will also see updated information for
curland the Request URL. -
Click the bar for the API POST /books to close the window.
-
You can verify the books were added to the Our Books page. Return to the School Library tab that's already open in your browser and refresh the page. Be careful not to close the School Library API tab. If you do, then you will need to reauthenticate.
Step 10: List books using the GET /books API🔗
-
Return to the School Library API tab in the browser. Click the GET /books API.
-
Click Try it out. If you see a Cancel button in red, then you are already in Try it out mode.
-
Click Execute.
-
Under Server response in the Response body, you will now see the two books you added. Notice they each have a unique id.
JSON[ { "id": 0, "title": "IP Routing Fundamentals", "author": "Mark A. Sportack", "isbn": "978-1578700714" }, { "id": 1, "title": "Python for Dummies", "author": "Stef Maruch Aahz Maruch", "isbn": "978-0471778646" }, { "id": 2, "title": "Linux for Networkers", "author": "Cisco Systems Inc.", "isbn": "000-0000000123" }, { "id": 3, "title": "NetAcad: 20 Years Of Online-Learning", "author": "Cisco Systems Inc.", "isbn": "000-0000001123" }, { "id": 4, "title": "IPv6 Fundamentals", "author": "Rick Graziani" }, { "id": 5, "title": "31 Days Before Your CCNA Exam", "author": "Allan Johnson" } ] -
Click the bar for the GET /books API to close the window.
Step 11: List a specific book using the GET /books{id} API🔗
-
Click the GET /books{id} API. Notice this API requires the id as a parameter.
Warning
Make sure you choose the GET API, not the DELETE or PUT APIs.
-
To the right of Parameters, click the Try it out button.
-
Under Parameters, enter 4 for the required id.
-
Click Execute. Notice the information provided by
curland the Request URL.- Curl - This is the
curlcommand to perform the same function usingcurl. - Request URL - This is the URL that can be used to get the same information using Postman and Python.
- Curl - This is the
-
Verify that the GET request was successful in the Server response. A code of 200 means the post was a success. In the Response body you will see the book you requested with the id of 4.
JSON{ "id": 4, "title": "IPv6 Fundamentals", "author": "Rick Graziani" } -
Click the bar for the GET /books{id} API to close the window.
Step 12: Delete a specific book using the DELETE /books{id} API🔗
-
Click the DELETE /books{id} API. Notice this API requires the id as a parameter.
-
Click Try it out.
-
Under Parameters, enter 4.
-
Click Execute.
-
Verify that the DELETE request was successful in the Server response. A code of 200 means the request was a success. In the Response body you will see the book you deleted with the id of 4.
JSON{ "id": 4, "title": "IPv6 Fundamentals", "author": "Rick Graziani" } -
Click the bar for the DELETE /books{id} API to close the window.
Step 13: List books using the GET /books API🔗
-
Click the GET /books API.
-
Click Try it out. If you see Cancel button in red, then you are already in Try it out mode.
-
Click Execute.
-
Under Server response in the Response body, you will no longer see the book with id 4.
JSON[ { "id": 0, "title": "IP Routing Fundamentals", "author": "Mark A. Sportack", "isbn": "978-1578700714" }, { "id": 1, "title": "Python for Dummies", "author": "Stef Maruch Aahz Maruch", "isbn": "978-0471778646" }, { "id": 2, "title": "Linux for Networkers", "author": "Cisco Systems Inc.", "isbn": "000-0000000123" }, { "id": 3, "title": "NetAcad: 20 Years Of Online-Learning", "author": "Cisco Systems Inc.", "isbn": "000-0000001123" }, { "id": 5, "title": "31 Days Before Your CCNA Exam", "author": "Allan Johnson" } ]Note
Do not close the School Library API tab in the Chromium browser. You will use the API documentation in the next part.
Part 2: Use Postman to Make API Calls to the API Simulator🔗
In this Part, you will use Postman to make the same API calls you made in the Student Library API documentation. Postman is a useful tool when an API developer web site is not available while providing the ability to easily save, organize, and reuse APIs.
Step 1: Open Postman🔗
-
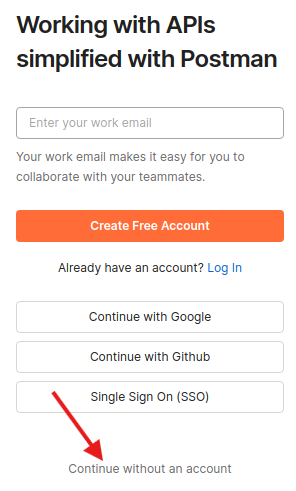
Double-click the Postman icon on the desktop . Normally, you would sign in to Postman, however, it is not necessary to get an account and login to Postman for labs in this course.
-
When the login window appears, choose Continue without an account.
-
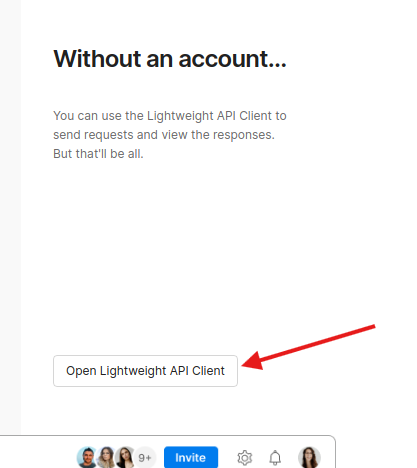
If prompted a second time to create an account, choose the option Open Lightweight API Client.
Step 2: List the books using the GET /books API🔗
-
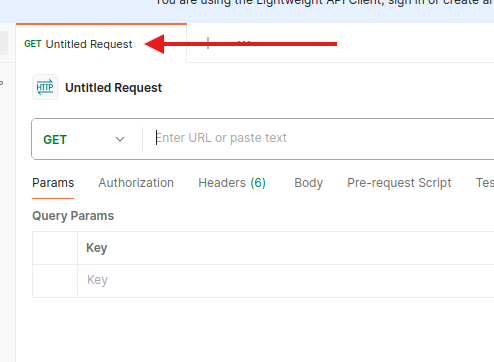
In the main window, ensure you have a new Untitled Request. If not, click the plus icon to create an Untitled Request. By default, this will be a GET request.
-
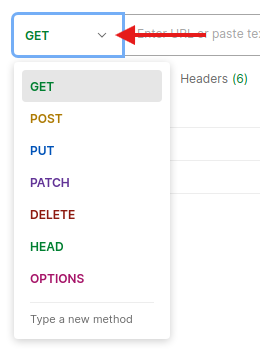
Click the down arrow next to GET to view the different API operations including GET, POST, and DELETE. Leave the selection on GET.
-
Return to the School Library API tab in Chromium and, if necessary, expand the GET /books API.
-
Under Request URL, select, right-click and Copy the URL to your clipboard (ignoring the includeISBN paramater if present):
http://library.demo.local/api/v1/books -
Return to Postman and paste the URL next to GET, where it states Enter URL or paste text.
Note
If pasting adds a line below the URL, remove the extra line.
-
Click Send. To verify that the API request was a success, you will now see a response that include the Status code 200 OK in green.

-
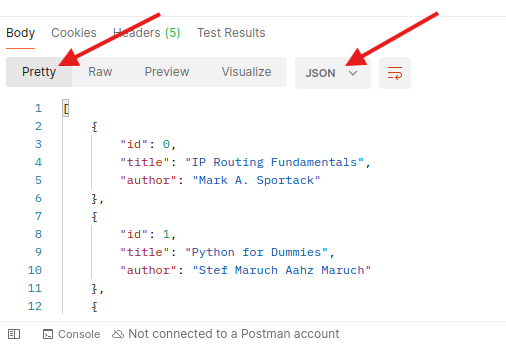
Scroll down to the Body section to see the response. Notice that the default is Pretty and json.
Note
You can save the JSON output to a file using the Save Response button in the top-right corner above the output. This is not required for this lab.
Step 3: Get a Token using the POST /loginViaBasic API🔗
-
In the main Postman window, click the plus icon next to the active tab to create a new Untitled Request.
-
Click the down arrow next to GET, and select POST.
-
Enter the request URL.
-
Return to the School Library API tab in Chromium and expand the POST /loginViaBasic API, if necessary.
-
Under Request URL, select, right-click and Copy the URL to your clipboard:
http://library.demo.local/api/v1/loginViaBasicNote
If the Request URL is no longer showing, then you probably closed and re-opened the School Library API documentation page and are no longer authenticated. Click Try it out, then Execute, and then re-authenticate with username cisco and password Cisco123!.
-
Return to Postman and paste the URL next to POST where it states, Enter URL or paste text.
Note
If pasting adds a line below the URL, remove the extra line.
-
-
Click the Authorization tab. Within this area, complete the following:

-
In the drop-down list for Type, choose Basic Auth.
-
For the Username and Password fields, fill in the following:
- Username: cisco
- Password: Cisco123!
-
-
Click Send.
-
If necessary, scroll down to the Body section to see your new token.
Important
Your token will be different than the one shown below.
JSON{ "token": "cisco|5xSUHYFDvIAoCRv0LqWVSDcjJAwWjg18vMml6u2lm1I" }
Step 4: Add a book using the POST /books API🔗
Now you will add the IPv6 Fundamentals book you deleted in Part 2 when using the Try it out feature in the School Library API documentation.
-
In the main Postman window, click the plus icon next to the active tab to create a new Untitled Request.
-
Click the down arrow next to GET, and select POST.
-
Enter request URL.
-
Return to the School Library API tab in Chromium and expand the POST /books API.
-
Under Request URL, select, right-click and Copy the URL to your clipboard:
http://library.demo.local/api/v1/booksNote
If the Request URL is no longer showing, then you probably canceled Try it out. Click Try it out, and then Execute to show the Request URL.
-
Return to Postman and paste the URL next to POST, where it states Enter URL or paste text.
Note
If pasting adds a line below the URL, remove the extra line.
-
-
Click the Authorization tab. Within this area, complete the following:
-
In the drop-down list for Type, choose API Key.
-
In the Key field, enter
X-API-KEY.Note
Recall that you saw
X-API-KEYin the School Library API web page when you got a token selecting the green Authorize button. -
Return to the previous POST tab in Postman and copy the token you received in Step 3. Be sure to include everything within the quotation marks starting at
cisco|.Important
Your token will be different than the one shown below.
"token": "cisco|5xSUHYFDvIAoCRv0LqWVSDcjJAwWjg18vMml6u2lm1I" -
Go back to the second POST tab in Postman. Paste the token in the Value field
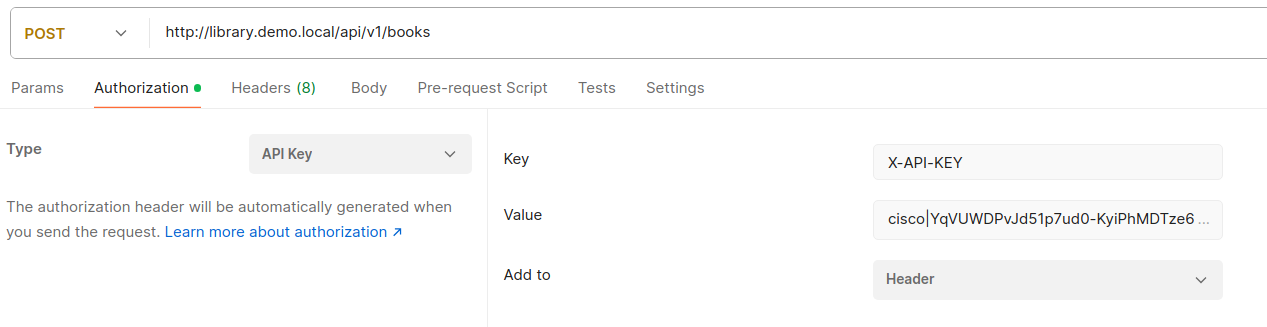
-
-
In the same row with the Authorization tab, click Body. This section will allow you to choose the format of your input.
- Click the raw radio button.
- Click Text and change this option to JSON.
-
In the input area you will see the number 1, for "line 1". Enter the following JSON object.
JSON{ "id": 4, "title": "IPv6 Fundamentals", "author": "Rick Graziani", "isbn": "978-158144778" } -
Click Send.
-
To verify that the API request was a success, you will now see a response that include the Status code 200 OK in green.
Step 5: Verify the additional book with the GET /books API🔗
-
Return to the first GET tab. As you can see, Postman makes it easy to switch between different API calls.
-
Click Send.
-
To verify that the API request was a success, you will now see a response that include the Status code 200 OK in green.
-
Click Body to see the response. Notice that the default is Pretty and JSON. Verify that the book you just added appears in the JSON output.
JSON[ { "id": 0, "title": "IP Routing Fundamentals", "author": "Mark A. Sportack" }, { "id": 1, "title": "Python for Dummies", "author": "Stef Maruch Aahz Maruch" }, { "id": 2, "title": "Linux for Networkers", "author": "Cisco Systems Inc." }, { "id": 3, "title": "NetAcad: 20 Years Of Online-Learning", "author": "Cisco Systems Inc." }, { "id": 4, "title": "IPv6 Fundamentals", "author": "Rick Graziani" } { "id": 5, "title": "31 Days Before Your CCNA Exam", "author": "Allan Johnson" }, ]
Step 6: Use additional parameters with the GET /books API🔗
-
Go to the School Library API web site. Scroll up to GET /books API and expand it, if necessary.
Notice the parameters that are available:
-
includeISBN: Includes in the results the ISBN numbers. Default = false
-
sortBy: Sort results using the specified parameter. Default = id
-
author: Return only books by the given Author.
-
page: Used to specify a page number when multiple pages of results are returned.
-
-
Click Try it out. If you see a Cancel button in red, then you do not need to select this button.
-
Under parameters:
- Click includeISBN and select true
- Click sortBy and select author
-
Click Execute.
-
In the Response body you will see the list of books now sorted by author and including the ISBNs.
JSON[ { "id": 5, "title": "31 Days Before Your CCNA Exam", "author": "Allan Johnson" }, { "id": 2, "title": "Linux for Networkers", "author": "Cisco Systems Inc.", "isbn": "000-0000000123" }, { "id": 3, "title": "NetAcad: 20 Years Of Online-Learning", "author": "Cisco Systems Inc.", "isbn": "000-0000001123" }, { "id": 0, "title": "IP Routing Fundamentals", "author": "Mark A. Sportack", "isbn": "978-1578700714" }, { "id": 4, "title": "IPv6 Fundamentals", "author": "Rick Graziani", "isbn": "978-1587144778" }, { "id": 1, "title": "Python for Dummies", "author": "Stef Maruch Aahz Maruch", "isbn": "978-0471778646" } ]Notice that the Request URL now includes the parameters. You will see this again in Postman.

-
Return to Postman and go to the first API tab (the GET tab). You will now include some of the parameters from the School Library API web site.
-
Click Params. You will see under Query Params input boxes for KEY and VALUE. Enter the following information:
-
Under KEY, enter
includeISBNand under Value entertrueNotice a check mark will automatically be included to the left of the value and a new row added.
-
Under KEY, enter
sortByand under Value enterauthorNotice that when entering these query parameters, it has updated the original URL next to the GET. This is the same Request URL you saw in the School Library API web site for this same API call. This is the URL Postman will be using, with these query parameters when making the API call.

-
-
Click Send.
Notice in the Body, it now shows the same list of books, sorted by author and including the ISBNs that you saw in the School Library API web site.
JSON[ { "id": 5, "title": "31 Days Before Your CCNA Exam", "author": "Allan Johnson" }, { "id": 2, "title": "Linux for Networkers", "author": "Cisco Systems Inc.", "isbn": "000-0000000123" }, { "id": 3, "title": "NetAcad: 20 Years Of Online-Learning", "author": "Cisco Systems Inc.", "isbn": "000-0000001123" }, { "id": 0, "title": "IP Routing Fundamentals", "author": "Mark A. Sportack", "isbn": "978-1578700714" }, { "id": 4, "title": "IPv6 Fundamentals", "author": "Rick Graziani", "isbn": "978-1587144778" }, { "id": 1, "title": "Python for Dummies", "author": "Stef Maruch Aahz Maruch", "isbn": "978-0471778646" } ]
Part 3: Use Python to Add 100 Books to the API Simulator🔗
You could use the OpenAPI Specification Try It tool or Postman to add as many books as you want. However, you would have to add them one at a time. A better solution would be to write a program to add the books. In this Part, you will simulate the process of adding 100 books by using the Python faker library.
Step 1: Open Visual Studio Code and navigate to the graphhopper directory🔗
-
Open Visual Studio Code from the Menu button or by double-clicking the icon on the desktop .
-
Click File > Open Folder..., navigate to the
labs/devnet-src/graphhopperfolder, and click Open.Note
If VS Code asks if you trust the authors of the files in the folder, choose Yes, I trust the authors
Step 2: Investigate the libraries used by add100RandomBooks.py program🔗
-
In VS Code EXPLORER pane on the left, click
add100RandomBooks.pyto open it, if necessary. -
At the top, notice the "shebang" (
#!) that sets the interpreter to Python3 and then the three libraries that are imported.Python#!/usr/bin/env python3 import requests import json from faker import Faker -
You will use the Python
requestslibrary throughout this course. Therequestslibrary is required if you want to use Python to make API requests using GET, POST, DELETE and other HTTP methods. -
fakeris a Python library that generates 'fake' data for you. This program uses the Pythonfakerlibrary to generate random book titles, authors, and ISBNs. You can search the internet for more information on thefakerlibrary. However, complete the following steps to see all the 252 methods for thefakerlibrary.-
Open a terminal window and start
python3.devasc@labvm:~/labs/devnet-src/graphhopper$ python3 Python 3.8.2 (default, Apr 27 2020, 15:53:34) [GCC 9.3.0] on linux Type "help", "copyright", "credits" or "license" for more information. >>> -
From
fakerimport theFakermodule (case sensitive).Python>>> from faker import Faker -
Assign the
Faker()module to a variable calledfake.Python>>> fake = Faker() -
To see all the methods, enter
fake.(don’t miss the period) and then press the Tab key twice. Notice the methodfake.name(), which you will use in the next step. In the next step and later in this lab, you will also use the three highlighted methods (prefaced withfake.):catch_phrase(),isbn13(), andname().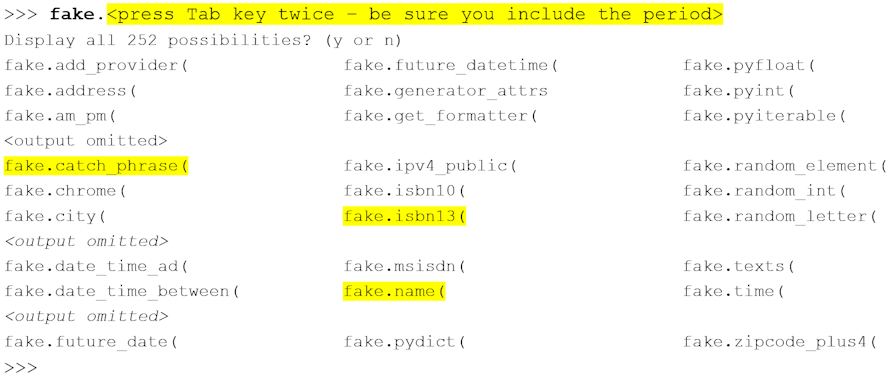
-
Step 3: Practice generating random data using the faker library🔗
-
Enter the following to generate a fake name. Your output will be a different fake name each time you execute the command.
Python>>> print(f'My name is {fake.name()}') My name is Katherine Ross. >>> -
Later in the program, a loop is used to iterate through these three methods to create entries for the School Library. Enter the following to generate 10 random names. After the
…you will need to press Enter a second time. Note the leading spaces on the second line.Python>>> for i in range(10): ... print(fake.name()) ... Kevin Moyer Mr. Christopher Green MD Spencer Jensen Whitney Guzman Nicole Scott Tammy Lewis Craig Edwards Michael Diaz Ryan Mccoy Terry Rocha >>> -
Quit the Python interpreter when done investigating the
fakerlibrary.Python>>> quit()
Step 4: Review the function variables🔗
Return to VS Code. The two functions in the program use three variables to get an authorization token from the School Library API service.
APIHOST = "http://library.demo.local"
LOGIN = "cisco"
PASSWORD = "Cisco123!"
Step 5: Review the getAuthToken function🔗
-
The
getAuthTokenfunction uses three variables to build a request. Thervariable invokes the POST method for the loginViaBasic API and stores the token value if the call is successful. Notice the use of an f-string to build the request URL, which will insert the value ofAPIHOSTinto the string.Pythondef getAuthToken(): authCreds = (LOGIN, PASSWORD) r = requests.post( f"{APIHOST}/api/v1/loginViaBasic", auth = authCreds ) -
If the call is unsuccessful (the HTTP status code is not equal to 200), an exception is raised and printed to the terminal window. Again, notice the use of an f-string to build the exception message. You can test the exception code by changing the one of the variables in Step 4.
Pythonif r.status_code == 200: return r.json()["token"] else: raise Exception(f"Status code {r.status_code} and text {r.text}, while trying to Auth.")
Step 6: Review the addBook function🔗
-
Similar to the
addAuthTokenfunction, theaddBookfunction uses the three variables shown in Step 4 to build a request. Thervariable invokes the POST method for the Books API. The data comes from a variable calledbook, which is specified in the final part of the program.Pythondef addBook(book, apiKey): r = requests.post( f"{APIHOST}/api/v1/books", headers = { "Content-type": "application/json", "X-API-Key": apiKey }, data = json.dumps(book) ) -
If the call is unsuccessful, an exception is raised and printed to the terminal window. You can test it by changing the one of the variables in Step 4.
Pythonif r.status_code == 200: print(f"Book {book} added.") else: raise Exception(f"Error code {r.status_code} and text {r.text}, while trying to add book {book}.")
Step 7: Review the code that invokes the two functions🔗
-
The
addAuthTokenfunction is invoked and the results are stored in the variableapiKey.PythonapiKey = getAuthToken() -
The
Faker()module is set to a variable namedfake. Aforloop then iterates 100 times. Theivariable is used later in the loop to set the value for the id key for each new book from 4 up to and not including 105.Note
If you want to keep the two previous books added previously in this lab, change the range to (6, 107).
Pythonfake = Faker() for i in range(4, 105): -
Next, three variables hold the value of methods invoked from the
Faker()module:catch_phrase(),name(), andisbn13().PythonfakeTitle = fake.catch_phrase() fakeAuthor = fake.name() fakeISBN = fake.isbn13() -
Recall that the payload parameter for the Books API requires JSON in the following format:
JSON{ "id": 0, "title": "string", "author": "string" } -
The
bookvariable is built using the three required keys for the payload parameter and values from the three fake variables.Pythonbook = {"id": i, "title": fakeTitle, "author": fakeAuthor, "isbn": fakeISBN} -
Finally, the
addBookfunction is called passing thebookandapiKeyvariables. BecauseaddBookis part of the loop, it will be called 100 times, one time each for book ID 4 through 104.
Step 8: Run and verify the add100RandomBooks.py program🔗
-
Return to the terminal window. Enter the
python3command to run the add100RandomBooks.py program. You should get output similar to the following although your book titles and ISBN numbers will be different fake values.devasc@labvm:~/labs/devnet-src/graphhopper$ python3 add100RandomBooks.py Book {'id': 4, 'title': 'Assimilated client-server frame', 'author': 'Chelsea Mitchell', 'isbn': '978-0-411-83123-3'} added. Book {'id': 5, 'title': 'Adaptive tangible conglomeration', 'author': 'Edward Ryan', 'isbn': '978-1-64406-014-8'} added. <output omitted for brevity> Book {'id': 103, 'title': 'Fundamental uniform data-warehouse', 'author': 'Dennis David', 'isbn': '978-1-68465-896-1'} added. Book {'id': 104, 'title': 'Organic 4thgeneration functionalities', 'author': 'Nicole Gilbert', 'isbn': '978-0-13-176202-2'} added. devasc@labvm:~/labs/devnet-src/graphhopper$ -
Return to the School Library tab in Chromium browser and refresh the page. You should now see your 100 new books added.
Note
If you go to the API documentation page instead of the main page (http://library.demo.local/api/v1/docs) and use Try It Out, you will only get a list of the first 10 books. You can enter a value from 2 to 10 the page parameter to see the other books.
-
Close the Chromium Browser, VS Code, and Postman. Leave the terminal window open for the next lab.
4.3 Integrate a REST API in a Python Application🔗
Objectives🔗
Part 1: Get an API Key
Part 2: Add your API key to your OS environment
Part 3: Build the Graphhopper Geocoding Application
Part 4: Build the Graphhopper Routing Application
Part 5: Test Full Application Functionality
Background / Scenario🔗
In this lab, you will create an application in Visual Studio Code (VS Code) that retrieves JSON data from the Graphhopper Directions API, parses the data, and formats it for output to the user. You will use the GET Route request from the Graphhopper Directions API. Review the Directions API documentation here: https://docs.graphhopper.com/
Instructions🔗
Part 1: Get an API Key🔗
Before building the application, you need to complete the following steps to get a Graphhopper API key.
-
Go to: https://www.graphhopper.com/.
-
Click Sign Up at the top of the page.
-
Fill out the form to create a new account. For Company, enter Cisco Networking Academy Student.
-
After verifying your email account and loging into Graphhopper, click API Keys in the navigation menu.
Note
Check your SPAM folder for the confirmation email from Graphhopper if you have not received it.
-
Click Create New Key to add a new API key. Name the new key Lab 4 – REST APIs. Click Create Key to create the new API key.
-
Click the copy button to copy your API Key to a text file for future use. This will be the key you use for the rest of this lab.
Part 2: Add your API key to your OS environment🔗
Although it’s possible to hardcode your API key directly into your application, that is not good security practice. Anyone who views your source code could see your API key. This is especially important if your source code is pushed to a cloud-based Git repository like GitHub.
Instead, you will store your key in an environment variable in your operating system. The environment variable is only accessible while logged in to the VM, and it ensures you won’t accidentally leak your API key.
-
Open the terminal and create a new environment variable called GRAPHHOPPER_API_KEY with the value of the key you obtained in Part 1. Standard practice is to use all capital letters for environment variables. Make sure that you type the variable name and key accurately. Note that you are redirecting this command to be appended (>>) to the .bashrc file. This is to ensure that this variable persists even after you close the terminal.
Important
Make sure you use your own key, not the one in the example below. Also be careful to spell "GRAPHHOPPER" correctly (there are two H's).
devasc@labvm:~$ echo "export GRAPHHOPPER_API_KEY=12345678-abcd-1234-9876-a1b2c3d4e5f6" >> ~/.bashrc -
Close all open terminal windows and relaunch the terminal. That includes closing and relaunching VS Code if you have it open.
-
Verify that your export was successful by echoing the variable on the command line (note the $ in front of the variable name).
devasc@labvm:~$ echo $GRAPHHOPPER_API_KEY
12345678-abcd-1234-9876-a1b2c3d4e5f6
Part 3: Build the Graphhopper Geocoding Application🔗
In this part, you will create a Python script to send a URL request to the Graphhopper Geocoding API. You will then test your API calls. Throughout the rest of this lab, you will build your script in parts, saving the file with a new name each time. This will help with learning the pieces of the application as well as provide you a series of scripts that you can return to if you run into any problems in the current version of your application.
Step 1: Create a New File in VS Code🔗
You can use any tools you want to enter in Python commands and execute the Python code. However, this lab will demonstrate building the application in VS Code.
-
Open VS Code . There is a shortcut on the Desktop, for your convenience.
-
Select File > Open Folder...
-
Navigate to the ~/labs/devnet-src/graphhopper directory and click Open.
Note
If VS Code asks if you trust the authors of the files in the folder, choose Yes, I trust the authors
-
Select File > New File…
-
Select Python File from the dropdown menu that appears
Note
If Python File is not one of the options displayed from the dropdown, ensure that there are no pending Extension updates in VS Code. Click the Extensions icon in the left navigation pane (or press Ctrl+Shift+X) and click the Update and/or Reload Extensions button
-
Select File > Save as… and name the file directions_api1.py and click Save.
Important
Be sure to name your files exactly as given in each step. The autograder will be running your code and will be looking for specific files by their filename.
Step 2: Importing modules for the application🔗
To begin your script for parsing JSON data, you will need to import some modules from the Python library:
-
The
environfunction from theosmodule will allow you to get environment variables from your operating system (for retrieving your API key). -
The
urllib.parsemodule provides a variety of functions that will enable you to parse and manipulate the components of URLs. -
The
requestsmodule is the heart of working with REST APIs in Python and provides functions for communicating with the REST API server using HTTP.
You can read more about the requests module, including all supported methods, here: https://requests.readthedocs.io/en/latest/
-
Add the following import statements at the top of your script.
Pythonimport os import requests import urllib.parse -
Select Terminal > New Terminal to open a Terminal inside VS Code.
-
Save and run your script. You should get no errors and no output (we haven't done anything but import libraries so far). You should save and run your scripts often to test code functionality.
devasc@labvm:~/labs/devnet-src/graphhopper$ python3 directions_api1.py
devasc@labvm:~/labs/devnet-src/graphhopper$
Step 3: Build the URL for the request to the Graphhopper Geocoding API🔗
The first step in creating your API request is to construct the URL that your application will use to make the call. Initially, the URL will be the combination of the following variables:
-
GEOCODE_URL: the Geocoding URL to request longitude and latitude information for a given address or location
-
ROUTE_URL: the Routing URL to request routing information from the point of origin to the destination
-
KEY: the Graphhopper API key you retrieved from the Graphhopper website
-
Create some constants that will be used in several places in your code. Best practice is to use all capital letters for constants in python.
PythonGEOCODE_URL = "https://graphhopper.com/api/1/geocode?" ROUTE_URL = "https://graphhopper.com/api/1/route?" KEY = os.environ.get("GRAPHHOPPER_API_KEY", None)Note
The
os.environ.getmethod retrieves the API key that you stored as an environment variable in Part 2. This keeps the actual key value secured and out of your source code. -
Create the
loc1andloc2variables, which will specify the point of origin and the destination, respectively. These parameters will also be included in the URL sent to Graphhopper.Pythonloc1 = "Toronto, ON" loc2 = "Ottawa, ON" -
Using the
GEOCODE_URL,loc1, andKEY, create a URL to retrieve the origin's longitude and latitude. Use theurlencodemethod to properly format the address value. This function builds the parameters part of the URL and converts possible special characters in the address value into acceptable characters (e.g. space into "+" and a comma into "%2C").For the
urlvariable, we will use the origin location variableloc1and limit to one set of the latitude and longitude coordinates, and the Graphhopper API key. You will replace theloc1variable when creating a Geocoding function later in the lab.Pythonurl = f"{GEOCODE_URL}{urllib.parse.urlencode({'q':loc1, 'limit': '1', 'key':KEY})}"Note
You can see the details of this API request, including the query paramaters like "q" and "limit", in the API documentation here https://docs.graphhopper.com/openapi/geocoding/getgeocode
-
Create variables to hold the reply of the requested URL and print the returned JSON data.
- The
replydatavariable holds the data from the reply of the Graphhopper URL. - The
json_datavariable holds a Python’s Dictionary representation of the JSON reply of thegetmethod of therequestsmodule. - The
requests.get()method will make the API call to the Graphhopper Geocoding API. - The
json_statusvariable holds the HTTP status code returned from the API (e.g., 200 OK, or 404 Not Found) - The
printstatement will be used temporarily to check the returned data. You will replace thisprintstatement with more sophisticated display options later in the lab.
Pythonreplydata = requests.get(url) json_data = replydata.json() json_status = replydata.status_code print(json_data) - The
Step 4: Test the URL request and commit the changes🔗
-
Save and run your directions_api1.py script and verify it works.
-
Troubleshoot your code, if necessary. Although your output might be slightly different, you should get a JSON response similar to the following. Notice that the output is a dictionary with two key/value pairs. The value for the key hits is a list that includes additional dictionaries and lists. The key point includes the lat and lng key/value pair that you will use later in the lab.
devasc@labvm:~/labs/devnet-src/graphhopper$ python3 directions_api1.py {'hits': [{'point': {'lat': 43.6534817, 'lng': -79.3839347}, 'extent': [-79.6392832, 43.5796082, -79.1132193, 43.8554425], 'name': 'Toronto', 'country': 'Canada', 'countrycode': 'CA', 'state': 'Ontario', 'osm_id': 324211, 'osm_type': 'R', 'osm_key': 'place', 'osm_value': 'city'}], 'locale': 'default'} devasc@labvm:~/labs/devnet-src/graphhopper$ -
Change the
loc1variable. Rerun the script to get different results.Note
To ensure the results you want, it is best to include both the city and the province for cities in Canada. When referring to cities in other countries, you can usually use either the English name for the city and country, or the native name.
-
Make sure to change the
loc1variable back to Toronto, ON before moving on to the next step -
Add the updated directions_api1.py file to the staging area then commit the changes to the local repository using the message Added the geocoding API code.
devasc@labvm:~/labs/devnet-src/graphhopper$ git add directions_api1.py
devasc@labvm:~/labs/devnet-src/graphhopper$ git commit -m "Added the geocoding API code"
[main c118840] Added the geocoding API code
1 file changed, 17 insertions(+)
create mode 100644 directions_api1.py
devasc@labvm:~/labs/devnet-src/graphhopper$
Step 5: Print the URL and check the status of the JSON request🔗
Now that you know the JSON request is working, you can add some more functionality to the application.
-
In VS Code, click File > Save As… and save your script as directions_api2.py.
-
Delete the
print(json_data)statement as you no longer need to test that the request is properly formatted. -
Add the statements below to the end of your code, which will do the following:
- Use the
status_codeproperty to determine the HTTP status code returned in the response. - Start an
ifloop that checks for a successful call, which is indicated by a returned value of 200. If the request is successful, add aprintstatement to display the constructed Geocoding request URL. The \n adds a blank line before displaying the URL.
Pythonif json_status == 200: print(f"Geocoding API URL for {loc1}:\n{url}")Note
Later in this lab, you will add
elifandelsestatements for differentstatus_codevalues. - Use the
Step 6: Display the JSON data in JSONView🔗
-
Save and run your code. It should print out the Geocoding URL for Toronto, ON.
devasc@labvm:~/labs/devnet-src/graphhopper$ python3 directions_api2.py
Geocoding API URL for Toronto, ON:
https://graphhopper.com/api/1/geocode?q=Toronto%2C+ON&limit=1&key=12345678-abcd-1234-9876-a1b2c3d4e5f6
Note
The
keyparamter at the end of the URL should be your key, not the one in the example output -
Copy and paste the URL returned from your Python application, into the address field in the Chromium web browser in your VM.
Note
The Chromium web browser installed in the VM has an extension called JSONVue installed, which formats JSON to make it easier to read.
-
The results only have two root dictionaries:
hitsandlocale. Expandhitsand investigate the rich data. Continue to expand the result as necessary until the latitude and longitude coordinates for the origin are displayed.JSON{ "hits": [ { "point": { "lat": 43.6534817, "lng": -79.3839347 }, "extent": [ -79.6392832, 43.5796082, -79.1132193, 43.8554425 ], "name": "Toronto", "country": "Canada", "countrycode": "CA", "state": "Ontario", "osm_id": 324211, "osm_type": "R", "osm_key": "place", "osm_value": "city" } ], "locale": "default" }
Step 7: Build the Geocoding function🔗
So far, you have created a URL requesting the latitude and longitude of a starting location and received the information from the API request. What about the information for the destination? You can reuse the same code for the second location by using a function.
In this step, you will create a function that accepts the location inputs and return the status_code value of the Geocoding API URL, longitude, and latitude of the location, and additional Graphhopper information regarding the location.
-
The example here uses the following parameters as the location input into the Geocoding function (already in your code, don't add them again).
Pythonloc1 = "Toronto, ON" loc2 = "Ottawa, ON" -
Delete the
GEOCODE_URLconstant because it will be moved into the new geocoding function. -
Delete all of the lines of code starting at
url =all the way to the end of the file. You should only have theimportstatements, the two remaining constants (ROUTE_URLandKEY), and theloc1andloc2variables remaining. -
At the bottom of the Python file, create a function called
geocoding()that will accept two arguments:locationandkey. Remember that all code that is part of this function needs to be indented below this line!Pythondef geocoding(location, key): -
Add a constant called
GEOCODE_URLthat will be the address of the Graphhopper Geocoding API. Remember, this line and all subsequent lines in this function need to be indented under thegeocoding()function.PythonGEOCODE_URL = "https://graphhopper.com/api/1/geocode?" -
Create a variable called
urlthat will be set to theGEOCODING_URLconstant, concatenated with the location and key, and limit of 1 result. These values will be properly formatted by theurllib.parse.urlencode()method.Pythonurl = f"{GEOCODE_URL}{urllib.parse.urlencode({'q':location, 'limit': '1', 'key':KEY})}" -
Leave one blank line, then enter the following code that will send the HTTPS request and store the results in a variable called
json_data(after parsing the JSON data into a Python dictionary). It will also store the HTTP status code in a variable calledjson_status. Remember, all three lines should be indented under thegeocoding()function.Pythonreplydata = requests.get(url) json_data = replydata.json() json_status = replydata.status_code -
Leave another blank line, then use the following
printstatement to output the URL used to send the request. This is useful for debugging purposes.Pythonprint(f"Geocoding API URL for {location}:\n{url}") -
Leave another blank line, and enter the following code, which verifies that the HTTP response code received from the API call is 200 (success). If it is a success, the latitude and longitude values are prased from the results and stored in variable. If the HTTP response code is anything other than 200, the latitude and longitude values are set to null.
Pythonif json_status == 200: lat = (json_data["hits"][0]["point"]["lat"]) lng = (json_data["hits"][0]["point"]["lng"]) else: lat = "null" lng = "null" -
Leave another blank line and return the HTTP status code, the latitude, and the longitude values to the function caller.
Pythonreturn json_status,lat,lng
Step 8: Test your new Geocoding function🔗
-
To use the function, you will create two variables to call the geocoding function and store the values returned from the function. Copy the following lines and paste them to the end of the application.
The geocoding function takes the input variable values for
loc1andkeyand returns the tuple with the values of thejson_status,lat, andlngvariables. The function is called again forloc2. These lines should NOT be indented as they are not part of thegeocoding()function.Pythonorig = geocoding(loc1, KEY) print(orig) dest = geocoding(loc2, KEY) print(dest) -
Save and run your directions_api2.py script and verify it works. Troubleshoot your code, if necessary.
You should get output similar to the following. Notice your
keyand theoriginanddestinationare embedded in the URL request. Notice the returned results from the function as a tuple with thestatus,latitudeandlongitudevalues.devasc@labvm:~/labs/devnet-src/graphhopper$ python3 directions_api2.py Geocoding API URL for Toronto, ON: https://graphhopper.com/api/1/geocode?q=Toronto%2C+ON&limit=1&key=12345678-abcd-1234-9876-a1b2c3d4e5f6 (200, 43.6534817, -79.3839347) Geocoding API URL for Ottawa, ON: https://graphhopper.com/api/1/geocode?q=Ottawa%2C+ON&limit=1&key=12345678-abcd-1234-9876-a1b2c3d4e5f6 (200, 45.4208777, -75.6901106) devasc@labvm:~/labs/devnet-src/graphhopper$
Step 9: Display additional information🔗
Besides the point dictionary with latitude and longitude information, you can also display other related information to verify that the coordinate is correct for the input location.
-
Display the JSON data again in the Chromium web browser. Notice the additional information available in the hits dictionary.
JSON{ "hits": [ { "point": { "lat": 43.6534817, "lng": -79.3839347 }, "extent": [ -79.6392832, 43.5796082, -79.1132193, 43.8554425 ], "name": "Toronto", "country": "Canada", "countrycode": "CA", "state": "Ontario", "osm_id": 324211, "osm_type": "R", "osm_key": "place", "osm_value": "city" } ], "locale": "default" } -
Remove the following
printstatement within thegeocoding()function. It will be replaced later in the function.Pythonprint("Geocoding API URL for " + location + ":\n" + url) -
Within the
geocoding()function, add the new variablesname,state,country, andvalue. Because the keysstateandcountryare not available for all locations, theifstatements are used to assign the desired strings for the variablenew_locand return the value assigned tonew_loc. For example, the key valuestateis not in the returnedhitsdictionary for Beijing, China.Pythonif json_status == 200: lat = json_data["hits"][0]["point"]["lat"] lng = json_data["hits"][0]["point"]["lng"] name = json_data["hits"][0]["name"] value = json_data["hits"][0]["osm_value"] if "country" in json_data["hits"][0]: country = json_data["hits"][0]["country"] else: country="" if "state" in json_data["hits"][0]: state = json_data["hits"][0]["state"] else: state="" if len(state) !=0 and len(country) !=0: new_loc = f"{name}, {state}, {country}" elif len(state) !=0: new_loc = f"{name}, {country}" else: new_loc = name print(f"Geocoding API URL for {new_loc} (Location Type: {value})\n {url}") else: lat = "null" lng = "null" new_loc = location return json_status,lat,lng,new_loc -
Save and run your directions_api2.py script and verify it works.
devasc@labvm:~/labs/devnet-src/graphhopper$ python3 directions_api2.py Geocoding API URL for Toronto, Ontario, Canada (Location Type: city) https://graphhopper.com/api/1/geocode?q=Toronto%2C+ON&limit=1&key=12345678-abcd-1234-9876-a1b2c3d4e5f6 (200, 43.6534817, -79.3839347, 'Toronto, Ontario, Canada') Geocoding API URL for Ottawa, Ontario, Canada (Location Type: city) https://graphhopper.com/api/1/geocode?q=Ottawa%2C+ON&limit=1&key=12345678-abcd-1234-9876-a1b2c3d4e5f6 (200, 45.4208777, -75.6901106, 'Ottawa, Ontario, Canada') devasc@labvm:~/labs/devnet-src/graphhopper$ -
Add the updated directions_api2.py file to the staging area then commit the changes to the local repository using the message Added additional functionality to the geocoding application.
devasc@labvm:~/labs/devnet-src/graphhopper$ git add directions_api2.py
devasc@labvm:~/labs/devnet-src/graphhopper$ git commit -m "Added additional functionality to the geocoding application."
[main a6b1aeb] Added additional functionality to the geocoding application.
1 file changed, 52 insertions(+)
create mode 100644 directions_api2.py
devasc@labvm:~/labs/devnet-src/graphhopper$
Step 10: Add User input for starting location and destination🔗
You have used static values for the location variables. Now let's modify the application so that the user inputs these locations. Complete the following steps to update your application:
-
In VS Code, click File > Save As… and save your script as directions_api3.py.
-
Delete the current
loc1andloc2variables from the beginning section of the code. -
Rewrite the last four lines of the application to be within a
whileloop, in which it requests user input for the starting location (loc1) and destination (loc2). The while loop allows the user to continue to make requests for different directions. Be sure all the remaining code is correctly indented within the while loop.Pythonwhile True: loc1 = input("Starting Location: ") orig = geocoding(loc1, KEY) print(orig) loc2 = input("Destination: ") dest = geocoding(loc2, KEY) print(dest)
Step 11: Test user input functionality🔗
-
Save and run your directions_api3.py script and verify it works. Troubleshoot your code, if necessary. You should get output similar to what is shown below. To end the program, enter Ctrl+C. You will get a KeyboardInterrupt error as shown in the output below. To stop the application more gracefully, you will add quit functionality in the next step.
devasc@labvm:~/labs/devnet-src/graphhopper$ python3 directions_api3.py
Starting Location: Toronto, ON
Geocoding API URL for Toronto, Ontario, Canada (Location Type: city)
https://graphhopper.com/api/1/geocode?q=Toronto%2C+ON&limit=1&key=12345678-abcd-1234-9876-a1b2c3d4e5f6
(200, 43.6534817, -79.3839347, 'Toronto, Ontario, Canada')
Destination: Ottawa, ON
Geocoding API URL for Ottawa, Ontario, Canada (Location Type: city)
https://graphhopper.com/api/1/geocode?q=Ottawa%2C+ON&limit=1&key=12345678-abcd-1234-9876-a1b2c3d4e5f6
(200, 45.4208777, -75.6901106, 'Ottawa, Ontario, Canada')
Starting Location: ^CTraceback (most recent call last):
File "directions_api3.py", line 47, in <module>
    loc1= input("Starting Location: ")
KeyboardInterrupt

devasc@labvm:~/labs/devnet-src/graphhopper$
Step 12: Add quit functionality to the application🔗
Instead of forcing the application to quit with a keyboard interrupt, you will add the ability for the user to enter q or quit as keywords to quit the application.
-
Add an
ifstatement after each location variable to check if the user enters q or quit, as shown below.Pythonwhile True: loc1 = input("Starting Location: ") if loc1 == "quit" or loc1 == "q": break orig = geocoding(loc1, KEY) print(orig) loc2 = input("Destination: ") if loc2 == "quit" or loc2 == "q": break dest = geocoding(loc2, KEY) print(dest)Note
The python
breakstatement terminates thewhileloop immediately, without processing the rest of the code inside the loop.
Step 13: Test the quit functionality and commit the changes🔗
-
Save and run your directions_api3.py script four times to test each location variable. Verify that both quit and q will end the application on both the Starting Location and Destination prompts. Troubleshoot your code, if necessary. You should get output similar to the following.
devasc@labvm:~/labs/devnet-src/graphhopper$ python3 directions_api3.py Starting Location: q devasc@labvm:~/labs/devnet-src/graphhopper$ python3 directions_api3.py Starting Location: quit devasc@labvm:~/labs/devnet-src/graphhopper$ python3 directions_api3.py Starting Location: Toronto, ON Geocoding API URL for Toronto, Ontario, Canada (Location Type: city) https://graphhopper.com/api/1/geocode?q=Toronto%2C+ON&limit=1&key=12345678-abcd-1234-9876-a1b2c3d4e5f6 (200, 43.6534817, -79.3839347, 'Toronto, Ontario, Canada') Destination: q devasc@labvm:~/labs/devnet-src/graphhopper$ python3 directions_api3.py Starting Location: Toronto, ON Geocoding API URL for Toronto, Ontario, Canada (Location Type: city) https://graphhopper.com/api/1/geocode?q=Toronto%2C+ON&limit=1&key=12345678-abcd-1234-9876-a1b2c3d4e5f6 (200, 43.6534817, -79.3839347, 'Toronto, Ontario, Canada') Destination: quit devasc@labvm:~/labs/devnet-src/graphhopper$ -
Add the updated directions_api3.py file to the staging area then commit the changes to the local repository using the message Added user input and quit functionality
devasc@labvm:~/labs/devnet-src/graphhopper$ git add directions_api3.py
devasc@labvm:~/labs/devnet-src/graphhopper$ git commit -m "Added user input and quit functionality"
[main df14489] Added user input and quit functionality
1 file changed, 57 insertions(+)
create mode 100644 directions_api3.py
devasc@labvm:~/labs/devnet-src/graphhopper$
Step 14: Handling errors within Geocoding function🔗
What happens if the user did not enter any location information? For example, if the user just pressed Enter accidently and did not input any locations. What if the user entered an invalid location, such as #? This can all be addressed within the geocode function.
-
In VS Code, click File > Save As… and save your script as directions_api4.py.
-
A
whilestatement can address the user not providing location information. Add the following highlighted statement to thegeocoding()function. The function will continue to ask for the location until the user provides the information.Pythondef geocoding (location, key): while location == "": location = input("Enter the location again: ") GEOCODE_URL = "https://graphhopper.com/api/1/geocode?" url = GEOCODE_URL + urllib.parse.urlencode({"q":location, "limit": "1", "key":key}) -
Save and run directions_api4.py. Press Enter a few times without entering any starting location information to verify the
whileloop is working correctly. Do the same thing for the destination.devasc@labvm:~/labs/devnet-src/graphhopper$ python3 directions_api4.py Starting Location: Enter the location again: Enter the location again: Enter the location again: Toronto, ON Geocoding API URL for Toronto, Ontario, Canada (Location Type: city) https://graphhopper.com/api/1/geocode?q=Toronto%2C+ON&limit=1&key=12345678-abcd-1234-9876-a1b2c3d4e5f6 (200, 43.6534817, -79.3839347, 'Toronto, Ontario, Canada') Destination: Enter the location again: Enter the location again: Ottawa, ON Geocoding API URL for Ottawa, Ontario, Canada (Location Type: city) https://graphhopper.com/api/1/geocode?q=Ottawa%2C+ON&limit=1&key=12345678-abcd-1234-9876-a1b2c3d4e5f6 (200, 45.4208777, -75.6901106, 'Ottawa, Ontario, Canada') Starting Location: q devasc@labvm:~/labs/devnet-src/graphhopper$ -
What if the user entered invalid characters, such as # or !, or other invalid inputs?
devasc@labvm:~/labs/devnet-src/graphhopper$ python3 directions_api4.py Starting Location: a8asdfjkheqwafd Traceback (most recent call last): File "directions_api4.py", line 52, in <module> orig = geocoding(loc1, KEY) File "directions_api4.py", line 19, in geocoding lat = (json_data["hits"][0]["point"]["lat"]) IndexError: list index out of range devasc@labvm:~/labs/devnet-src/graphhopper$ -
Copy and paste any successful Geocoding API URL from previous output into the Chromium browser address field. Then, modify the query string (?q=) to use an invalid location name. For example, replace Toronto%2C+ON with a8asdfjkheqwafd. Press Enter to see what results you get in the browser.
https://graphhopper.com/api/1/geocode?q=a8asdfjkheqwafd&limit=1&key=12345678-abcd-1234-9876-a1b2c3d4e5f6 -
In this example, you should have received an empty
hitslist for the successful API request. This is because the request was accepted, but since no location was found, the API returned empty results (hits).JSON{ "hits": [], "locale": "default" } -
Update the existing test condition of the
ifstatement so it tests that thehitsresults is not empty (in addition to already testing for HTTP status code 200).Pythonif json_status == 200 and len(json_data["hits"]) !=0: lat = (json_data["hits"][0]["point"]["lat"]) lng = (json_data["hits"][0]["point"]["lng"])Note
The if
json_status == 200is already in your code. Simply addand len(json_data)["hits"]) !=0to it to test for an empty result. -
Save and run the code. It should return HTTP status 200, but values of null for both the
latitudeandlongitudeif given an invalid location.devasc@labvm:~/labs/devnet-src/graphhopper$ python3 directions_api4.py Starting Location: a8asdfjkheqwafd (200, 'null', 'null', 'a8asdfjkheqwafd') Destination: q devasc@labvm:~/labs/devnet-src/graphhopper$ -
What if the API call failed and Graphhopper returned an HTTP status code other than 200 (success)? Modify the code in the
elseblock to print an error message if a status code other than 200 is returned.Pythonelse: lat = "null" lng = "null" new_loc = location if json_status != 200: print(f"Geocode API status: {str(json_status)}\nError message: {json_data['message']}") return json_status,lat,lng,new_loc -
Test this error handling by slightly modifying the
GEOCODE_URLconstant to something that doesn't exist (like geocodetest).PythonGEOCODE_URL = "https://graphhopper.com/api/1/geocodetest? -
Save and run the code again, and confirm that you receive error code 400 and an appropriate error message from Graphhopper.
devasc@labvm:~/labs/devnet-src/graphhopper$ python3 directions_api4.py Starting Location: Toronto, ON Geocode API status: 400 Error message: Cannot handle request towards /geocodetest. Missing profile parameter? (400, 'null', 'null', 'Toronto, ON') Destination: q devasc@labvm:~/labs/devnet-src/graphhopper$ -
Change the
GEOCODE_URLback to the way it was and save the file before continuing.PythonGEOCODE_URL = "https://graphhopper.com/api/1/geocode?" -
Add the updated directions_api4.py file to the staging area then commit the changes to the local repository using the message Added error handling to the code.
devasc@labvm:~/labs/devnet-src/graphhopper$ git add directions_api4.py
devasc@labvm:~/labs/devnet-src/graphhopper$ git commit -m "Added error handling to the code"
[main f51567e] Added error handling to the code
1 file changed, 61 insertions(+)
create mode 100644 directions_api4.py
devasc@labvm:~/labs/devnet-src/graphhopper$
Part 4: Build the Graphhopper Routing Application🔗
In the previous part, you have built an application that accepts user input and returns the latitude and longitude information for an origin and destination location.
In this part, you will finish the application to provide routing information between the starting and ending locations. You will also provide information regarding total travelled distance and trip duration. In addition, you will add the vehicle feature to your application, where the user can choose the method of travel on land.
Step 1: Build the URL for the request to Graphhopper Routing API🔗
In this step, you will build the URL for the Routing API request if the Geocoding API calls were successful.
-
In VS Code, click File > Save As… and save your script as directions_api5.py.
-
Since you have verified the status, latitude, and longitude values returned from the Geocoding function multiple times, delete the
print(orig)andprint(dest)from thewhileloop at the end of your code. -
The Geocoding function returns a tuple with these three values:
json_status,latitude, andlongitude. Add aprintstatement with a divider and anifstatement to check if the geocoding function returns a successful status for both locations.Pythonwhile True: loc1 = input("Starting Location: ") if loc1 == "quit" or loc1 == "q": break orig = geocoding(loc1, KEY) loc2 = input("Destination: ") if loc2 == "quit" or loc2 == "q": break dest = geocoding(loc2, KEY) print("="*50) if orig[0] == 200 and dest[0] == 200:Note
Recall that the
origanddestvariables take the format(status, latitude, longitude, name), soorig[0]anddest[0]retun the status code from these variables. -
At the end of the script, add the following lines of code to request the routing information for the Graphhopper Routing API and print out the URL for validation using the Chromium web browser.
op: the string that provides the latitude and longitude of the origin
dp: the string that provides the latitude and longitude of the destination
paths_url: URL to request the route between the origin and destination
paths_status: the status code returned from URL to request the route between the origin and destination
paths_data: the JSON data returned from the URL to request the route between the origin and destinationPythonif orig[0] == 200 and dest[0] == 200: op=f"&point={str(orig[1])}%2C{str(orig[2])}" dp=f"&point={str(dest[1])}%2C{str(dest[2])}" paths_url = f"{ROUTE_URL}{urllib.parse.urlencode({'key':KEY})}{op}{dp}" paths_status = requests.get(paths_url).status_code paths_data = requests.get(paths_url).json() print(f"Routing API Status: {str(paths_status)}\nRouting API URL:\n{paths_url}") -
Run your directions_api5.py script. Verify that both quit and q will end the application. Troubleshoot your code, if necessary. You should get output similar to the following. The highlighted text below is the URL to request the routing information from the Routing API.
devasc@labvm:~/labs/devnet-src/graphhopper$ python3 directions_api5.py
Starting Location: Toronto, ON
Geocoding API URL for Toronto, Ontario, Canada (Location Type: city)
https://graphhopper.com/api/1/geocode?q=Toronto%2C+ON&limit=1&key=12345678-abcd-1234-9876-a1b2c3d4e5f6
Destination: Ottawa, ON
Geocoding API URL for Ottawa, Ontario, Canada (Location Type: city)
https://graphhopper.com/api/1/geocode?q=Ottawa%2C+ON&limit=1&key=12345678-abcd-1234-9876-a1b2c3d4e5f6
==================================================
Routing API Status: 200
Routing API URL:
https://graphhopper.com/api/1/route?key=12345678-abcd-1234-9876-a1b2c3d4e5f6&point=43.6534817%2C-79.3839347&point=45.4208777%2C-75.6901106
Starting Location: q
devasc@labvm:~/labs/devnet-src/graphhopper$
Step 2: Display trip summary information to include duration and distance🔗
-
Copy and paste the Routing URL from the previous step into the Chromium web browser address field.
Important
Use the URL displayed in your output, not the one in the sample output above.
-
The results only have three root dictionaries:
hints,info, andpaths. Expandpathsif necessary and investigate the rich data. The highlighted information below provides the duration and total distance travelled for this route.JSON{ "hints": {...}, "info": {...}, "paths": [ { "distance": 449135.042, "weight": 22814.350759, "time": 16077310, "transfers": 0, "legs": [], "points_encoded": true, "points_encoded_multiplier": 100000.0, <output omitted for brevity> } } -
The following
ifstatement tests the response status for the Routing APIs. When the response status returns as 200 for the Routing API, the variablepaths_datastores the JSON data returned from Routing API. Severalprintstatements are added displaying thefromandtolocations, as well as thetimeanddistancekeys for the trip as strings.The additional statements also include
printstatements that will display a double line before the next request for a starting location. Make sure these statements are embedded in (indented under) thewhile Trueloop at the end of your code, and part of theifblock that tests theoriganddestvariables.Pythonprint("="*50) print(f"Directions from {orig[3]} to {dest[3]}") print("="*50) if paths_status == 200: print(f"Distance Traveled: {str(paths_data['paths'][0]['distance'])} m") print(f"Trip Duration: {str(paths_data['paths'][0]['time'])} millisec") print("="*50) -
Save and run directions_api5.py to see the following output.
devasc@labvm:~/labs/devnet-src/graphhopper$ python3 directions_api5.py Starting Location: Toronto, ON Geocoding API URL for Toronto, Ontario, Canada (Location Type: city) https://graphhopper.com/api/1/geocode?q=Toronto%2C+ON&limit=1&key=12345678-abcd-1234-9876-a1b2c3d4e5f6 Destination: Ottawa, ON Geocoding API URL for Ottawa, Ontario, Canada (Location Type: city) https://graphhopper.com/api/1/geocode?q=Ottawa%2C+ON&limit=1&key=12345678-abcd-1234-9876-a1b2c3d4e5f6 ================================================== Routing API Status: 200 Routing API URL: https://graphhopper.com/api/1/route?key=12345678-abcd-1234-9876-a1b2c3d4e5f6&point=43.6534817%2C-79.3839347&point=45.4208777%2C-75.6901106 ================================================== Directions from Toronto, Ontario, Canada to Ottawa, Ontario, Canada ================================================== Distance Traveled: 449135.042 m Trip Duration: 16077310 millisec ================================================== Starting Location: q devasc@labvm:~/labs/devnet-src/graphhopper$ -
By default, Graphhopper uses meters to measure distance. Convert your application to display in kilometers (km) instead.
Pythonif paths_status == 200: km = (paths_data["paths"][0]["distance"])/1000 -
Replace the Distance Traveled
printstatement to use the one shown below that displays the distance in kilometers instead of meters. The extra decimal places for kilometers is not helpful. Use the{:.1f}argument to format the float values to 1 decimal place, as shown below.Pythonif paths_status == 200: km = (paths_data["paths"][0]["distance"])/1000 print(f"Distance Traveled: {km:.1f} km") print("Trip Duration: " + str(paths_data["paths"][0]["time"]) + " millisec") print("="*50) -
Graphhopper reports the elapsed time in milliseconds, which is not terribly useful. Add these lines of code to convert the elapsed time so the trip duration time can be displayed in the form of
hh:mm:ss. The modulo operator (%) returns the remainder, instead of the quotient.Pythonif paths_status == 200: km = (paths_data["paths"][0]["distance"])/1000 sec = int(paths_data["paths"][0]["time"]/1000%60) min = int(paths_data["paths"][0]["time"]/1000/60%60) hr = int(paths_data["paths"][0]["time"]/1000/60/60) -
Replace the Trip Duration
printstatement as shown below. To display the time in the form ofhh:mm:ss, The displayed numbers should be in the form of two digital whole number. Use the{:02d}argument to format the float values to a digital whole number, as shown below.Pythonprint(f"Trip Duration: {hr:02d}:{min:02d}:{sec:02d}")
Step 3: Test the parsing and formatting functionality🔗
-
Save and run your directions_api5.py script to verify it works. Troubleshoot your code, if necessary. Make sure you have all the proper opening and closing parentheses. You should get output similar to the following.
devasc@labvm:~/labs/devnet-src/graphhopper$ python3 directions_api5.py Starting Location: Toronto, ON Geocoding API URL for Toronto, Ontario, Canada (Location Type: city) https://graphhopper.com/api/1/geocode?q=Toronto%2C+ON&limit=1&key=12345678-abcd-1234-9876-a1b2c3d4e5f6 Destination: Ottawa, ON Geocoding API URL for Ottawa, Ontario, Canada (Location Type: city) https://graphhopper.com/api/1/geocode?q=Ottawa%2C+ON&limit=1&key=12345678-abcd-1234-9876-a1b2c3d4e5f6 ================================================== Routing API Status: 200 Routing API URL: https://graphhopper.com/api/1/route?key=12345678-abcd-1234-9876-a1b2c3d4e5f6&point=43.6534817%2C-79.3839347&point=45.4208777%2C-75.6901106 ================================================== Directions from Toronto, Ontario, Canada to Ottawa, Ontario, Canada ================================================== Distance Traveled: 449.1 km Trip Duration: 04:27:57 ================================================== Starting Location: q devasc@labvm:~/labs/devnet-src/graphhopper$ -
Add the updated directions_api5.py file to the staging area then commit the changes to the local repository using the message Added the initial routing code.
devasc@labvm:~/labs/devnet-src/graphhopper$ git add directions_api5.py
devasc@labvm:~/labs/devnet-src/graphhopper$ git commit -m "Added the initial routing code"
[main 90553f1] Added the initial routing code
1 file changed, 81 insertions(+)
create mode 100644 directions_api5.py
devasc@labvm:~/labs/devnet-src/graphhopper$
Step 4: Inspect the instructions list in the JSON data🔗
Now you are ready to display the step-by-step directions from the starting location to the destination. Return to the Chromium browser where earlier you viewed the output in JSON. If you closed the browser, copy the Routing URL from last time you ran the program and paste it into the browser address bar.
-
The paths list includes one big dictionary with most of the JSON data. Find the instructions list as shown below. Each dictionary contains a
textkey with a value, such as "Turn onto ...", as shown below. You need to parse the JSON data to extract the value for thetextkey to display inside your application.JSON{ "hints": {...}, "info": {...}, "paths": [ { "distance": 449135.042, "weight": 22814.350759, "time": 16077310, <output ommitted for brevity> "instructions": [ { "distance": 84.609, "heading": 73.72, "sign": 0, "interval": [0,3], "text": "Continue", "time": 30459, "street_name": "" }, { "distance": 173.67, "sign": -3, "interval": [3,4], "text": "Turn sharp left onto Bay Street", "time": 24046, "street_name": "Bay Street" }, <output ommitted for brevity> ] } ] }
Step 5: Add a for loop to iterate through the instructions JSON data🔗
Complete the following steps to upgrade the application to display the value for the text key. You will do this by creating a for loop to iterate through the instructions list, displaying the text value for the instructions list from starting location to destination.
-
In VS Code, click File > Save As… and save your script as directions_api6.py.
-
Add a
forloop, highlighted below, after the second double lineprintstatement. Theforloop iterates through the instructions list and does the following:- Creates two variables to store the text (
paths) and distance (distance) data from the Routing API JSON data. - Prints the text value.
- Converts meters to kilometers.
- Formats the kilometer value to print only two decimal places with the "{:.2f}" f-string.
- Prints a double line before the application asks for another starting location.
Note
The last
printstatement is not indented within theforloopPythonprint("Trip Duration: {0:02d}:{1:02d}:{2:02d}".format(hr, min, sec)) print("="*50) for each in range(len(paths_data["paths"][0]["instructions"])): path = paths_data["paths"][0]["instructions"][each]["text"] distance = paths_data["paths"][0]["instructions"][each]["distance"] print(f"{path} ( {distance/1000:.1f} km )") print("="*50) - Creates two variables to store the text (
Step 6: Test the JSON iteration🔗
Save and run your directions_api6.py script to verify it works. Troubleshoot your code, if necessary. You should get an output similar to the following:
devasc@labvm:~/labs/devnet-src/graphhopper$ python3 directions_api6.py
Starting Location: Toronto, ON
Geocoding API URL for Toronto, Ontario, Canada (Location Type: city)
 https://graphhopper.com/api/1/geocode?q=Toronto%2C+ON&limit=1&key=12345678-abcd-1234-9876-a1b2c3d4e5f6
Destination: Ottawa, ON
Geocoding API URL for Ottawa, Ontario, Canada (Location Type: city)
 https://graphhopper.com/api/1/geocode?q=Ottawa%2C+ON&limit=1&key=12345678-abcd-1234-9876-a1b2c3d4e5f6
==================================================
Routing API Status: 200
Routing API URL:
https://graphhopper.com/api/1/route?key=12345678-abcd-1234-9876-a1b2c3d4e5f6&point=43.6534817%2C-79.3839347&point=45.4208777%2C-75.6901106
==================================================
Directions from Toronto, Ontario, Canada to Ottawa, Ontario, Canada
==================================================
Distance Traveled: 449.1 km
Trip Duration: 04:27:57
==================================================
Continue ( 0.1 km )
Turn sharp left onto Bay Street ( 0.2 km )
Turn right onto Dundas Street West ( 2.5 km )
Turn left ( 13.1 km )
Keep right toward 401 West, 401 East ( 0.2 km )
Keep right and take 401 East toward Victoria Park Avenue, Warden Avenue ( 0.5 km )
Keep left toward 401 East ( 270.2 km )
Keep left onto Highway 401 ( 72.1 km )
Keep right onto Highway 416 and take 416 North toward Kemptville, Ottawa ( 74.9 km )
Keep right and take 417 East toward Ottawa ( 0.6 km )
Keep left and take 417 East toward Ottawa ( 12.6 km )
Keep right ( 0.5 km )
Turn right onto Arlington Avenue ( 0.2 km )
Turn left onto Bank Street ( 0.7 km )
Turn right onto Somerset Street West ( 0.7 km )
Turn left onto Cartier Street ( 0.2 km )
Continue ( 0.0 km )
Arrive at destination ( 0.0 km )
==================================================
Starting Location: q
devasc@labvm:~/labs/devnet-src/graphhopper$
Step 7: Report Routing API errors🔗
Now you are ready to add a feature to let the users know that Graphhopper cannot provide a route between the two locations. For example, a user might enter locations that will return an invalid route. As it is currently written, if an invalid route is returned the application displays the URL and asks for a new starting location. The user has no idea what happened.
-
To cause the Routing API request to fail without user notification, try the following values in your application. You should see similar results.
devasc@labvm:~/labs/devnet-src/graphhopper$ python3 directions_api6.py Starting Location: Beijing, China Geocoding API URL for 北京市 (Location Type: state) https://graphhopper.com/api/1/geocode?q=Beijing%2C+China&limit=1&key=12345678-abcd-1234-9876-a1b2c3d4e5f6 Destination: Toronto, ON Geocoding API URL for Toronto, Ontario, Canada (Location Type: city) https://graphhopper.com/api/1/geocode?q=Toronto%2C+ON&limit=1&key=12345678-abcd-1234-9876-a1b2c3d4e5f6 ================================================== Routing API Status: 400 Routing API URL: https://graphhopper.com/api/1/route?key=12345678-abcd-1234-9876-a1b2c3d4e5f6&point=40.190632%2C116.412144&point=43.6534817%2C-79.3839347 ================================================== Directions from 北京市 to Toronto, Ontario, Canada ================================================== Starting Location: q devasc@labvm:~/labs/devnet-src/graphhopper$ -
Note the Routing API status was returned as 400. Copy the URL from the previous step to a Chromium browser tab.
Important
Use the URL displayed in your output, not the one in the sample output above.
Notice that there are two key/value entries in the dictionary (
messageandhints).JSON{ "message": "Connection between locations not found", "hints": [ { "message": "Connection between locations not found", "details": "com.graphhopper.util.exceptions.ConnectionNotFoundException" } ] } -
Add an
elsestatement to theif paths_status == 200:statement to notify the users with the error message received from the failed Graphhopper Routing API request.Pythonprint("="*50) for each in range(len(paths_data["paths"][0]["instructions"])): path = paths_data["paths"][0]["instructions"][each]["text"] distance = paths_data["paths"][0]["instructions"][each]["distance"] print("{0} ( {1:.1f} km / {2:.1f} miles )".format(path, distance/1000, distance/1000/1.61)) print("="*50) else: print(f"Error message: {paths_data['message']}") print("*"*50) -
Test the failure scenario again and verify that an appropriate error message is now displayed.
devasc@labvm:~/labs/devnet-src/graphhopper$ python3 directions_api6.py Starting Location: Beijing, China Geocoding API URL for 北京市 (Location Type: state) https://graphhopper.com/api/1/geocode?q=Beijing%2C+China&limit=1&key=12345678-abcd-1234-9876-a1b2c3d4e5f6 Destination: Toronto, ON Geocoding API URL for Toronto, Ontario, Canada (Location Type: city) https://graphhopper.com/api/1/geocode?q=Toronto%2C+ON&limit=1&key=12345678-abcd-1234-9876-a1b2c3d4e5f6 ================================================== Routing API Status: 400 Routing API URL: https://graphhopper.com/api/1/route?key=12345678-abcd-1234-9876-a1b2c3d4e5f6&point=40.190632%2C116.412144&point=43.6534817%2C-79.3839347 ================================================== Directions from 北京市 to Toronto, Ontario, Canada ================================================== Error message: Connection between locations not found ************************************************** Starting Location: q devasc@labvm:~/labs/devnet-src/graphhopper$ -
Add the updated directions_api6.py file to the staging area then commit the changes to the local repository using the message Added the turn-by-turn directions.
devasc@labvm:~/labs/devnet-src/graphhopper$ git add directions_api6.py
devasc@labvm:~/labs/devnet-src/graphhopper$ git commit -m "Added the turn-by-turn directions"
[main 7f776f7] Added the turn-by-turn directions
1 file changed, 89 insertions(+)
create mode 100644 directions_api6.py
devasc@labvm:~/labs/devnet-src/graphhopper$
Step 8: Add more modes of transportation🔗
With free access to Graphhopper, you have a few different modes of transportation to choose from (car, bike, foot, and more). The default method is by car.
-
In VS Code, click File > Save As… and save your script as directions_api7.py.
-
By adding the following lines of code after
while True:(around line 50), you allow the users to choose their mode of land transportation available in Graphhopper. When users enter a listed method, the method is assigned to the variablevehicle. If no match is found, thencaris assigned tovehicleas the default.Pythonwhile True: print(f"\n{'+'*50}") print("Vehicle profiles available on Graphhopper:") print(f"{'+'*50}") print("car, bike, foot") print(f"{'+'*50}") profile = ["car", "bike", "foot"] vehicle = input("Enter a vehicle profile from the list above: ") if vehicle == "quit" or vehicle == "q": break elif vehicle in profile: vehicle = vehicle else: vehicle = "car" print("No valid vehicle profile was entered. Using the car profile.")Note
The
while True:line should already be in your code. Insert the rest of the above code after thewhile True:line in your existing code -
Locate the variable
paths_url(around line 79). Update the query by adding a new fieldvehicle.Pythonpaths_url = f"{ROUTE_URL}{urllib.parse.urlencode({'key':KEY, 'vehicle':vehicle})}{op}{dp}" -
Locate the
printstatement regarding the directions (around line 86). Update theprintstatement with the highlighted text which adds the transportation method to the output.Pythonprint("="*50) print(f"Directions from {orig[3]} to {dest[3]} by {vehicle}") print("="*50)
Part 5: Test Full Application Functionality🔗
Step 1: Verify the Output🔗
Run your directions_api7.py script and verify it works. Test with multiple starting and destination cities, including some on different continents that should return an error message. Also try different modes of travel (car, bike, foot). Troubleshoot your code, if necessary. You should get output similar to the following.
devasc@labvm:~/labs/devnet-src/graphhopper$ python3 directions_api7.py

++++++++++++++++++++++++++++++++++++++++++++++++++
Vehicle profiles available on Graphhopper:
++++++++++++++++++++++++++++++++++++++++++++++++++
car, bike, foot
++++++++++++++++++++++++++++++++++++++++++++++++++
Enter a vehicle profile from the list above: bike
Starting Location: Toronto, ON
Geocoding API URL for Toronto, Ontario, Canada (Location Type: city)
 https://graphhopper.com/api/1/geocode?q=Toronto%2C+ON&limit=1&key=12345678-abcd-1234-9876-a1b2c3d4e5f6
Destination: Ottawa, ON
Geocoding API URL for Ottawa, Ontario, Canada (Location Type: city)
 https://graphhopper.com/api/1/geocode?q=Ottawa%2C+ON&limit=1&key=12345678-abcd-1234-9876-a1b2c3d4e5f6
==================================================
Routing API Status: 200
Routing API URL:
https://graphhopper.com/api/1/route?key=12345678-abcd-1234-9876-a1b2c3d4e5f6&vehicle=bike&point=43.6534817%2C-79.3839347&point=45.4208777%2C-75.6901106
==================================================
Directions from Toronto, Ontario, Canada to Ottawa, Ontario, Canada by bike
==================================================
Distance Traveled: 419.8 km
Trip Duration: 28:46:34
==================================================
Continue ( 0.0 km )
Turn left ( 0.0 km )
Turn left ( 0.0 km )
Continue onto Bay Street ( 0.0 km )
Continue ( 0.0 km )
Turn left onto Bay Street ( 0.0 km )
Turn right onto Albert Street ( 0.1 km )
Turn right onto Albert Street ( 0.1 km )
Turn left onto Yonge Street ( 0.0 km )

<output omitted>

Turn left onto Albert Street ( 0.1 km )
Keep right ( 0.4 km )
Keep left ( 0.1 km )
Keep left ( 0.2 km )
Turn right ( 0.1 km )
Turn left ( 0.0 km )
Turn slight right ( 1.2 km )
Turn right ( 0.0 km )
Turn left ( 0.1 km )
Keep right ( 0.0 km )
Arrive at destination ( 0.0 km )
==================================================

++++++++++++++++++++++++++++++++++++++++++++++++++
Vehicle profiles available on Graphhopper:
++++++++++++++++++++++++++++++++++++++++++++++++++
car, bike, foot
++++++++++++++++++++++++++++++++++++++++++++++++++
Enter a vehicle profile from the list above:
No valid vehicle profile was entered. Using the car profile.
Starting Location: Toronto, ON
Geocoding API URL for Toronto, Ontario, Canada (Location Type: city)
 https://graphhopper.com/api/1/geocode?q=Toronto%2C+ON&limit=1&key=12345678-abcd-1234-9876-a1b2c3d4e5f6
Destination: Ottawa, ON
Geocoding API URL for Ottawa, Ontario, Canada (Location Type: city)
 https://graphhopper.com/api/1/geocode?q=Ottawa%2C+ON&limit=1&key=12345678-abcd-1234-9876-a1b2c3d4e5f6
==================================================
Routing API Status: 200
Routing API URL:
https://graphhopper.com/api/1/route?key=12345678-abcd-1234-9876-a1b2c3d4e5f6&vehicle=car&point=43.6534817%2C-79.3839347&point=45.4208777%2C-75.6901106
==================================================
Directions from Toronto, Ontario, Canada to Ottawa, Ontario, Canada by car
==================================================
Distance Traveled: 449.1 km
Trip Duration: 04:27:57
==================================================
Continue ( 0.1 km )
Turn sharp left onto Bay Street ( 0.2 km )
Turn right onto Dundas Street West ( 2.5 km )
Turn left ( 13.1 km )
Keep right toward 401 West, 401 East ( 0.2 km )
Keep right and take 401 East toward Victoria Park Avenue, Warden Avenue ( 0.5 km )
Keep left toward 401 East ( 270.2 km )
Keep left onto Highway 401 ( 72.1 km )
Keep right onto Highway 416 and take 416 North toward Kemptville, Ottawa ( 74.9 km )
Keep right and take 417 East toward Ottawa ( 0.6 km )
Keep left and take 417 East toward Ottawa ( 12.6 km )
Keep right ( 0.5 km )
Turn right onto Arlington Avenue ( 0.2 km )
Turn left onto Bank Street ( 0.7 km )
Turn right onto Somerset Street West ( 0.7 km )
Turn left onto Cartier Street ( 0.2 km )
Continue ( 0.0 km )
Arrive at destination ( 0.0 km )
==================================================

++++++++++++++++++++++++++++++++++++++++++++++++++
Vehicle profiles available on Graphhopper:
++++++++++++++++++++++++++++++++++++++++++++++++++
car, bike, foot
++++++++++++++++++++++++++++++++++++++++++++++++++
Enter a vehicle profile from the list above: car
Starting Location: Beijing, China
Geocoding API URL for 北京市 (Location Type: state)
 https://graphhopper.com/api/1/geocode?q=Beijing%2C+China&limit=1&key=12345678-abcd-1234-9876-a1b2c3d4e5f6
Destination: Toronto, ON
Geocoding API URL for Toronto, Ontario, Canada (Location Type: city)
 https://graphhopper.com/api/1/geocode?q=Toronto%2C+ON&limit=1&key=12345678-abcd-1234-9876-a1b2c3d4e5f6
==================================================
Routing API Status: 400
Routing API URL:
https://graphhopper.com/api/1/route?key=12345678-abcd-1234-9876-a1b2c3d4e5f6&vehicle=car&point=40.190632%2C116.412144&point=43.6534817%2C-79.3839347
==================================================
Directions from 北京市 to Toronto, Ontario, Canada by car
==================================================
Error message: Connection between locations not found
**************************************************

++++++++++++++++++++++++++++++++++++++++++++++++++
Vehicle profiles available on Graphhopper:
++++++++++++++++++++++++++++++++++++++++++++++++++
car, bike, foot
++++++++++++++++++++++++++++++++++++++++++++++++++
Enter a vehicle profile from the list above:
No valid vehicle profile was entered. Using the car profile.
Starting Location: Leeds, England
Geocoding API URL for Leeds, England, United Kingdom (Location Type: city)
 https://graphhopper.com/api/1/geocode?q=Leeds%2C+England&limit=1&key=12345678-abcd-1234-9876-a1b2c3d4e5f6
Destination: London, England
Geocoding API URL for London, England, United Kingdom (Location Type: city)
 https://graphhopper.com/api/1/geocode?q=London%2C+England&limit=1&key=12345678-abcd-1234-9876-a1b2c3d4e5f6
==================================================
Routing API Status: 200
Routing API URL:
https://graphhopper.com/api/1/route?key=12345678-abcd-1234-9876-a1b2c3d4e5f6&vehicle=car&point=53.7974185%2C-1.5437941&point=51.5074456%2C-0.1277653
==================================================
Directions from Leeds, England, United Kingdom to London, England, United Kingdom by car
==================================================
Distance Traveled: 313.7 km
Trip Duration: 03:27:10
==================================================
Continue ( 0.0 km )
Turn right onto Albion Street ( 0.3 km )
Turn sharp right onto Great George Street ( 0.3 km )
Keep right onto New Briggate ( 0.5 km )
Turn right onto Regent Street ( 0.1 km )
Continue onto Regent Street ( 0.4 km )
Continue onto Duke Street and take A61, A63, M621, M1, M66 toward A61, A63, M621, M1, M66 ( 0.2 km )
Keep right onto Marsh Lane ( 0.7 km )
Continue onto South Accommodation Road ( 1.5 km )
Keep left onto A61 ( 0.2 km )
Keep right toward M621 ( 297.7 km )
At roundabout, take exit 4 onto Staples Corner ( 0.6 km )
At roundabout, take exit 1 onto Edgware Road ( 4.7 km )
Keep left onto Kilburn High Road ( 1.6 km )
Turn left onto Maida Vale ( 2.0 km )
Keep left onto Oxford Street ( 0.8 km )
Turn right onto New Bond Street ( 0.5 km )
Turn left onto Conduit Street ( 0.2 km )
Turn right onto Savile Row ( 0.1 km )
Turn left onto New Burlington Street ( 0.1 km )
Turn right onto Regent Street ( 0.4 km )
Turn left onto Regent Street ( 0.5 km )
Keep left onto Haymarket ( 0.0 km )
Turn left onto Pall Mall East ( 0.3 km )
Enter roundabout ( 0.1 km )
Arrive at destination ( 0.0 km )
==================================================

++++++++++++++++++++++++++++++++++++++++++++++++++
Vehicle profiles available on Graphhopper:
++++++++++++++++++++++++++++++++++++++++++++++++++
car, bike, foot
++++++++++++++++++++++++++++++++++++++++++++++++++
Enter a vehicle profile from the list above: foot
Starting Location: Oshawa, ON
Geocoding API URL for Oshawa, Ontario, Canada (Location Type: city)
 https://graphhopper.com/api/1/geocode?q=Oshawa%2C+ON&limit=1&key=12345678-abcd-1234-9876-a1b2c3d4e5f6
Destination: Whitby, ON
Geocoding API URL for Whitby, Ontario, Canada (Location Type: town)
 https://graphhopper.com/api/1/geocode?q=Whitby%2C+ON&limit=1&key=12345678-abcd-1234-9876-a1b2c3d4e5f6
==================================================
Routing API Status: 200
Routing API URL:
https://graphhopper.com/api/1/route?key=12345678-abcd-1234-9876-a1b2c3d4e5f6&vehicle=foot&point=43.8975558%2C-78.8635324&point=43.87982%2C-78.9421751
==================================================
Directions from Oshawa, Ontario, Canada to Whitby, Ontario, Canada by foot
==================================================
Distance Traveled: 6.7 km
Trip Duration: 01:20:16
==================================================
Continue ( 0.0 km )
Turn right ( 0.2 km )
Turn right ( 1.1 km )
Keep right ( 1.2 km )
Keep right ( 0.0 km )
Turn right ( 0.0 km )
Turn left ( 0.8 km )
Turn left ( 0.8 km )

<output omitted>

Turn right ( 0.0 km )
Turn right ( 0.0 km )
Turn left ( 0.8 km )
Turn left onto Brock Street North ( 0.0 km )
Arrive at destination ( 0.0 km )
==================================================

++++++++++++++++++++++++++++++++++++++++++++++++++
Vehicle profiles available on Graphhopper:
++++++++++++++++++++++++++++++++++++++++++++++++++
car, bike, foot
++++++++++++++++++++++++++++++++++++++++++++++++++
Enter a vehicle profile from the list above: q
devasc@labvm:~/labs/devnet-src/graphhopper$
Step 2: Commit your code and push to GitHub🔗
-
Add the updated directions_api7.py file to the staging area then commit the changes to the local repository using the message Lab complete!.
devasc@labvm:~/labs/devnet-src/graphhopper$ git add directions_api7.py devasc@labvm:~/labs/devnet-src/graphhopper$ git commit -m "Lab complete!" [main 6f0106b] Lab complete! 1 file changed, 103 insertions(+) create mode 100644 directions_api7.py devasc@labvm:~/labs/devnet-src/graphhopper$ -
Push all the changes you made in the local repository back to the GitHub repository to complete the lab. Remember to use your Personal Access Token when asked for your GitHub password.
devasc@labvm:~/labs/devnet-src/graphhopper$ git push origin main
Username for '<https://github.com>': <username>
Password for '<https://username@github.com>':
Enumerating objects: 22, done.
Counting objects: 100% (22/22), done.
Delta compression using up to 2 threads
Compressing objects: 100% (21/21), done.
Writing objects: 100% (21/21), 3.24 KiB | 3.24 MiB/s, done.
Total 21 (delta 12), reused 0 (delta 0), pack-reused 0 (from 0)
remote: Resolving deltas: 100% (12/12), done.
To github.com:Ontario-Tech-NITS/lab-4-rest-apis-<username>.git
   c3ed8de..6f0106b  main -> main
Tip
If you’ve configured your VM to use SSH to connect to GitHub instead of HTTPS, you will not be asked for a username and password, although you may be asked for a passphrase for your SSH key, if you configured one.
-
In your browser, return to the repository on github.com and verify all your changes are present, along with the corresponding commit messages. Wait a minute or so for the autograder tests to complete and ensure that it says passing in green.