Lab 1 - Dev Environment🔗
Objectives🔗
Part 1: Prepare a Computer for Virtualization
Part 2: Explore the DEVASC VM GUI
Part 3: Create Lab Environment Accounts
Part 4: Install Webex on your Device
Background🔗
In this lab, you will install the DEVASC virtual machine (DEVASC VM) in Oracle VirtualBox. After completing the installation, you will explore the GUI interface. You will then create the necessary accounts for the services that you will use throughout the labs. Finally, you will install Webex Teams in the lab environment for communication with the other students in your class, and for use in later labs.
Note
The Ubuntu username is devasc and the password is Cisco123!
Worksheet
Throughout the lab you will see boxes like this that say Worksheet. These are indicators that you need to complete the steps and add some output to the associated "Lab Worksheet" that will be submitted for grading
Required Resources🔗
- Host computer with at least 4 GB of RAM and 15 GB of free disk space
- High-speed internet access to download Oracle VirtualBox and the DEVASC VM
Instructions🔗
Part 1: Prepare a Computer for Virtualization🔗
In this Part, you will download and install desktop virtualization software and the DEVASC VM. You can find the DEVASC VM file on Canvas.
Note
The following instructions are for Windows 10 using VirtualBox v7.2.4. Your steps may differ slightly. Regardless of the operating system or VirtualBox version, be sure you locate and select the options specified in the following steps.
Note
If you have previously installed VirtualBox, you can proceed to Step 2.
Step 1: Download and install VirtualBox🔗
VMware Player and Oracle VirtualBox are two virtualization programs that you can download and install to support the VM images. In this lab, you will use the VirtualBox application.
-
Navigate to https://www.virtualbox.org/. Click the download link on this page.
-
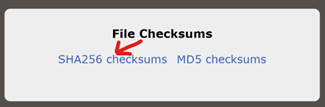
Choose and download the appropriate VirtualBox installation file based on your operating system. You can verify the checksums by clicking this link on the download page:
-
Run the installer for VirtualBox and accept the default installation settings, installing any missing dependencies as requested.
-
VirtualBox should be open and ready for the next step. If not, launch it from your Start menu.
-
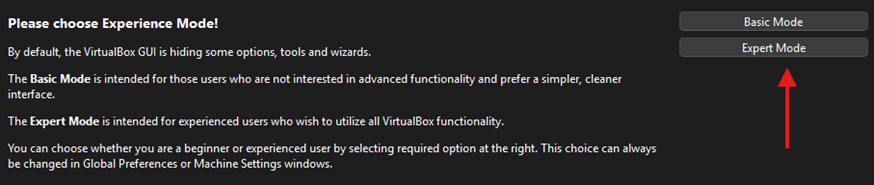
Click on Expert Mode on the main VirtualBox window to ensure you have access to all the settings needed for the labs:
Step 2: Configure VirtualBox Network Settings🔗
-
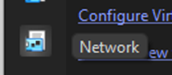
Click the Network icon on the left navigation pane (or click File > Tools > Network).
-
Click the NAT Networks tab.
-
Click the Create button. A new network called NatNetwork should be created.
-
Click on the name NatNetwork to show the network settings in the pane at the bottom of the window.
-
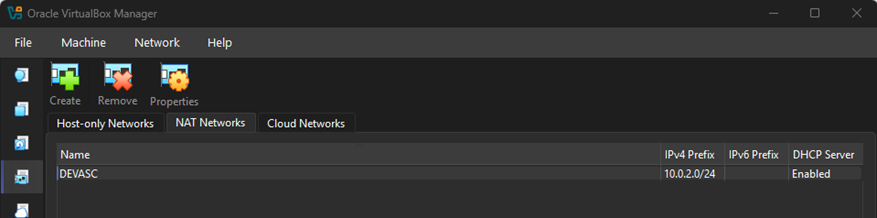
Under General Options, change the Name field from NatNetwork to DEVASC.
-
Ensure that the IPv4 Prefix is set to 10.0.2.0/24.
-
Ensure that Enable DHCP has been checked.
-
Click Apply.
-
Your properly configured NAT Network should look like the screenshot below:
-
Click the Home icon on the left navigation pane to return to the main screen.
Step 3: Import the DEVASC VM🔗
-
Download the Cisco Networking Academy DEVASC VM from the Labs module on Canvas. Note the location of the downloaded VM.
-
In VirtualBox, select File > Import Appliance.
-
The source of the appliance is Local File System. Click the folder icon next to the File field, browse to the location of the downloaded DEVASC VM, then click Open.
-
Click Finish to start the import process. The import process may take a few minutes.
-
Once the import process is complete, click the Settings button on the VM.
-
Select Network from the menu on the left, then change the Attached to: dropdown from NAT to NAT Network. Click OK.
Note
NAT Network will allow the DEVASC VM to communicate with other VMs in later labs.
Part 2: Explore the DEVASC VM GUI🔗
-
Start the DEVASC VM. This will take a few minutes as the Ubuntu image boots.
-
The DEVASC VM contains Packet Tracer. You must agree to the Cisco Packet Tracer EULA to continue starting the VM. When you see the license agreement, use the arrow keys to scroll the text. Press the Right key to select <OK> when you are finished. Press the Space key to move to the Agreement screen. Press the Left key to select <I Agree> when you are finished.
-
The Ubuntu image will continue to load and launch the GUI. Close any popup messages that may open.
Note
By default, the Host key is set to the Right Ctrl key. This key is used for navigating the VirtualBox interface, such as entering/leaving full screen mode (Host+F)
-
Open the Terminal application.
-
Update Visual Studio Code using the command
sudo snap refresh code. This may take a few minutes. -
In the later labs, you will use the terminal, VS Code, PacketTracer, Chromium Browser, and Postman. Open these applications and explore them.
Note
You may get errors about expired certificates when you open PacketTracer for the first time. You can safely ignore these errors.
-
Click the Menu button and explore the Places, System, and All applications.
Tip
Remember that this is a virtual machine and is completely separate from the computer on which it is installed. You can make any changes you like. If you make a mistake, or break something, you can simply remove the VM from VirtualBox and import a fresh copy from the file you downloaded. This is a great way to experiment with programs without affecting your real computer. Don't be afraid to explore and have fun!
Worksheet
Take a screenshot according to the instructions in the Lab 1 Worksheet (Part 2).
Part 3: Create Lab Environment Accounts🔗
There are many tools that you will need to use to complete the labs in this course. Some of these require you to have your own account. These are easy to set up and can be done for free. In this Part, you will create the accounts you will need for the rest of the course.
Step 1: Create a DevNet account🔗
-
From within the DEVASC VM, open the Chromium browser and navigate to https://developer.cisco.com.
-
Click SIGN UP FREE.
-
You can choose any of the Login types for which you already have an account. This allows for easy association with other accounts. If you do not wish to associate your DevNet account with any other apps, Choose Login with a Cisco ID.
-
Follow the instructions to complete the account creation.
Worksheet
Take a screenshot according to the instructions in the Lab 1 Worksheet (Part 3, Step 1).
Step 2: Create a GitHub Account🔗
-
In the Chromium browser in the DEVASC VM, navigate to https://github.com.
-
If you don’t already have an account, fill in the Email field and then click Sign up for GitHub. If you already have an account, fill in the worksheet and move to the next step.
-
Follow the instructions to create a new GitHub Free account.
Worksheet
Enter your GitHub username in the indicated spot in the Lab 1 Worksheet (Part 3, Step 2).
Step 3: Create a Webex account🔗
-
Navigate to https://webex.com.
-
Click Start for Free or Sign up, it's free.
-
Enter your @ontariotechu.net email address in the Enter email address field.
-
Click Continue with email.
-
Follow the instructions to complete the account creation.
Worksheet
Take a screenshot according to the instructions in the Lab 1 Worksheet (Part 3, Step 3).
Step 4: Shut down the VM🔗
When you are done with the VM, you can save the machine state of the VM for future use or shut down the VM.
Close the VM using the GUI
-
From the Virtual Box File menu, choose Close...
-
Click the Save the machine state radio button and click OK. The next time you start the virtual machine, you will be able to resume working in the operating system in its current state.
Note
The other two options in the Close Virtual Machine dialog box are:
Send the shutdown signal: This simulates pressing the power button on a physical computer.
Power off the machine: This simulates pulling the plug on a physical computer.
Close the VM using the CLI
To shut down the VM using the command line, you can use the menu options inside the VM (Menu > Quit > Shutdown) or enter sudo shutdown -h now command in a terminal window.
Rebooting the VM
If you want to reboot the VM, you can use the menu options inside the VM (Menu > Quit > Restart) or enter the sudo reboot command in a terminal.
Part 4: Install Webex on your device🔗
In this Part, you will install Webex (formerly Webex Teams)
Step 1: Download the installation file🔗
-
Navigate to https://www.webex.com/downloads.html
-
Download the version for your specific operating system architecture and version.
-
Open the installation file and follow the instructions to finish the installation.
Step 2: Launch Webex🔗
Open Webex and sign in with your newly created Webex account (using @ontariotechu.net). You should see that you are now a member of a Team called INFR 3200U - Intro to Devops and Automation. If not, please contact your instructor.
Worksheet
Post a message in the INFR 3200U workspace as per the instructions in the Lab 1 Worksheet (Part 4).